

Whether you’re new to photography or have done it for quite some time, there’s always room to learn. And the great thing about photography is that the learning opportunities are endless.
We all love taking pictures for various reasons. While most of us do it for memory, some of us do it for the love of art. In any case, it is equally important that we follow some basic principles that will help us take photos that are impactful and engage the viewers.
In this article, we’ll have a look at 7 effective photography tips that will help you start taking beautiful pictures. Whether you’re a beginner or an amateur, and whether you shoot with a camera or a phone, you’ll all find it equally useful for sure.
7 Tips for Taking Stunning Pictures
1. Get to Know Your Camera

When you have an understanding of what your camera is capable of doing, you can set learning goals for yourself to master that ability. So, be sure to spend enough time going through the menu of your camera or your camera app whenever you can.
And while you’re at it, keep the manual handy so that you can go through any function in detail while scrolling through the menu and settings. Another efficient method can be to do a quick online search instead.
Being well acquainted with your gear develops confidence and even lets you quickly navigate to the required settings with ease. This is very helpful in situations where you need to act swiftly.
2. Learn About the Principles of Composition

Composition is how you arrange the various elements of your photograph when taking pictures. When starting out, we may feel like it doesn’t matter where we place our subject, but in reality, composition is one of those factors that can either make or break a photograph.
Think of composition principles as a set of proven guidelines that tell you about the most effective ways you can place your subject and supporting elements within your frame when taking pictures.
We have compiled a list of the most effective composition techniques for you so be sure to go through the article and be acquainted with at least a couple of them.
3. Stop Taking Crooked Photos

Sounds like a pretty simple thing to avoid, right? However, you’ll be surprised to know how many people spoil an otherwise good-looking photo by not having straight.
If you’re using a smartphone, enable a grid and use one of the horizontal lines to align with the horizon. If you use a camera, you too can enable a grid or a level indicator to show if the camera is placed straight or not.
However, if you already have an image that you like but is tilted, you can straighten it easily using Colorcinch photo editor.
Step 1: Upload the image to Colorcinch.
 Step 2: Navigate to Edit – Rotate.

Step 3: Adjust the Straighten slider until your image appears to be leveled and click on Apply. Keep in mind that based on how tilted your original level is, some amount of the image will get cropped.
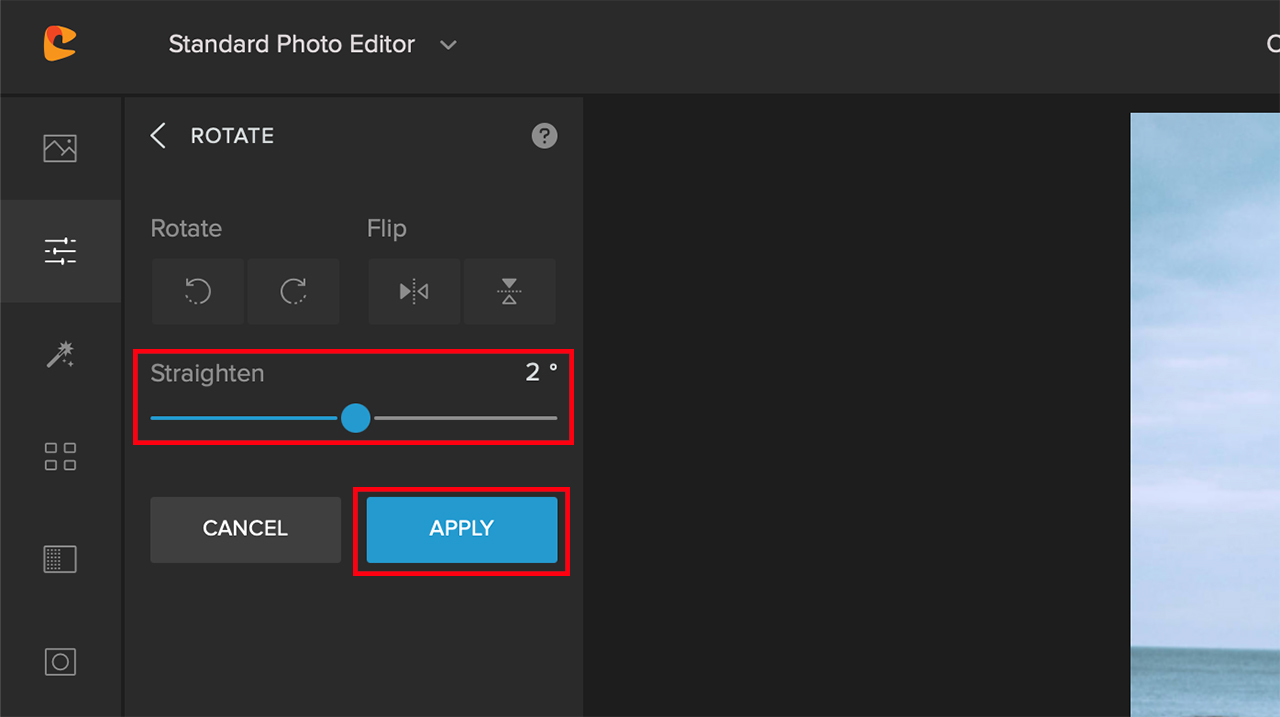
As you can see below, having the horizon straight makes a whole lot of difference.


4. Understand How Lighting Affects Your Scene
You’ll hear this a lot, but lighting is indeed the most important factor that affects your photography. Having a firm understanding of how the light interacts with your subject and the rest of the scene is pivotal.
Keep in mind that you won’t be using light just to illuminate your subject, but add shadows as well. Shadows give structure to your subject while adding mood & depth to the image.
 Also, pay attention to the type of light source and the kind of light it is producing. Smaller light sources produce harsh light hence harsh shadows while larger light sources produce soft light hence soft shadows.
Depending on what kind of look you’re going for, you’ll need to adopt each of them differently.
In the same context, many portraits and landscape photographers love to go out and shoot during what’s called the golden hour as the light is really soft and wraps around the subject beautifully.
If you’re just starting out, we highly recommend that you go through our guide to golden hour photography and even go out to take pictures during golden hour.

5. Learn How to Focus on Your Subject
Images that don’t have the subject in sharp focus are practically useless. It’s therefore quintessential that you learn how to focus on what’s important in the frame.
If you’re using an iPhone or an Android to take pictures, focusing is as easy as simply tapping on the area where you want to focus. Be sure to do that before you press the shutter button.
With a camera, however, you have many focus points that you need to place over your subject for the camera to lock focus.
Moreover, based on whether your subject is stationary or moving around, you can also set your camera to focus only once (autofocus single, AF-S), or track the moving subject continuously (autofocus continuous, AF-C).
6. Get Your Exposure Right
If you use a smartphone to take pictures, exposure is not an issue most of the time. But when the lighting is a bit challenging, like when the light is behind the subject, you might need to intervene.
To do so, simply tap on the subject and you should see a brightness slider appear on your iPhone or Android screen. Simply drag it to adjust the exposure manually.
Things can get a bit tricky when shooting with a camera. You can adjust the exposure in your camera by adjusting any one of the following parameters:
- Shutter speed
- Aperture
- ISO
However, adjusting any one will have some “side effect” as well. For instance, besides exposure, aperture also controls the depth of field in an image. Similarly, shutter speed also plays a role to freeze the subject, and increasing ISO introduces digital noise.
Make an effort to understand the Exposure Triangle. This will make getting a balanced exposure so much easier. You can read more about it in our post on how to fix underexposed images.
7. Learn How to Process Your Images
Post-processing is a big part of the photography process. Being able to process the pictures you’ve taken allows you to give a personal touch to the images. It’s not just about manipulating and altering images.
With the knowledge of post-processing, you can make the photos appear as what you’d actually witnessed on location; and even better. You’re only limited by your creativity and imagination.
If you feel overwhelmed with post-processing software like Photoshop or Lightroom, Colorcinch provides a much more intuitive and easy-to-use online photo editing experience. And the best part is that you don’t even need to register to give it a try.

Besides the usual exposure, details, and color enhancement, you can find tons of creative ways to make your photos pop; that too with minimal clicks. Be sure to explore the Overlays, Filters, and Effects panels.
To Sum It Up
Taking pictures has become an integral part of our lives these days. Today we can conveniently capture and share treasurable moments via different social media. So, it gives us a huge upper hand if we know how to take better pictures.
And you don’t have to be an expert photographer to be able to take photos that stand out. Be sure to try out at least a few of the tips that we shared here, and take lots of photos. After all, it’s only when you practice that you’ll be able to learn quickly and effectively.