Did your latest photos come up blurry and you are looking for a way to sharpen them? If so, then you have nothing to worry about. In this article, we will go into more detail about how you can sharpen blurry images using post-processing tools like the Colorcinch image editor.
Colorcinch lets you edit images in a variety of ways: from brightening your photos to improving color and vibrance, nothing is left out. So if you are wondering how to make pictures less blurry online, this is the best guide for you.
All you need to do is follow a series of simple steps. In a few minutes, your pictures will look clearer than you think.
Let’s sharpen your photos!
How to Sharpen Blurry Images in Colorcinch
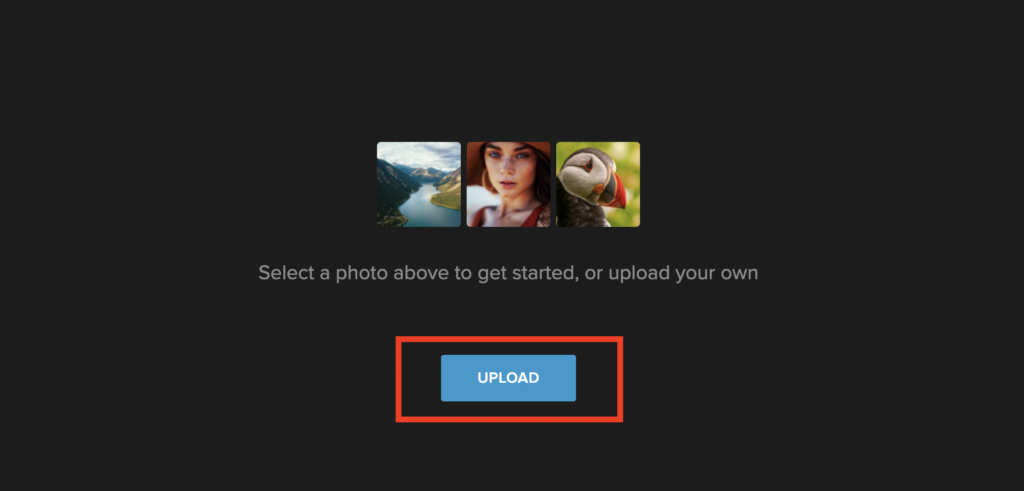
With Colorcinch, you don’t even have to log in to use the editor. The first thing you have to do to unblur an image is to upload one of your pixelated images to Colorcinch.
The process is pretty simple. As soon as you open the editor, you’ll see the Upload button.
1. Use Details Tool from Enhance
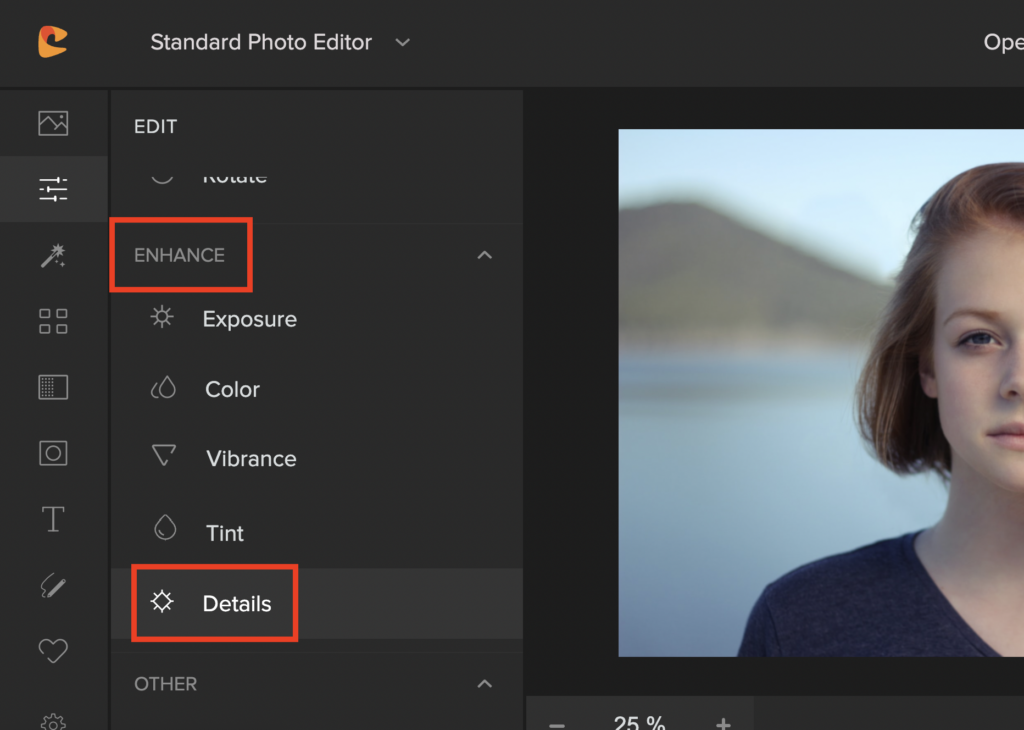
After uploading your blurred image, navigate to the Edit tab in the left column. In the Enhance toolbox, click on Details. On the Details tab, you have access to three different sliders: Sharpen, Clarity, and Blur.
If you are trying to make a png or jpg picture less blurry, we recommend using the following settings:
- Sharpen: Between 20 and 35% (to highlight edges and details without distorting the image)
- Clarity: Between 10 and 30% (to focus on the midtones of the image and sharpen it)
- Blur: Keep the value at 0%
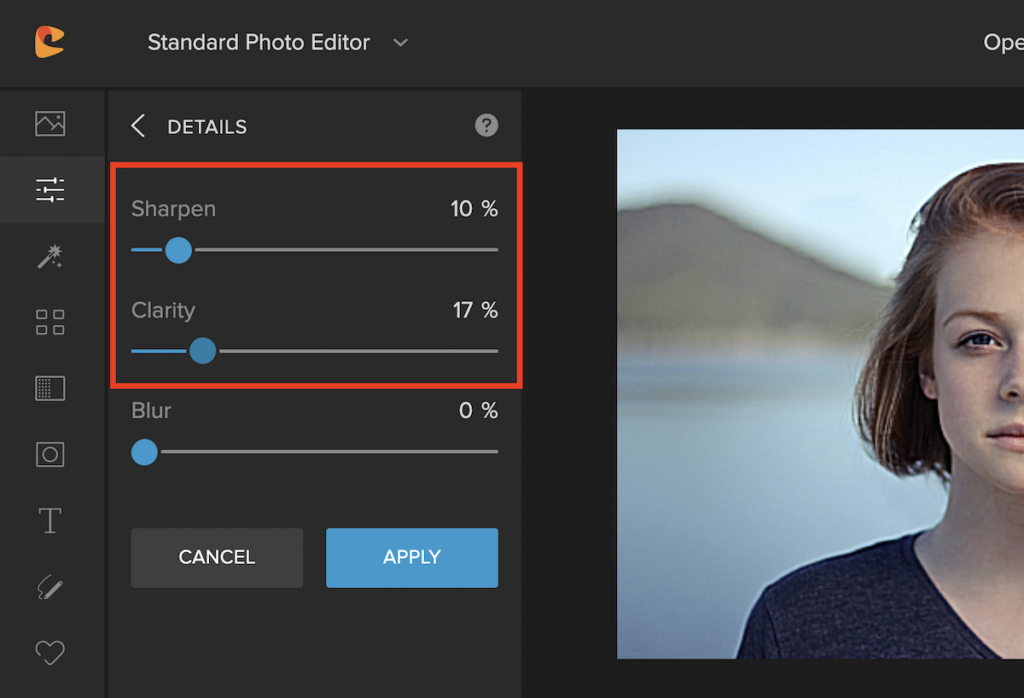
Although it all depends on your personal needs and preferences, we have found that these are the perfect settings for sharpening an image in the Colorcinch desktop app while keeping a nice balance.


2. Apply Filters
Another feature of Colorcinch that you can use to make pictures clearer is Filters. After optimizing the details of your image, all you have to do is select the Filters tab in the left column.
The platform offers hundreds of filters within 15 categories for you to choose from. Moreover, there are numerous variations for each Colorcinch filter.
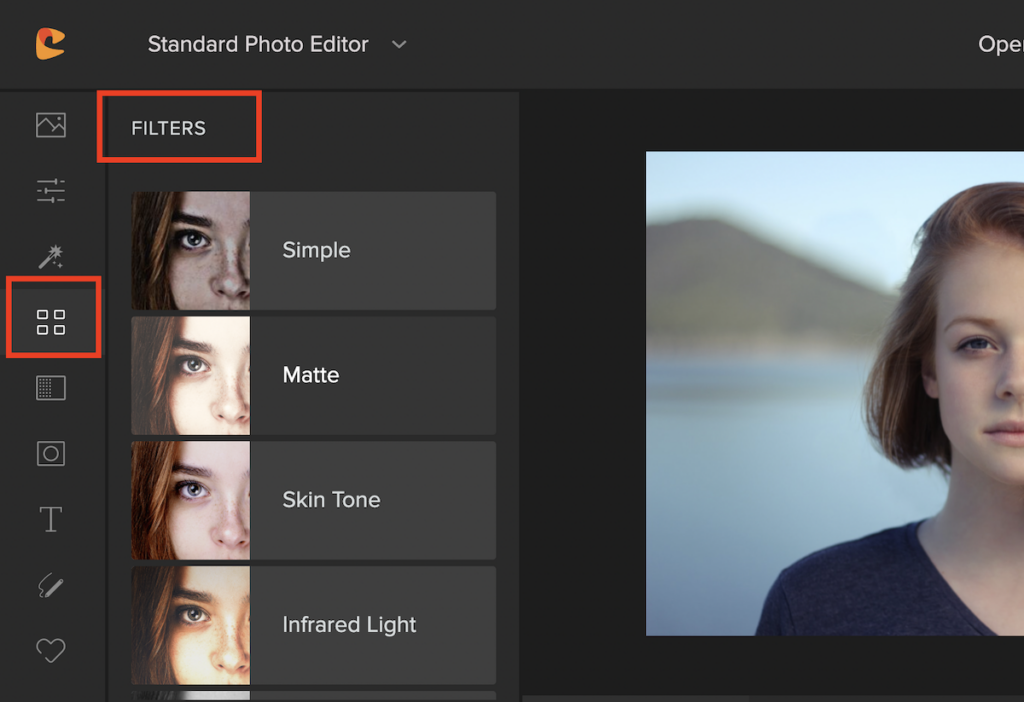
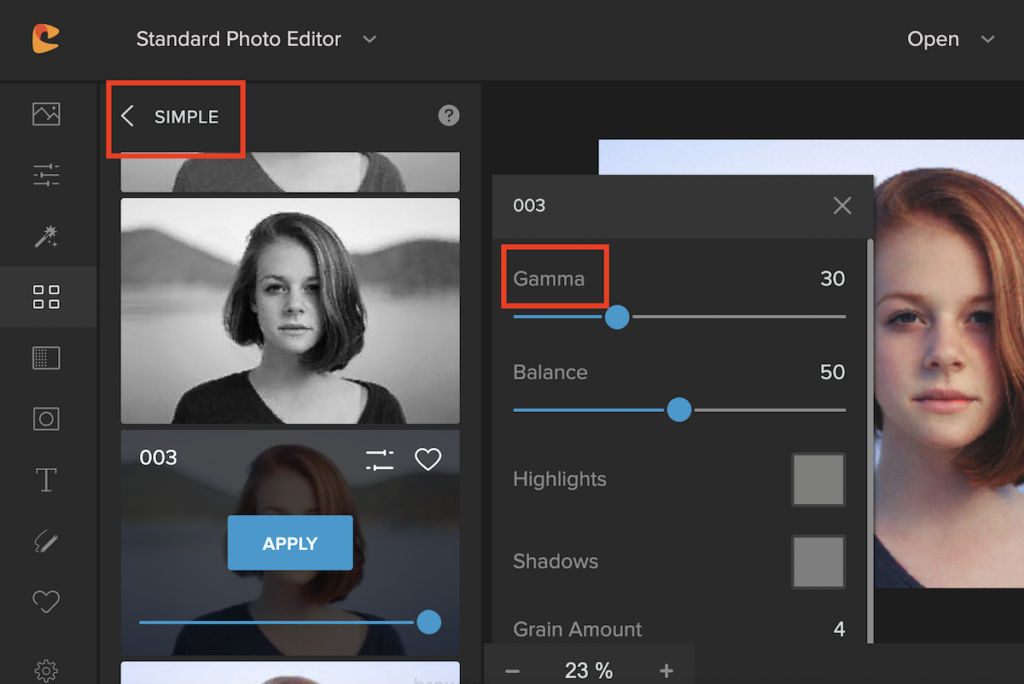
If you only want to fix your blurry pictures, we recommend using either the Simple or Skin Tone filters. Be sure to experiment with the filter’s gamma and balance settings.
For this portrait, we chose the 003 variant of the Simple filter and set the Gamma slider to 30%. Once you’re happy with the result, all you have to do is click the Apply button.
Alternatively, the photo editor also offers you the possibility to add fun effects that let you cartoonize yourself, turn a photo into a sketch or an oil painting, and much more. To do that, you just need to navigate to the Effects panel in the left column.
So, after sharpening your images, take some time to play with the additional effects that Colorcinch provides.
3. Apply Textures
Finally, with an online photo editor like Colorcinch, you can add textures and sparkle your (previously) blurry images even more.
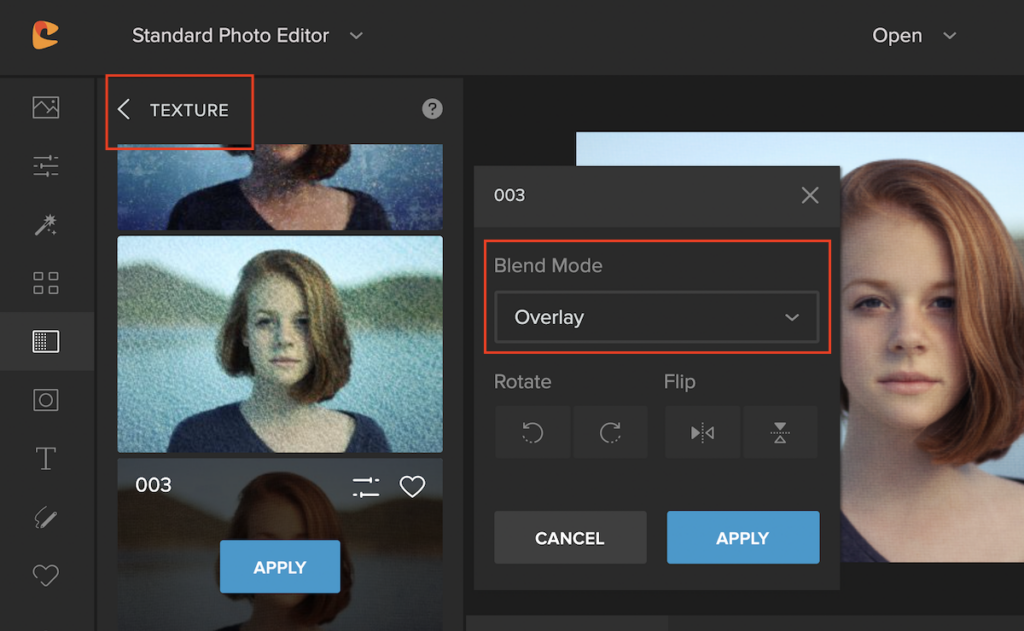
To do this, you need to click on Overlays in the left column. With just a few clicks, the app allows you to apply textures and effects like fog, shadows, sun flares, etc.
To give our portrait a vintage look, we selected texture 003. Click Apply once more and you’re good to go.
EXTRA TIP: Remember that any change you make during post-processing can affect your previous edits. That’s why most of our adjustments were nothing more than micro fine-tuning. The key to photo editing is always to maintain a nice balance.
The only thing left is to save the results to your desktop or laptop. To do this, you need to click Save.
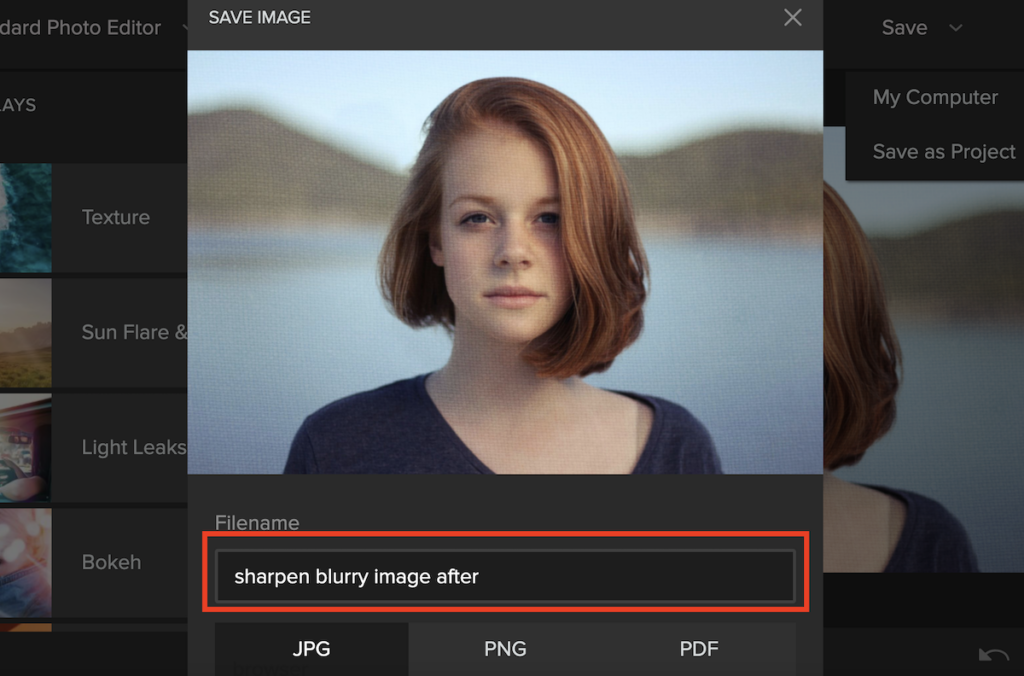
Let’s have a look at the final result!


4. How to Sharpen Photos on Your Phone
If you don’t have a desktop or laptop, or just want to sharpen a photo on your smartphone, we have good news.
While the Google Photos app now has a sharpening and denoising feature, it’s only effective for relatively sharp photos. If that’s what you want, you can easily access the feature by tapping the Edit button on the bottom bar of your screen.
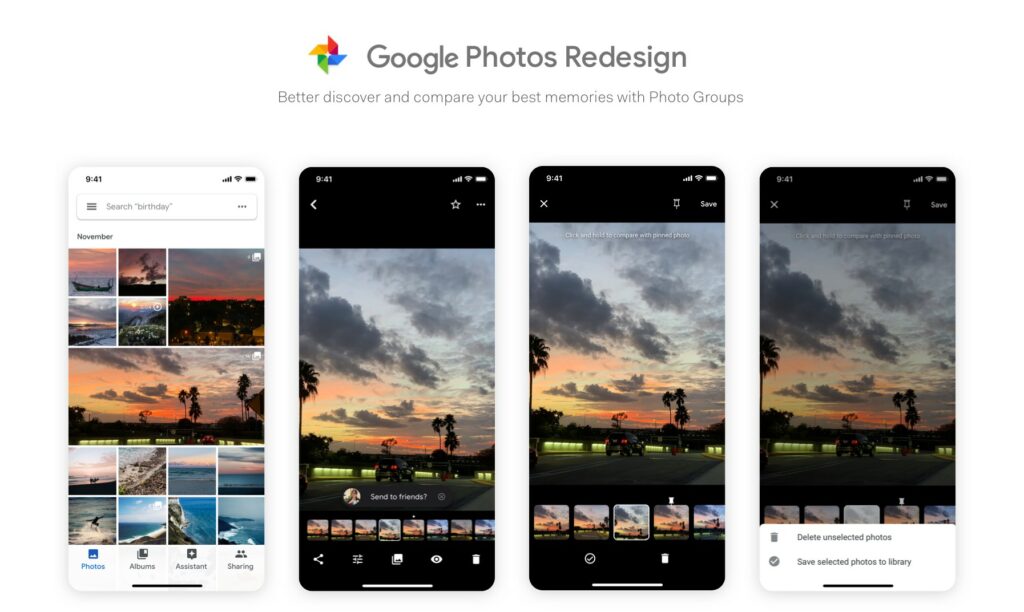
Go to Sharpen and then to Denoise, and adjust the sliders until you’re happy with the results. This is a great solution for quick edits, but it can’t help you fully edit your blurry images.
Fortunately, the Colorcinch photo editor is also available for Chromebooks and tablets. The process is exactly the same and the app is fully optimized to provide an easy experience.
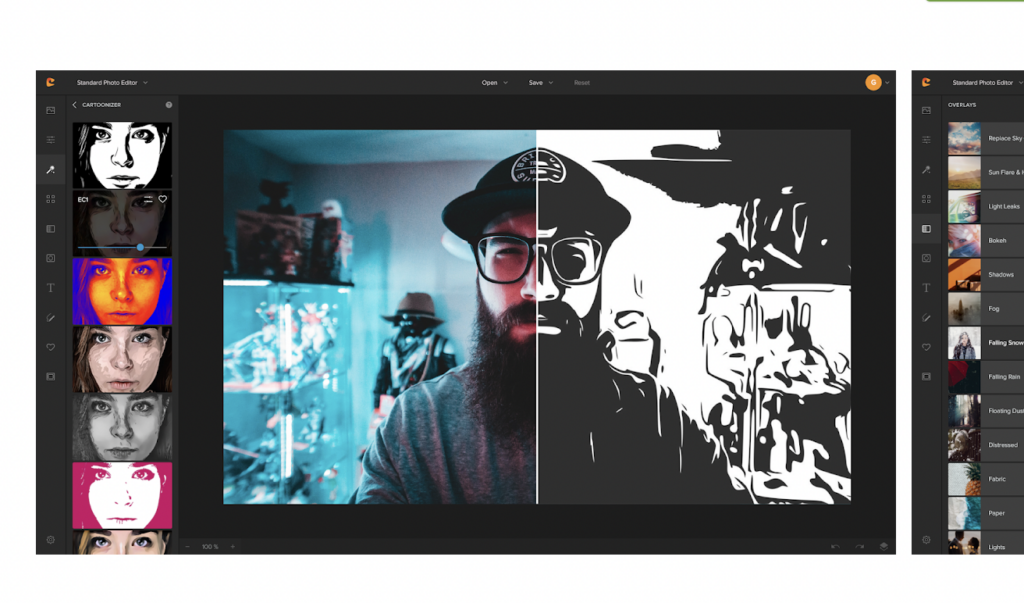
In fact, with Colorcinch, you’ll have access to all the filters, effects, and editing features that the desktop online platform offers.
5. Tips on How to Avoid Blurry Images in the Future
There are techniques that will help you take crisp pictures, whether you use a camera or your phone. So if you want to avoid taking blurry photos in the future, you can apply the following tips:
Using a Camera | Using a Smartphone |
| Use a faster shutter speed (e.g. 1/100) | Tap the shutter button gently |
| Select a wider aperture (e.g. f/4) | Stay still while photographing |
| Keep your ISO low (to avoid noise) | Use the self-timer feature |
| Keep your camera steady (avoid extending your elbows and hold your breath to reduce vibration) | Hold your phone steady (use both hands, bring your elbows to your side and hold your breath) |
| Use a tripod or monopod | Prop your phone or use a tripod |
| Shoot in burst mode | Avoid using the digital zoom |
Best tips to avoid blurry photos: Camera and Smartphone
Conclusion
As we promised, now you know how to make a picture less blurry. Even if you apply the above tips, sometimes your photos won’t be as sharp as you need them to be. In this case, the Colorcinch tutorial we provided in this article will be very helpful.
Remember that all you need to do to sharpen the image is to use a proper photo editor, like Colorcinch or Photoshop. Until next time, happy editing!


