So you’ve fallen in love with Colorcinch, and you use the tool to enhance all of your images.
(If you’re still new to editing with Colorcinch, check out these posts on getting started.) Why stop there?
Once you’ve edited your images with Colorcinch, you can bring them to life by turning them into interactive images.
What is an interactive image?
An interactive image is an image that asks its viewer to engage with it by doing something. That action can come in many forms including: clicking around to explore what they see, giving an opinion on the image’s content, and choosing how they want to navigate through a series of images.
Why make an interactive image?
We come across a lot of good content online every day, but there’s rarely enough time to consume all of them. Thankfully, with Pocket, you don’t have to miss the amazing resources you come across.
- Interactive content gets twice as much engagement as static content. The obvious plus side here, whether you’re using your image to market a concept or just trying to show off your favorite photo, is that viewers spend more time on your image.
2. It’s a great way to spice up your social media, website, or blog. Insert interactive images on your digital platforms to grab your audience’s attention.
3. You can turn your images into ones as useful as they are beautiful, using them to educate your viewers on anything you think they should know. Here’s a simple example of an image turned into a resource on earthquake safety.
How to make an image interactive?
Okay, so you’ve chosen an image you’d like to enhance with interactivity, and you’re ready to make it happen.
Let’s take a look at how to do that with Genially, a free all-in-one creation tool for making all kinds of interactive and animated content including interactive images, presentations, PowerPoint sliders, infographics, maps, and escape games. It allows you to insert content from standard images or text to more exciting options like social posts, live maps, and videos.
For those of you who prefer learning from a video, here’s one that explains the process. (Otherwise, read on for a written explanation.)
Here are the six steps that will take your image to the next level:
1. Log in to Genially and click on the Create Genially button on the left bar menu. If you’re not registered, make sure you’ve signed up for a free account first.
2. Choose the Interactive Image option and click on Create Interactive Image. Select the Your Computer option and upload a photo from your device.
You’ll be taken to the Editor, where you can transform your static image into an interactive one.
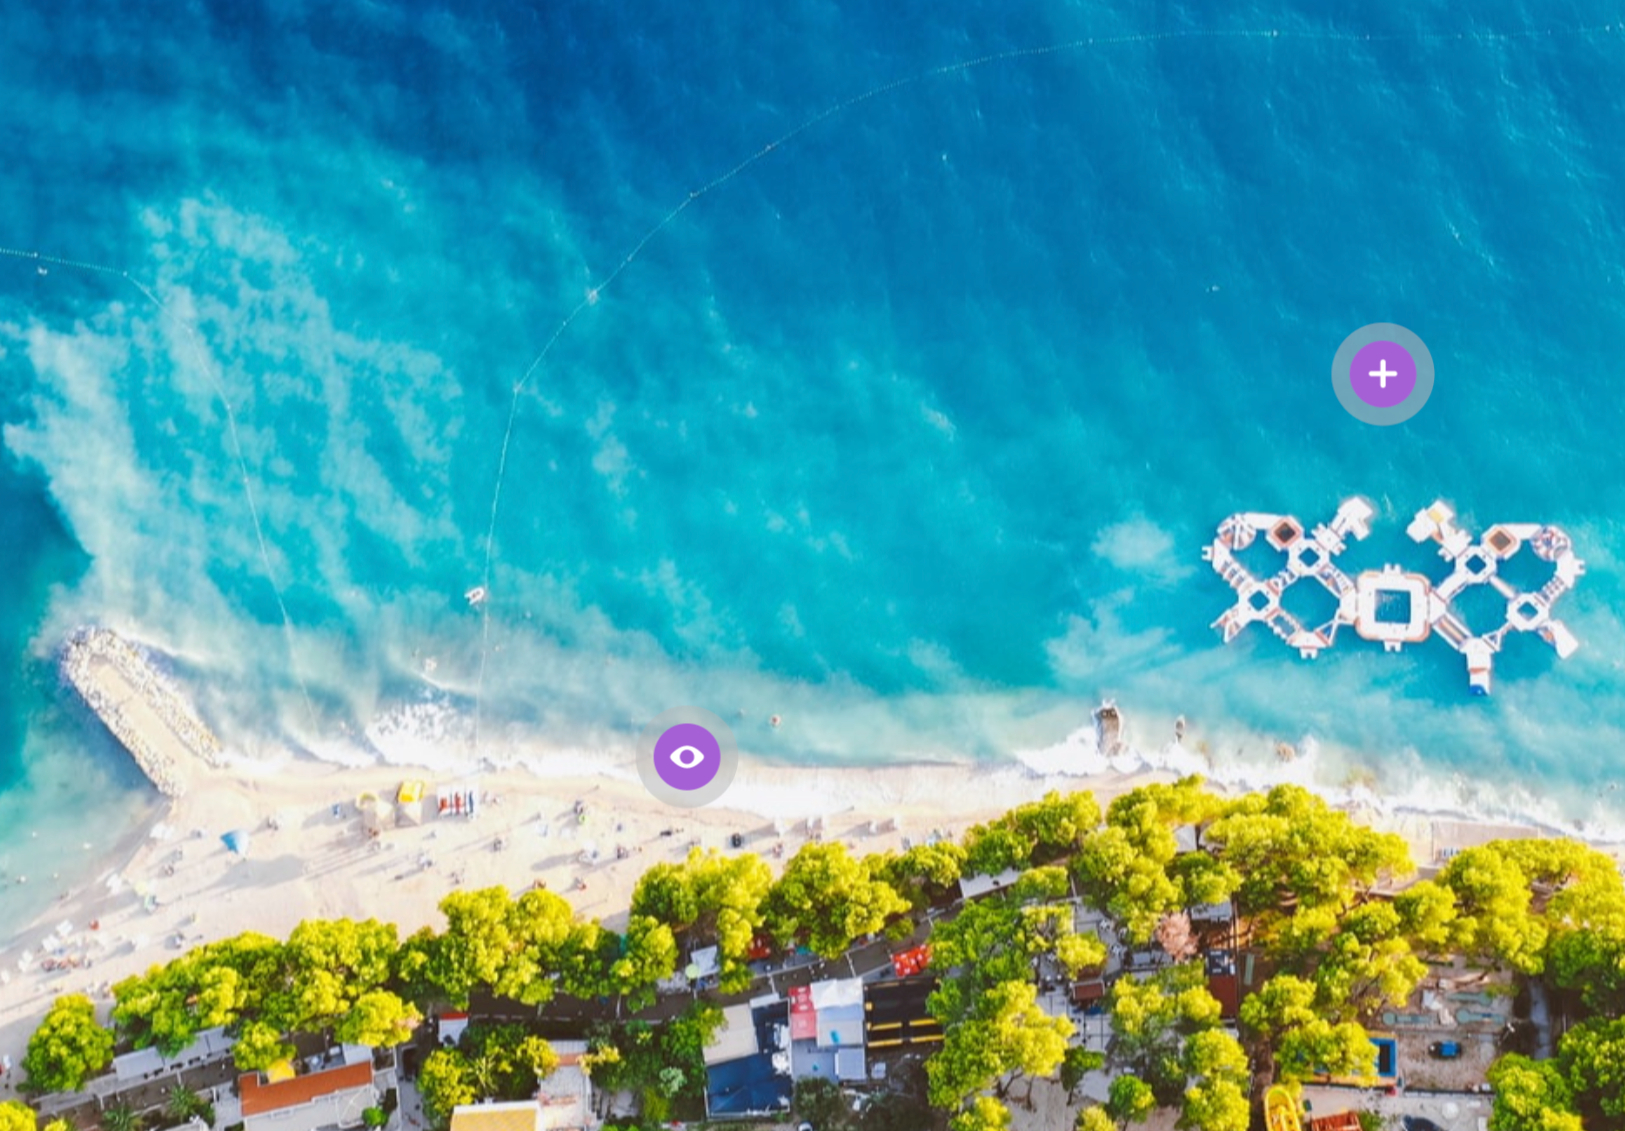
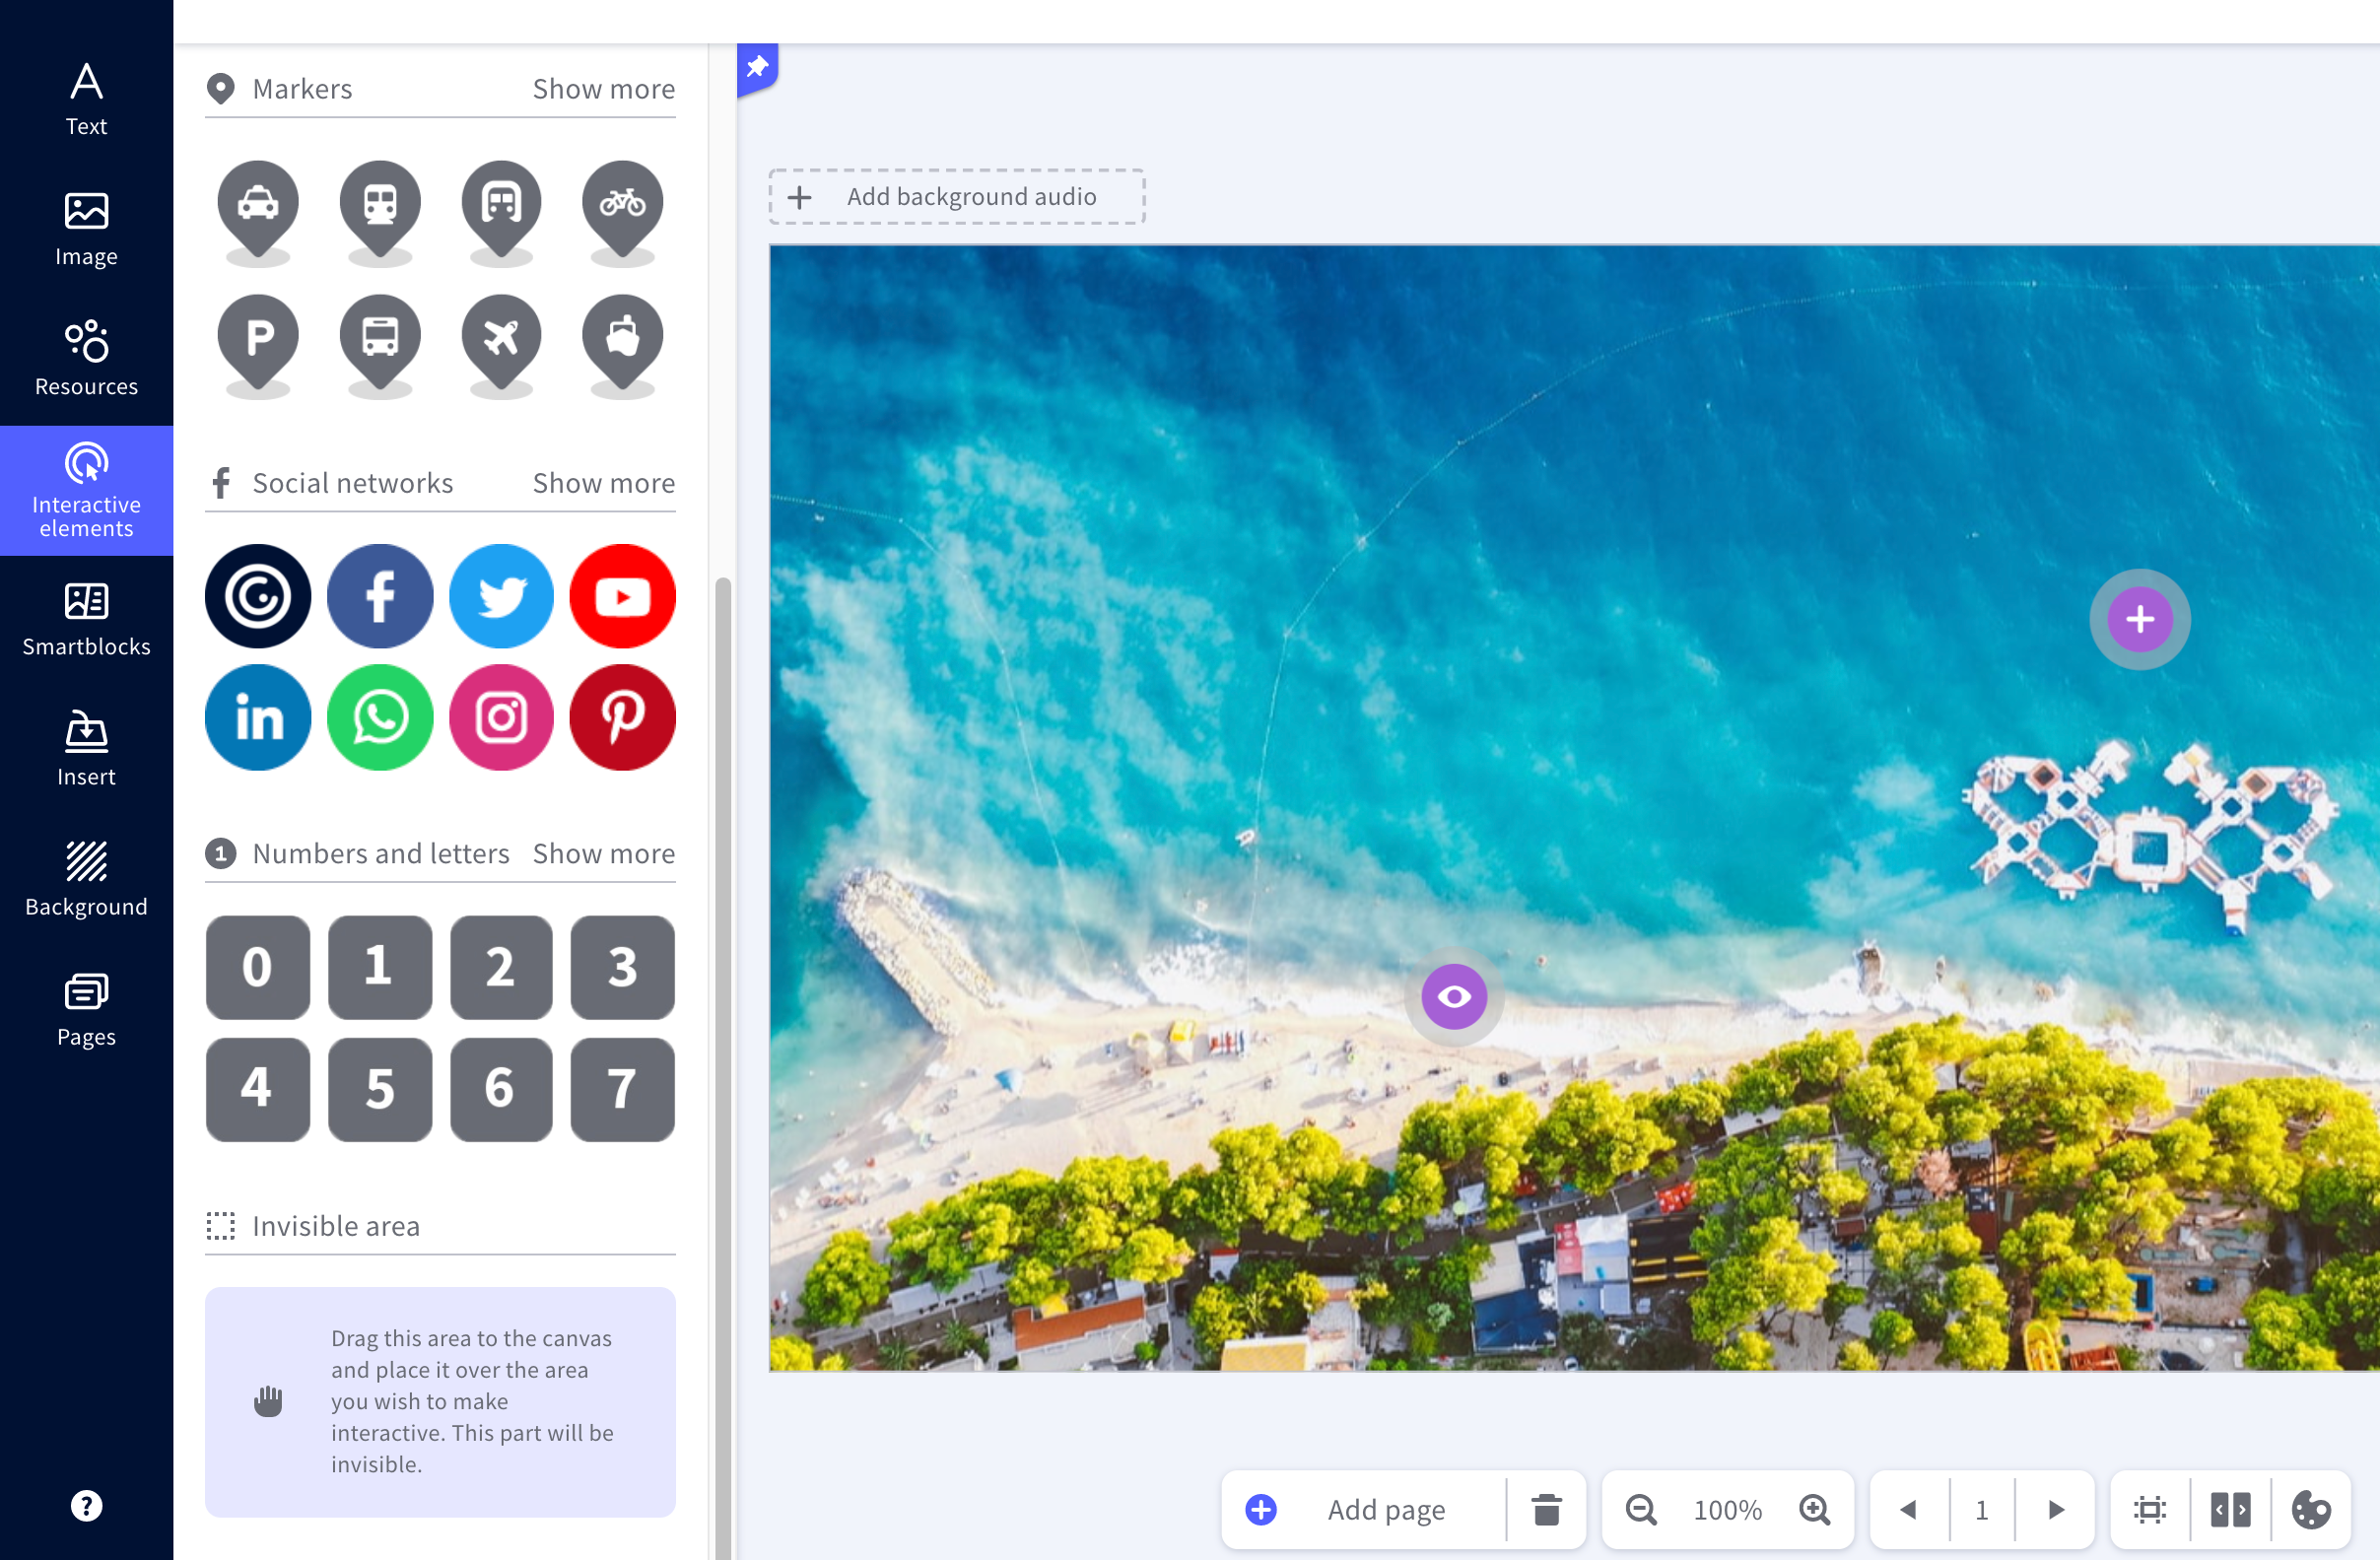
3. To add interactive hotspots or buttons to your image, go to the left-hand menu of interactive elements and drag in buttons to the canvas workspace. Moreover, to use the same button several times, just drag it over once and then copy and paste it on the canvas several times.
Scroll to the end of the interactive elements tab to find the “invisible area” option.

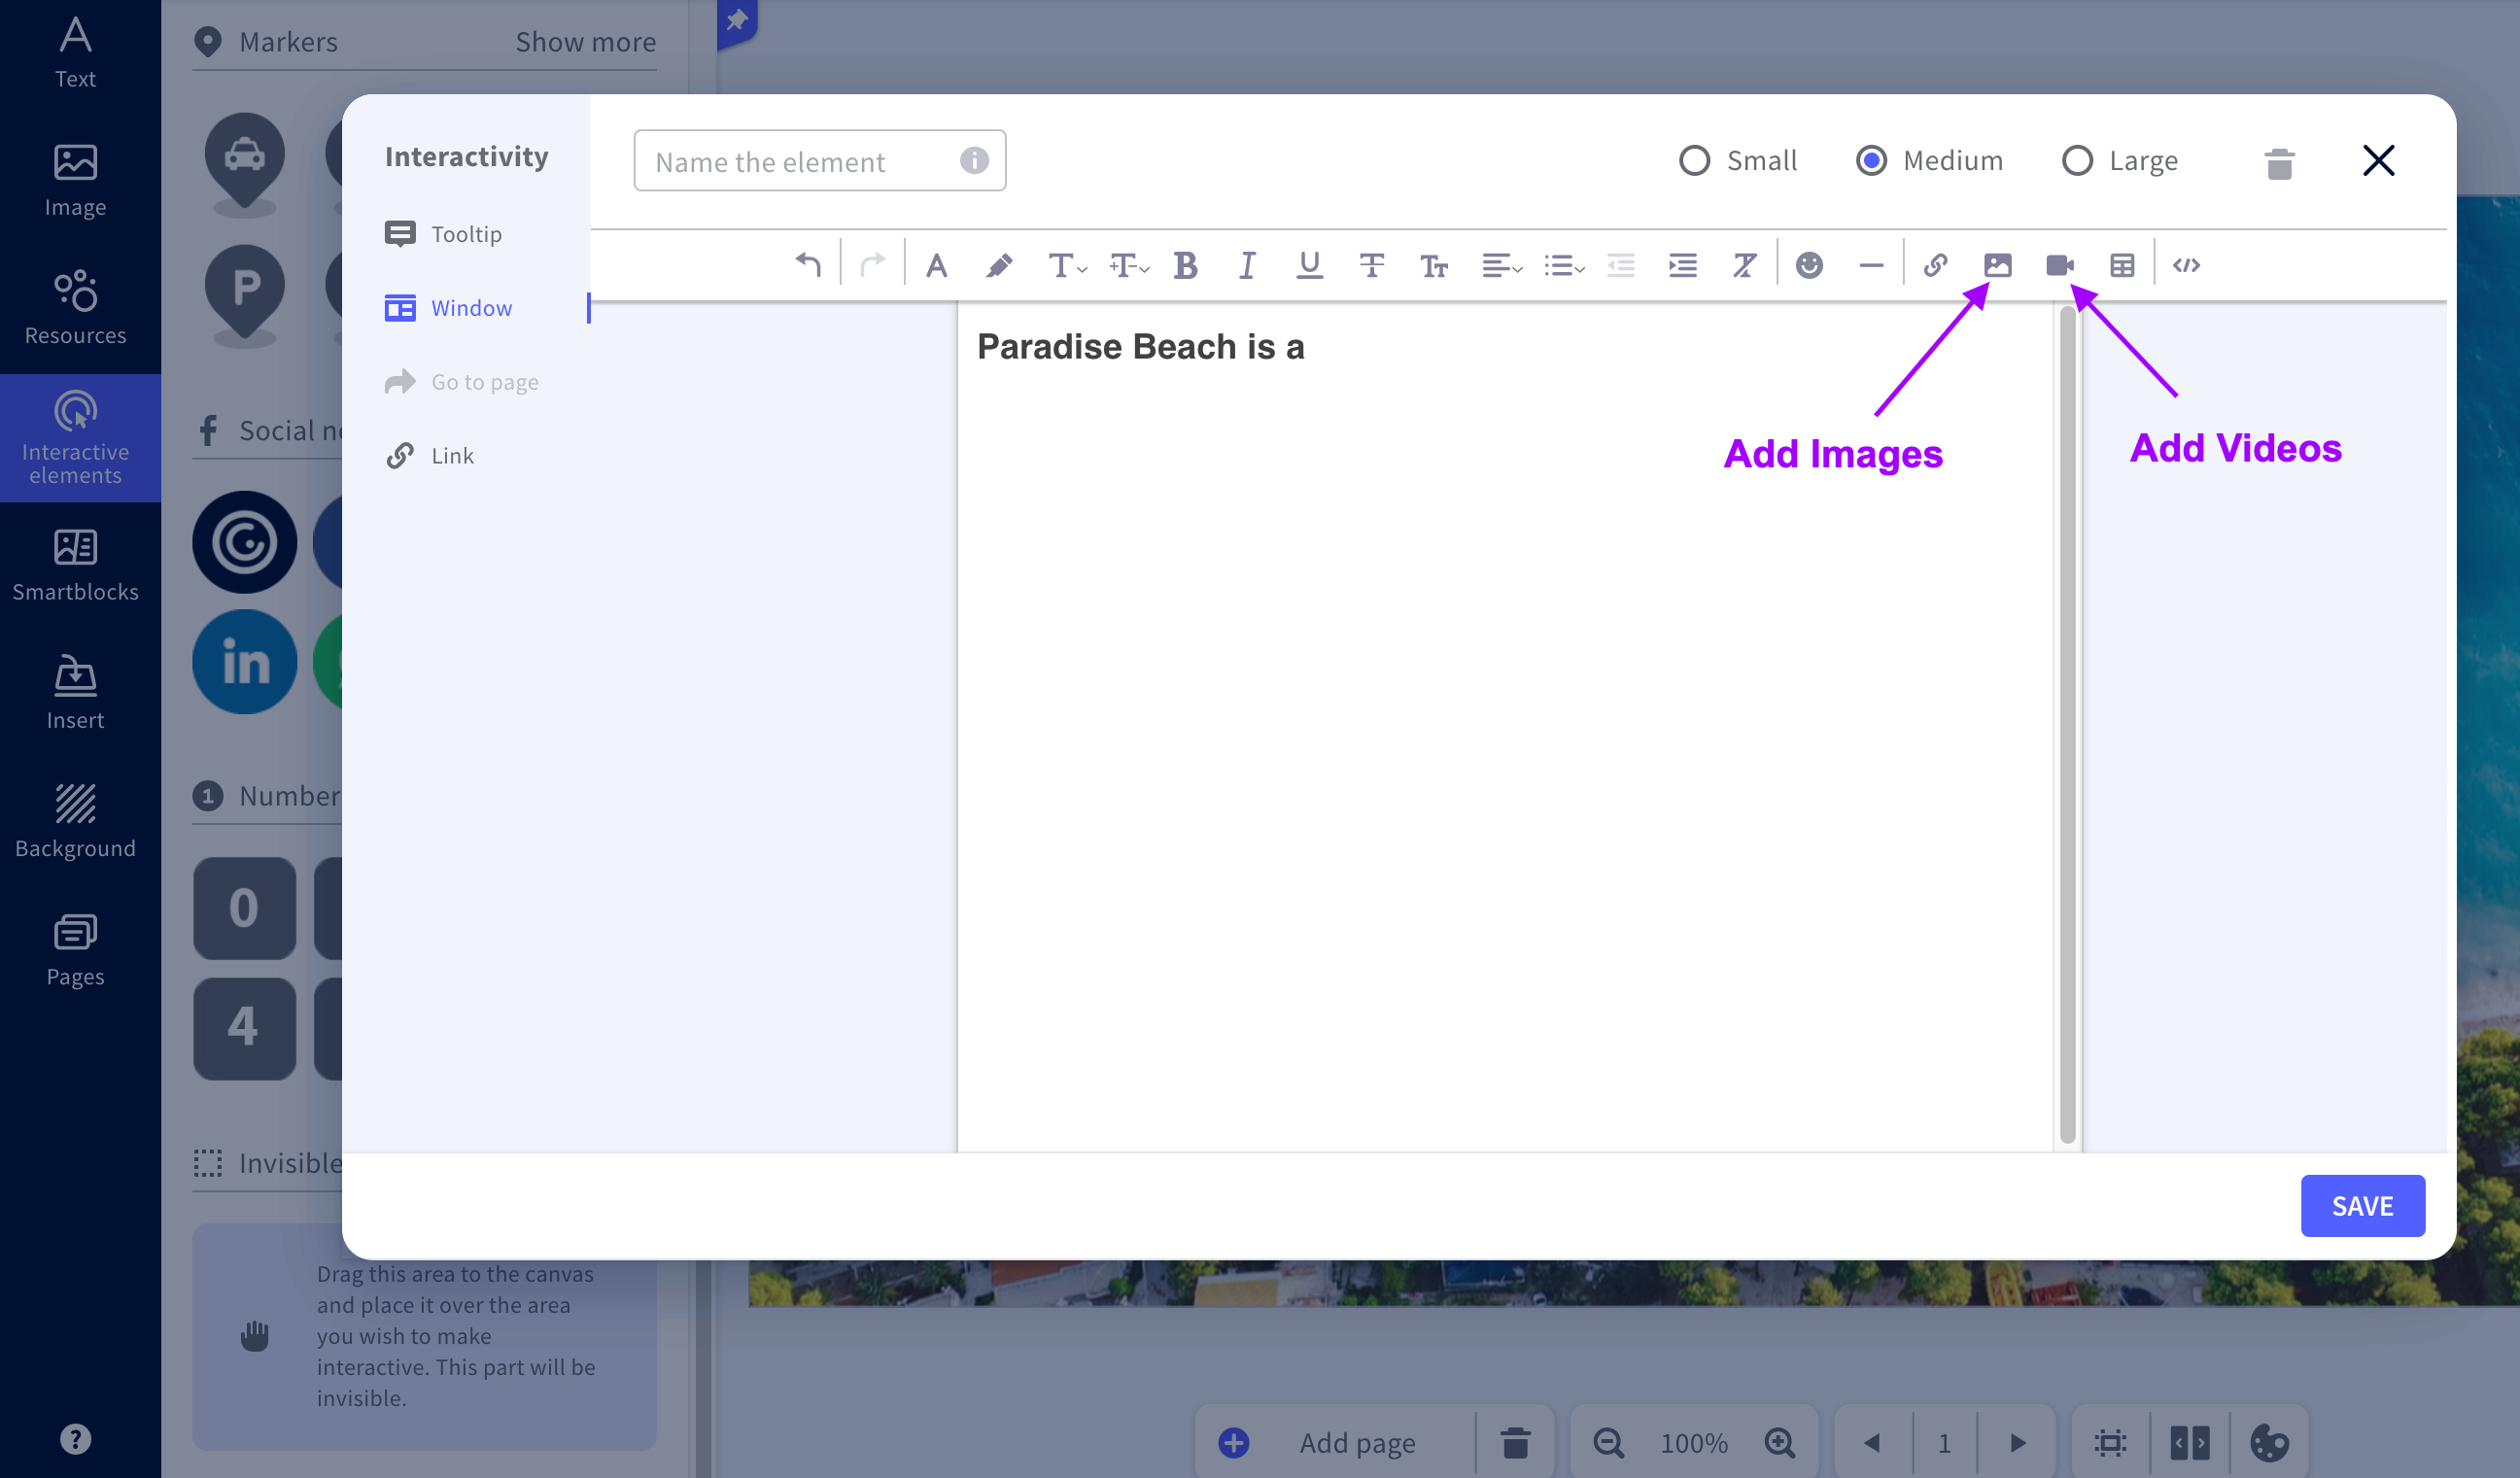
4. Add content to your hotspots! Click on the one you’d like to edit and then select the hand icon that appears above it. Choose the Tooltip option for short texts or the Window option for longer texts, videos, etc.
Content inserted as a tooltip will appear in a chat bubble when the viewer hovers their cursor over the corresponding hotspot. On the other hand, content inserted in a Window will appear when a viewer clicks on the hotspot.
5. A window will pop up where you can enter what you’d like to insert in that hotspot.

For text: Simply type away!
Images: Click on the insert image icon > Click on the grey box that appears to select an image from your device or click on the link symbol to paste a URL of an image found online > Click Insert and then Save.
Youtube video: Find a video on Youtube > Click on Share > Copy the video’s URL > Return to Genially where you have your insert window open > Click on the insert video icon that looks like a video camera > Paste the URL in the space that appears > Click Insert and then Save.
6. Once you’re done, you can publish your creation and access its sharing options by clicking on the All Set button in the upper-right corner.
And that’s it! Happy creating! We can’t wait to see your Colorcinch images full of life and interactivity.


