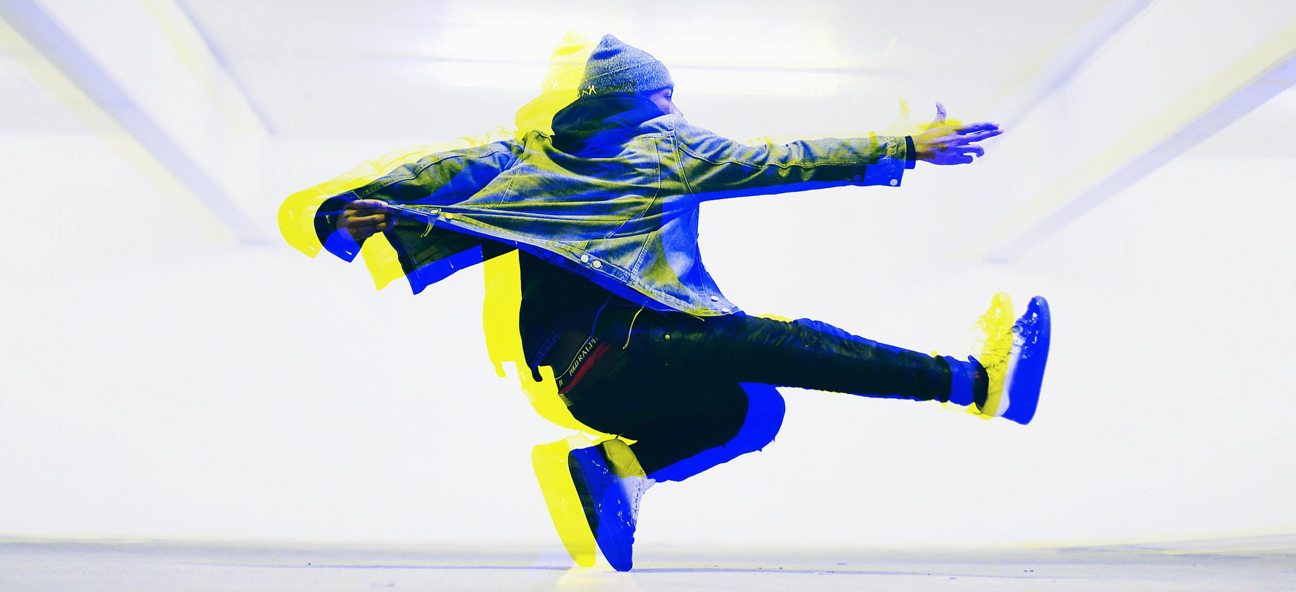
Want to add some extra edge to your pictures? You can’t go wrong with glitch photo effects! Glitch effects can completely change the mood, tone, and aesthetic of your pictures.
There are so many styles to choose from, too – from grungy and dirty glitch photos, to sleek, psychedelic, colorful, kaleidoscope effects, to everything in between.
Colorcinch makes it super easy to create cool glitch art without any editing skills or expensive photo editors. All it takes is a few clicks to add amazing glitch effects to your pictures!
What are glitch photo effects?
In general terms, a glitch happens when something goes wrong with a computer system or electronic device. It can be due to a power interruption, a software error, or a hardware malfunction.
On the computer screen, that glitch looks like a random block of pixels that don’t belong. Here’s an actual glitch issue from someone with a Windows computer.
Visually, glitch effects just look super cool! They add something unsettling to photos and make them look like they’re from another world. In fact, glitch background effects have long been used in TV and movies to signal something weird, paranormal, and disturbing.
Countless traditional and digital artists have also created cool glitch art, adding their own creative flair to the mix.
In short, if you want to make your pictures look different, unique, and a little bit freaky, glitch effects are the way to go!
Before we go into the four main ways to make glitch art photos using Colorcinch, let’s quickly go over the basics of the app.
What is Colorcinch?
Colorcinch is a free, browser-based photo editor you can use to make all sorts of edits to your pictures – from basic cropping and resizing, to adding fun filters and effects, creating layers, and more.
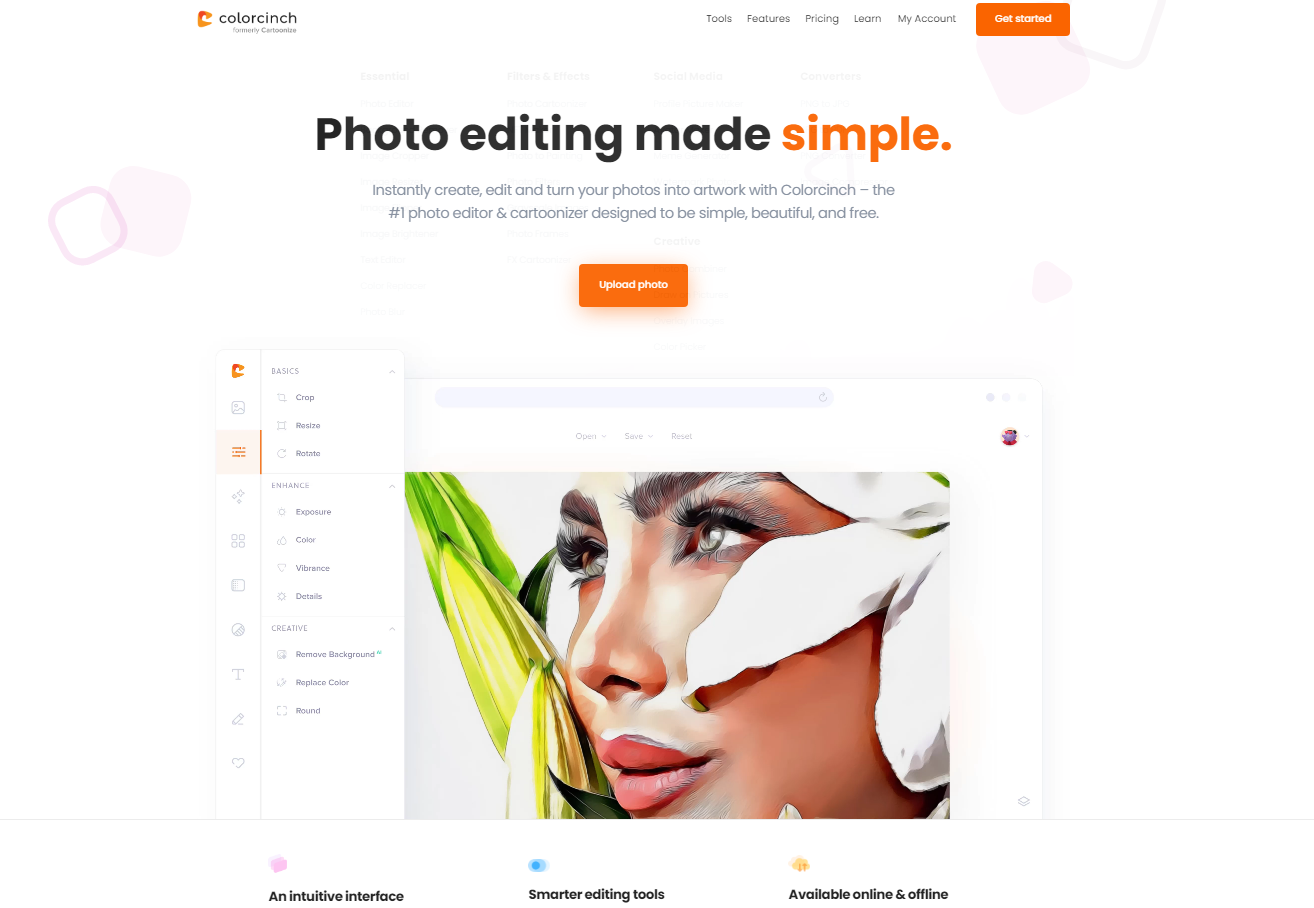
And yes, that includes glitch effects and glitch art!
Colorcinch is extremely user-friendly, and even if you’ve never edited a picture before, you’ll be able to figure out how to use the app with ease.
While Colorcinch’s free version offers plenty of features and options, you can also upgrade to Colorcinch Plus for even more editing power.
Colorcinch Plus gives you access to premium photo effects, customizable presets, advanced editing tools, advanced blending, high-resolution exports and image files, collaboration features, and much more.
The Monthly Plan for Colorcinch Plus only costs $8.99 and you can cancel anytime. Or, if you want to save even more, you can sign up for the Annual Plan for just $4.99!
Now that we’ve got that out of the way, let’s walk you through the key parts of Colorcinch.
How to Use Colorcinch
There are two ways to get started with Colorcinch.
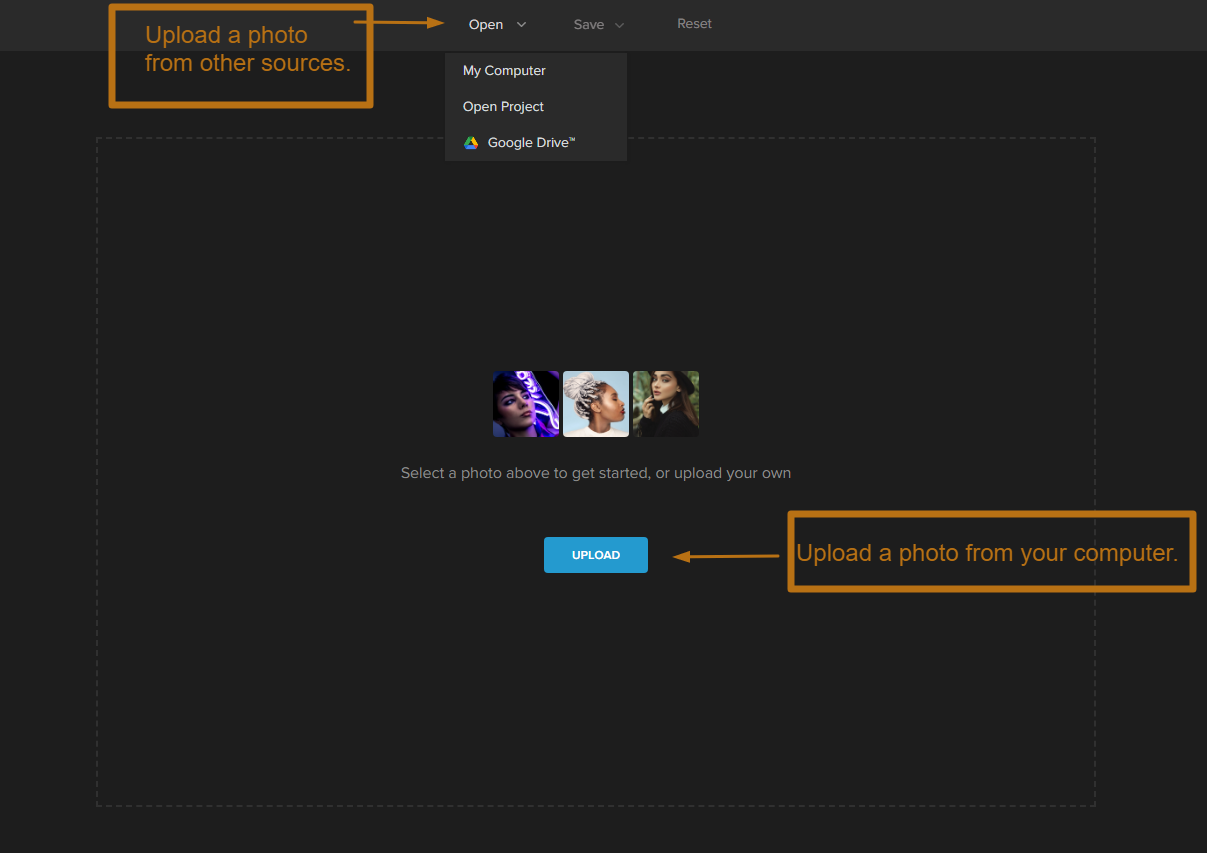
The first is to go to the website and click on the “UPLOAD” button. This will open up a blank canvas where you can upload your photo from your computer (or Google Drive), or choose one from Colorcinch’s sample images.
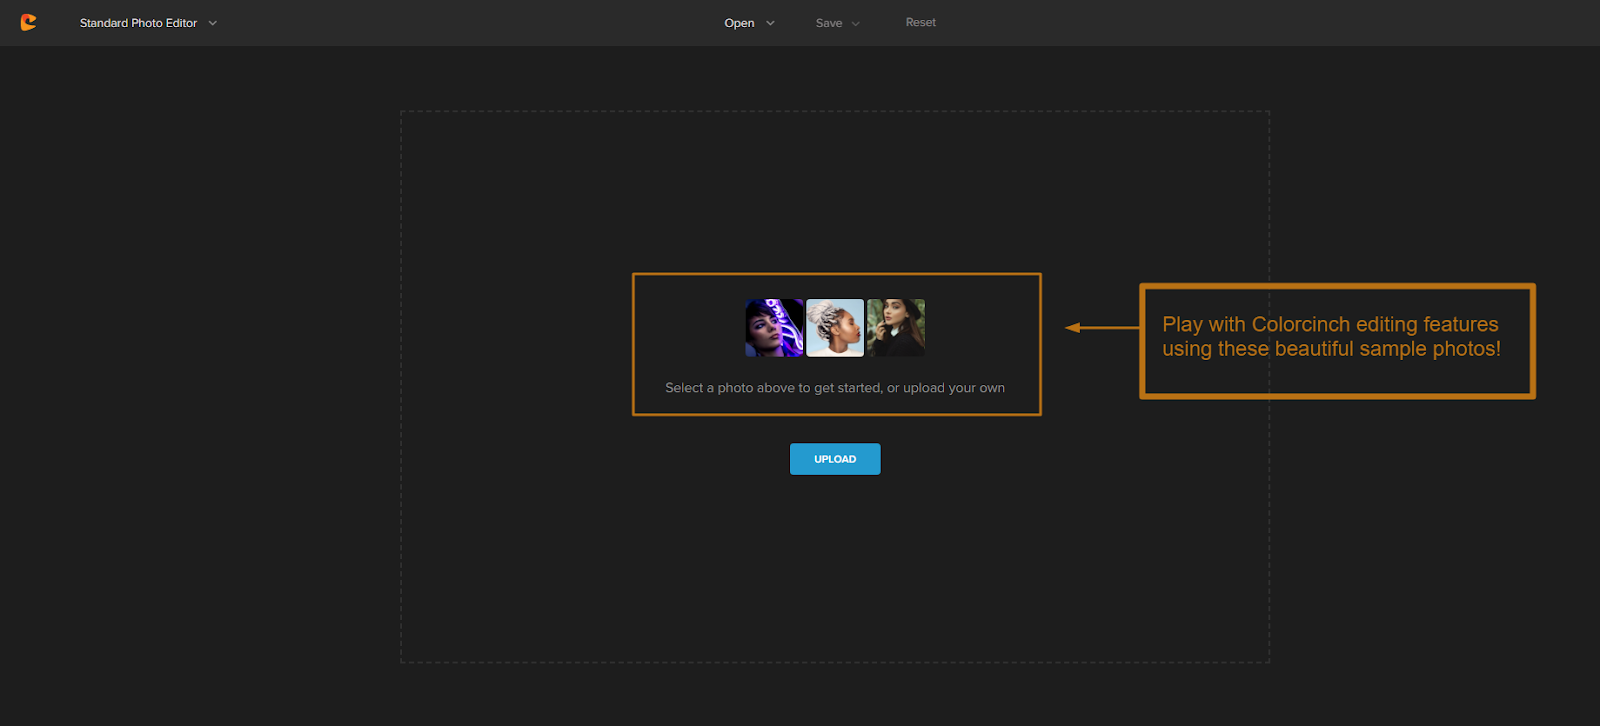
You can also use the Image Manager feature to organize all of your photos in one place. This is great if you plan on editing multiple pictures, or if you just want to keep all of your edited photos in one place.
Once you have your photo uploaded, you can start editing!
On the left panel of the interface, you’ll see all of the different editing tools available:
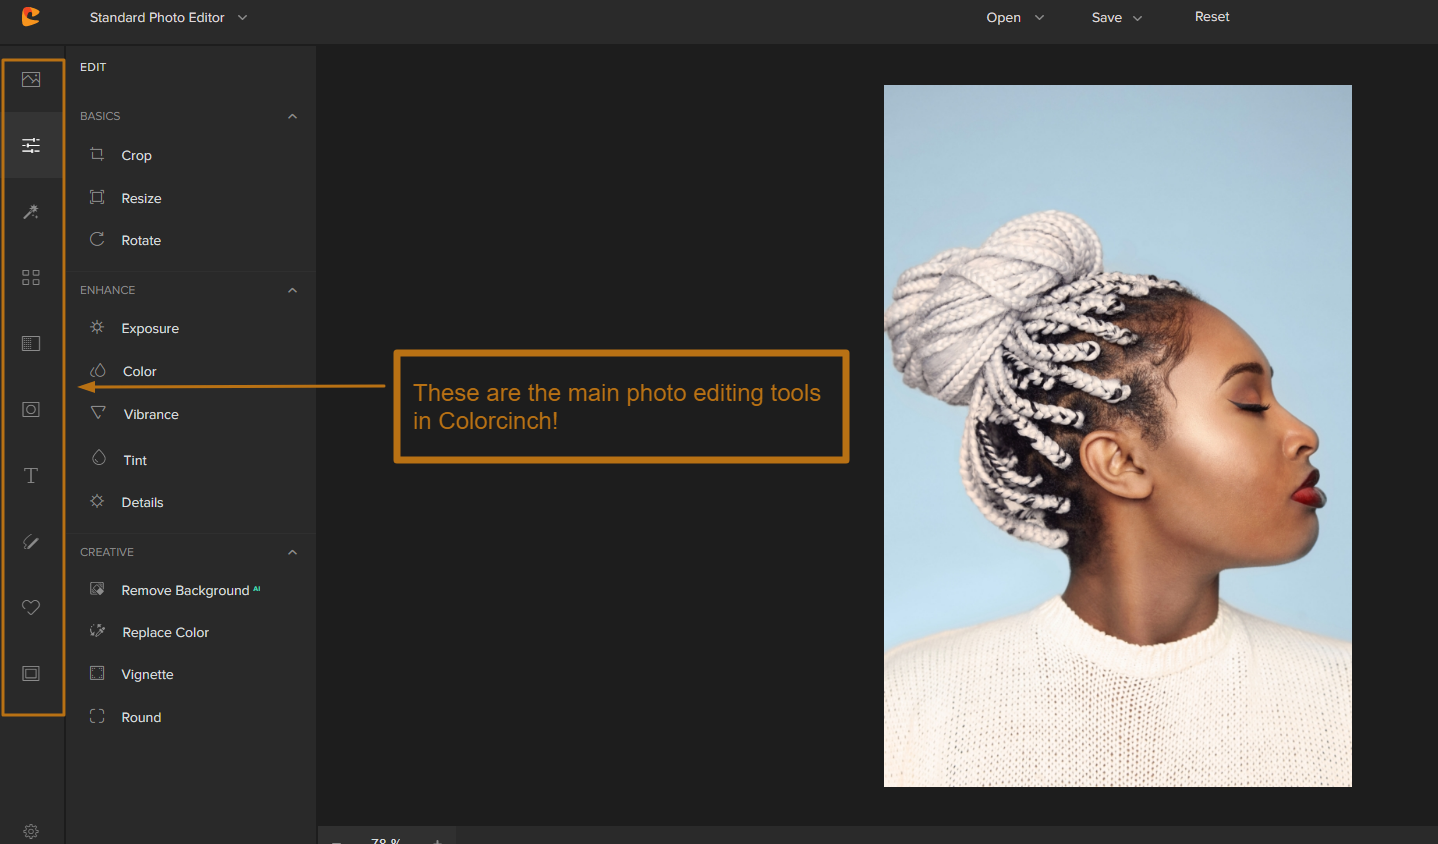
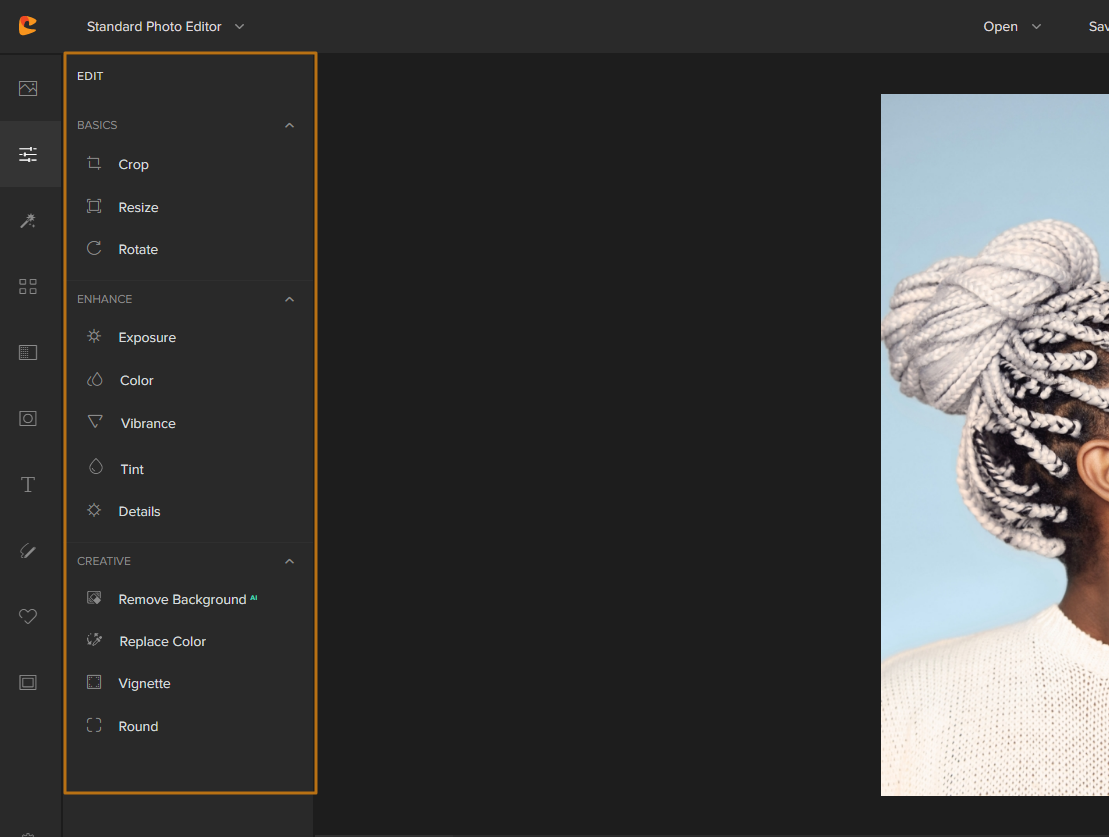
EDIT: Here, you can crop, resize, and rotate your photo. You can also adjust and enhance elements like Color, Vibrant, Tint, etc. The edit panel is where you’ll find Colorcinch’s AI-powered background remover, too – definitely check that out!
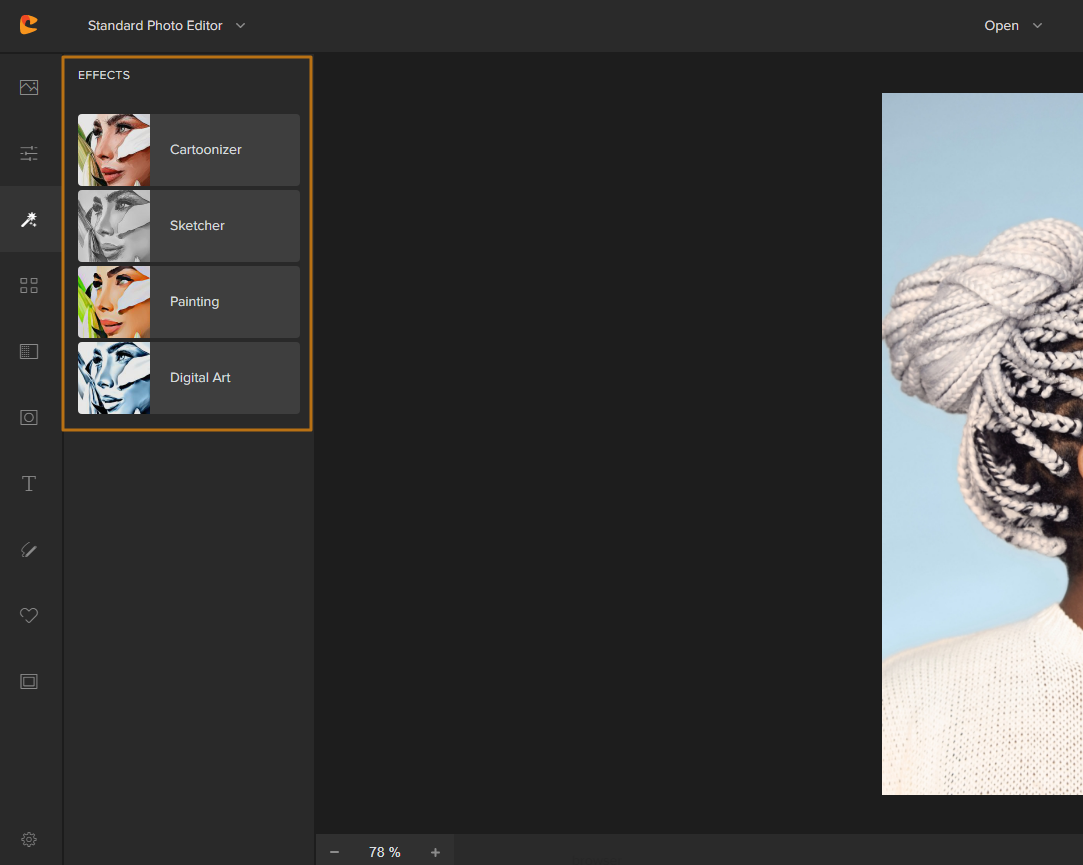
EFFECTS: With one click, Cartoonize your photo or turn it into Digital Art, a Painting, or a Sketch!
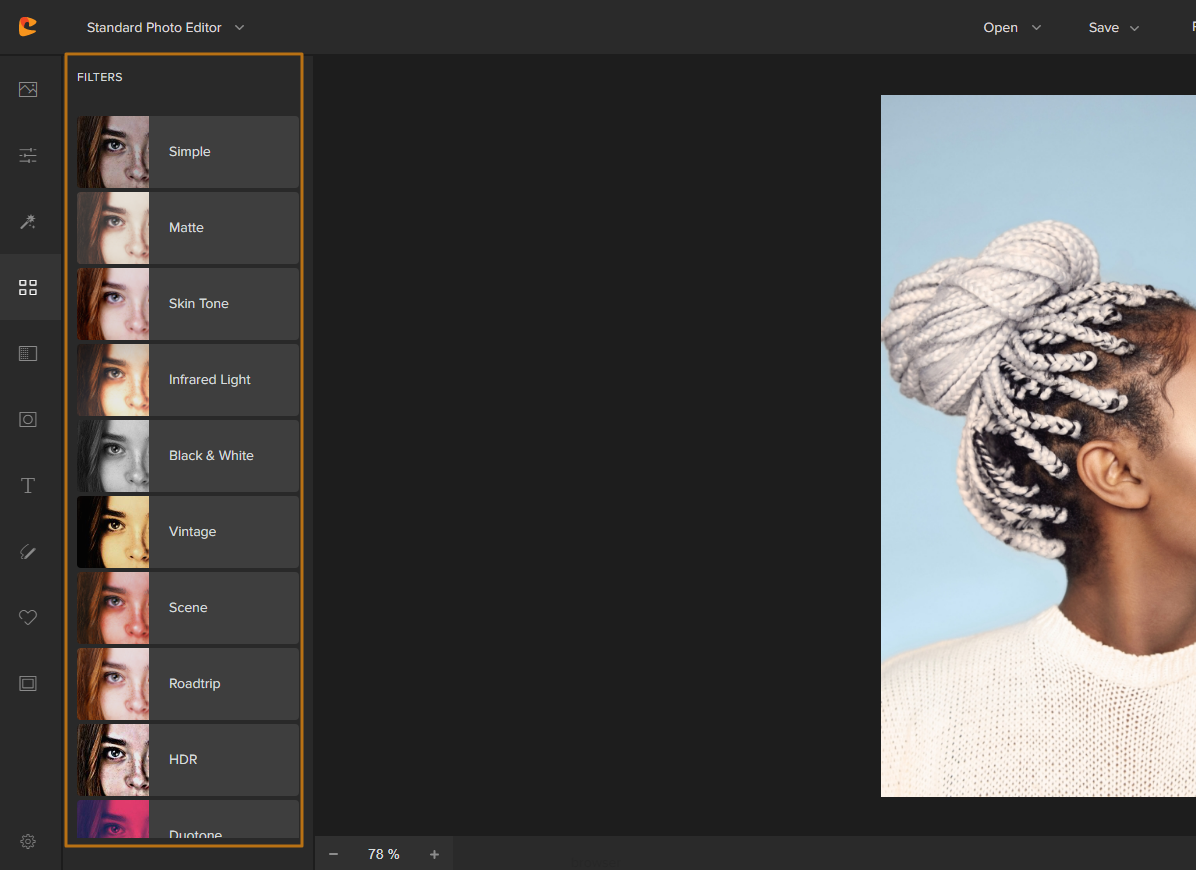
FILTERS: From Retro to B&W to Lomo, there’s a Colorcinch filter for every mood and style. This is also where you’ll find all the Glitch effects!
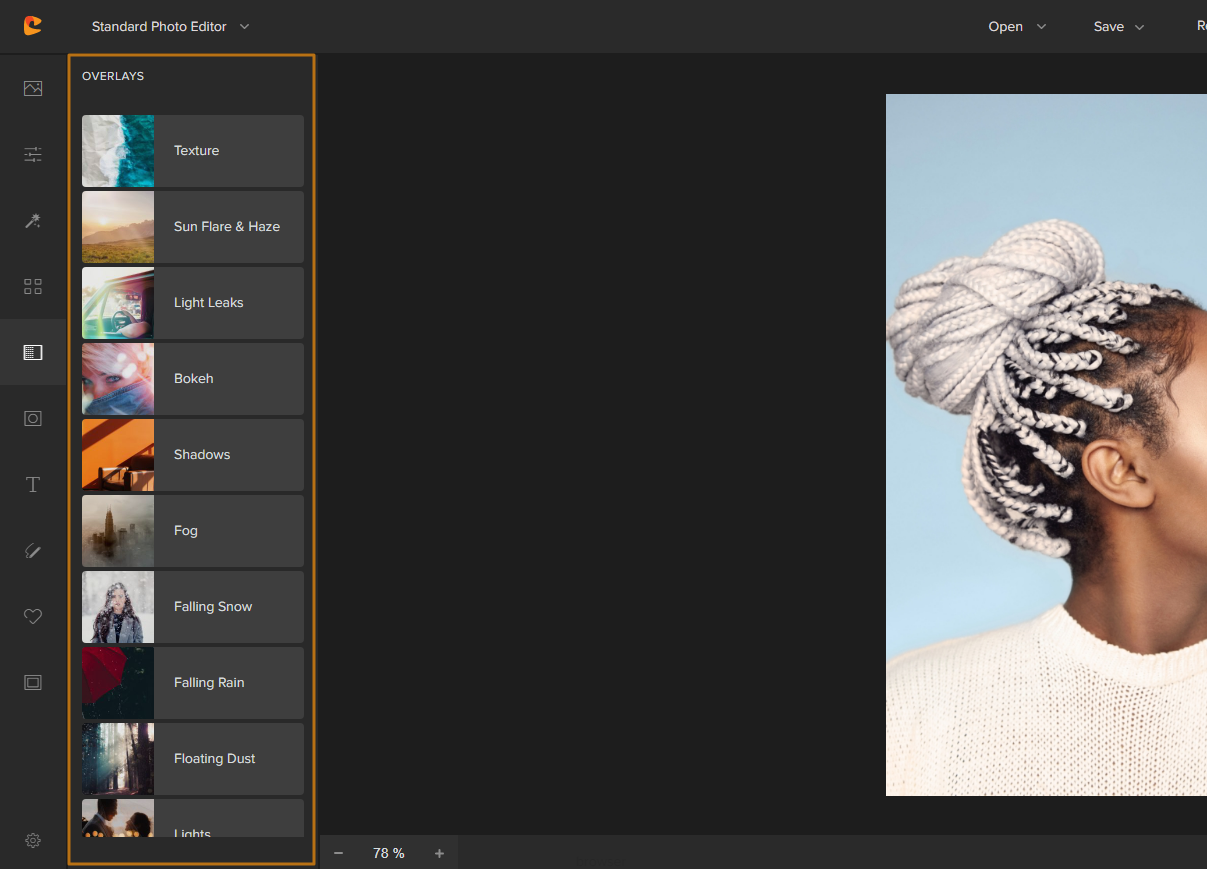
OVERLAYS: Add some pizzazz to your photo with an Overlay. Choose from over 100 different designs, or upload your own PNG file. Overlays are an excellent way to change the mood of an image or give it some really creative textures and lighting!
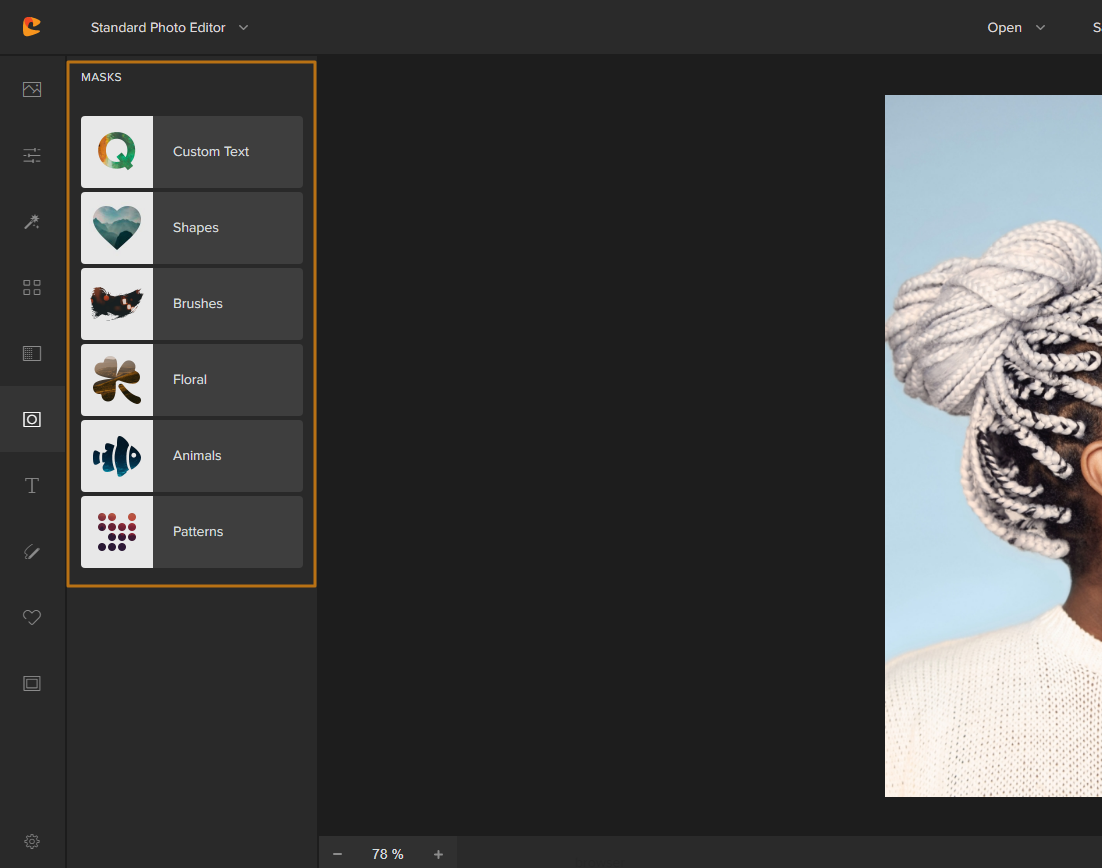
MASKS: Use a Mask to turn part of your photo into a shape – like a heart, star, or circle.
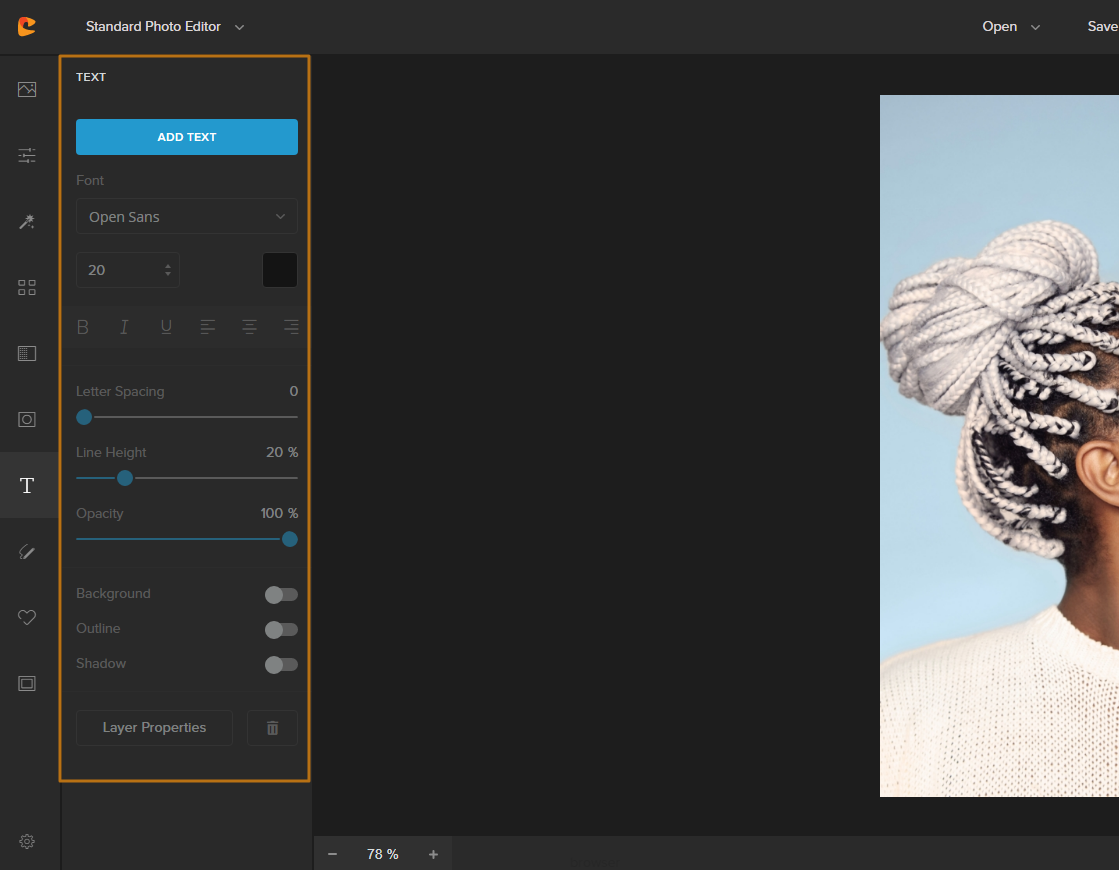
TEXT: Add text to your photo with a wide variety of fonts, colors, and styles.
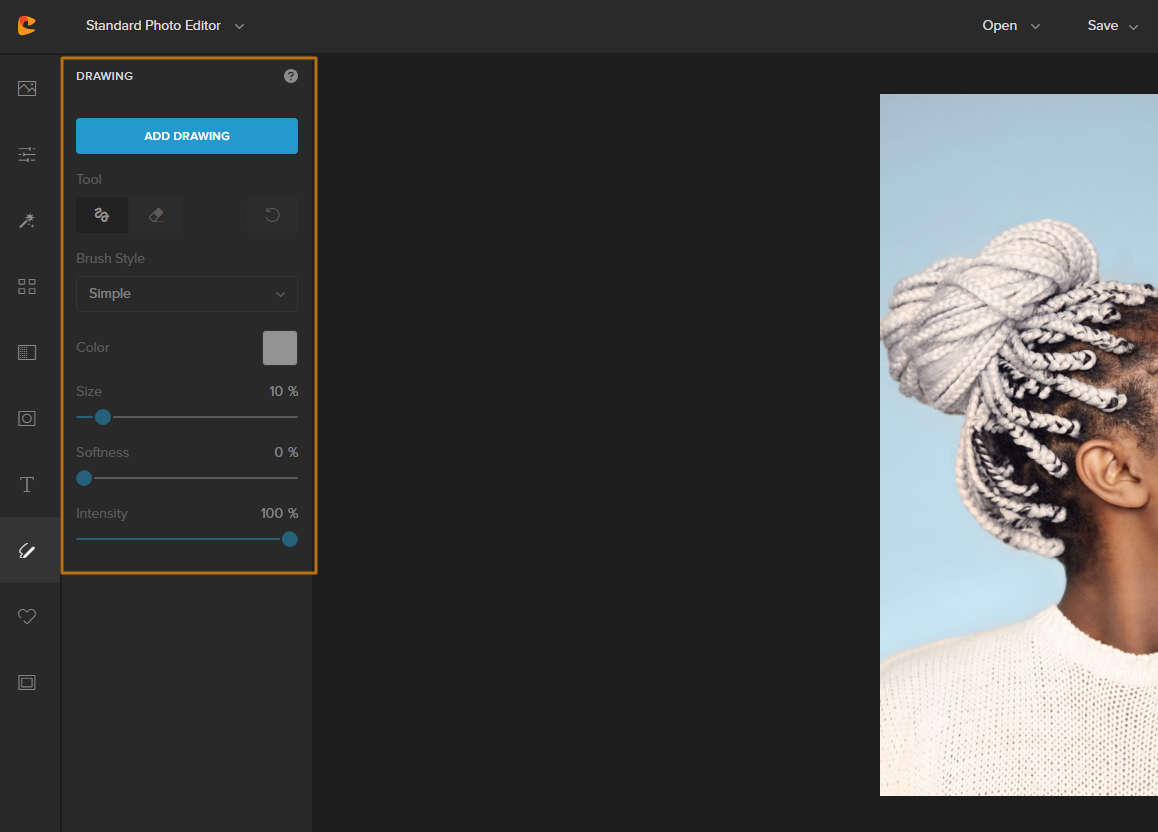
DRAW: Use Colorcinch’s different brushes, pens, and pencils to draw on your photo using your mouse cursor!
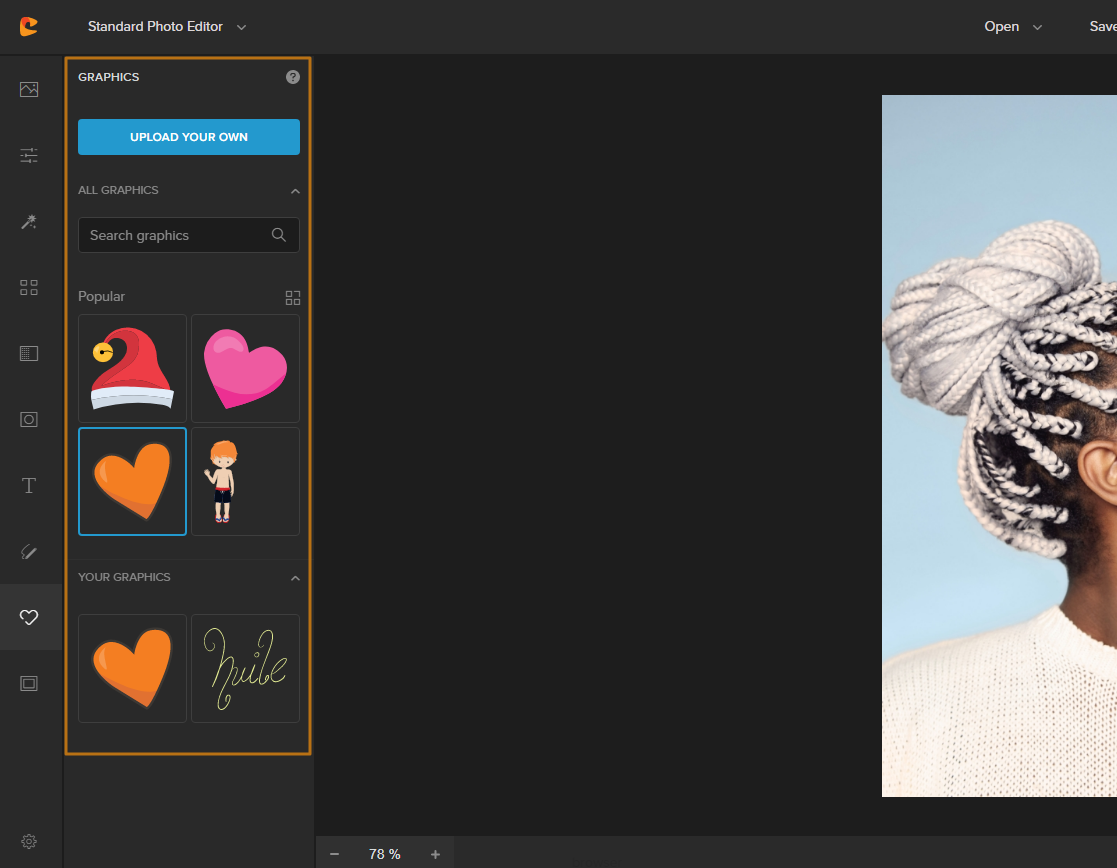
GRAPHICS: Add some cute graphics to your artwork or upload your own for fully custom results!
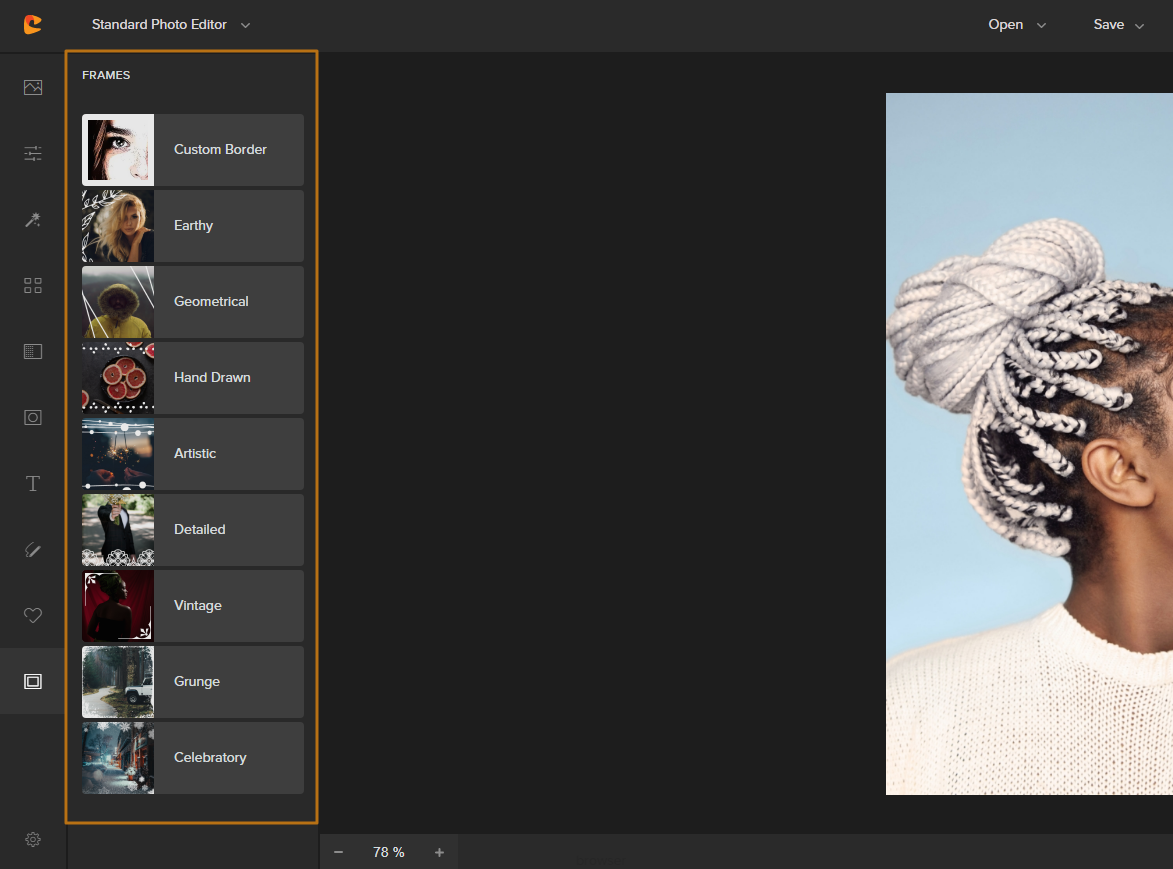
FRAMES: Choose from a variety of different frames to add some borders around your photo.
That’s just the start. Within all those main categories, you’ll find even more styles, options, features, and customization settings. You can also combine different effects and tools to create your own unique looks.
For example, you can add a frame to your photo, then use an Overlay and a Mask to create a one-of-a-kind composition.
The possibilities are endless!
Do note that some of the coolest Colorcinch features are only available under a Plus subscription. If you’re serious about photo editing or just want exceptional results, upgrading is totally worth it.
But don’t worry – even the free version of Colorcinch already has a ton to offer, and we’re confident you’ll be able to create some amazing pictures when you go try it out!
4 Ways to Make a Photo Look Glitchy Using Colorcinch
With that said, let’s now dive into how to add glitch effects and create glitch art using Colorcinch!
First, upload the image file you want to enhance with the glitch photo effect.
Again, click on the UPLOAD button or click “Open” to import a photo from your computer, Google Drive account, or an existing Colocinch project.
Want to use a still from a video? Use your preferred video capture software.
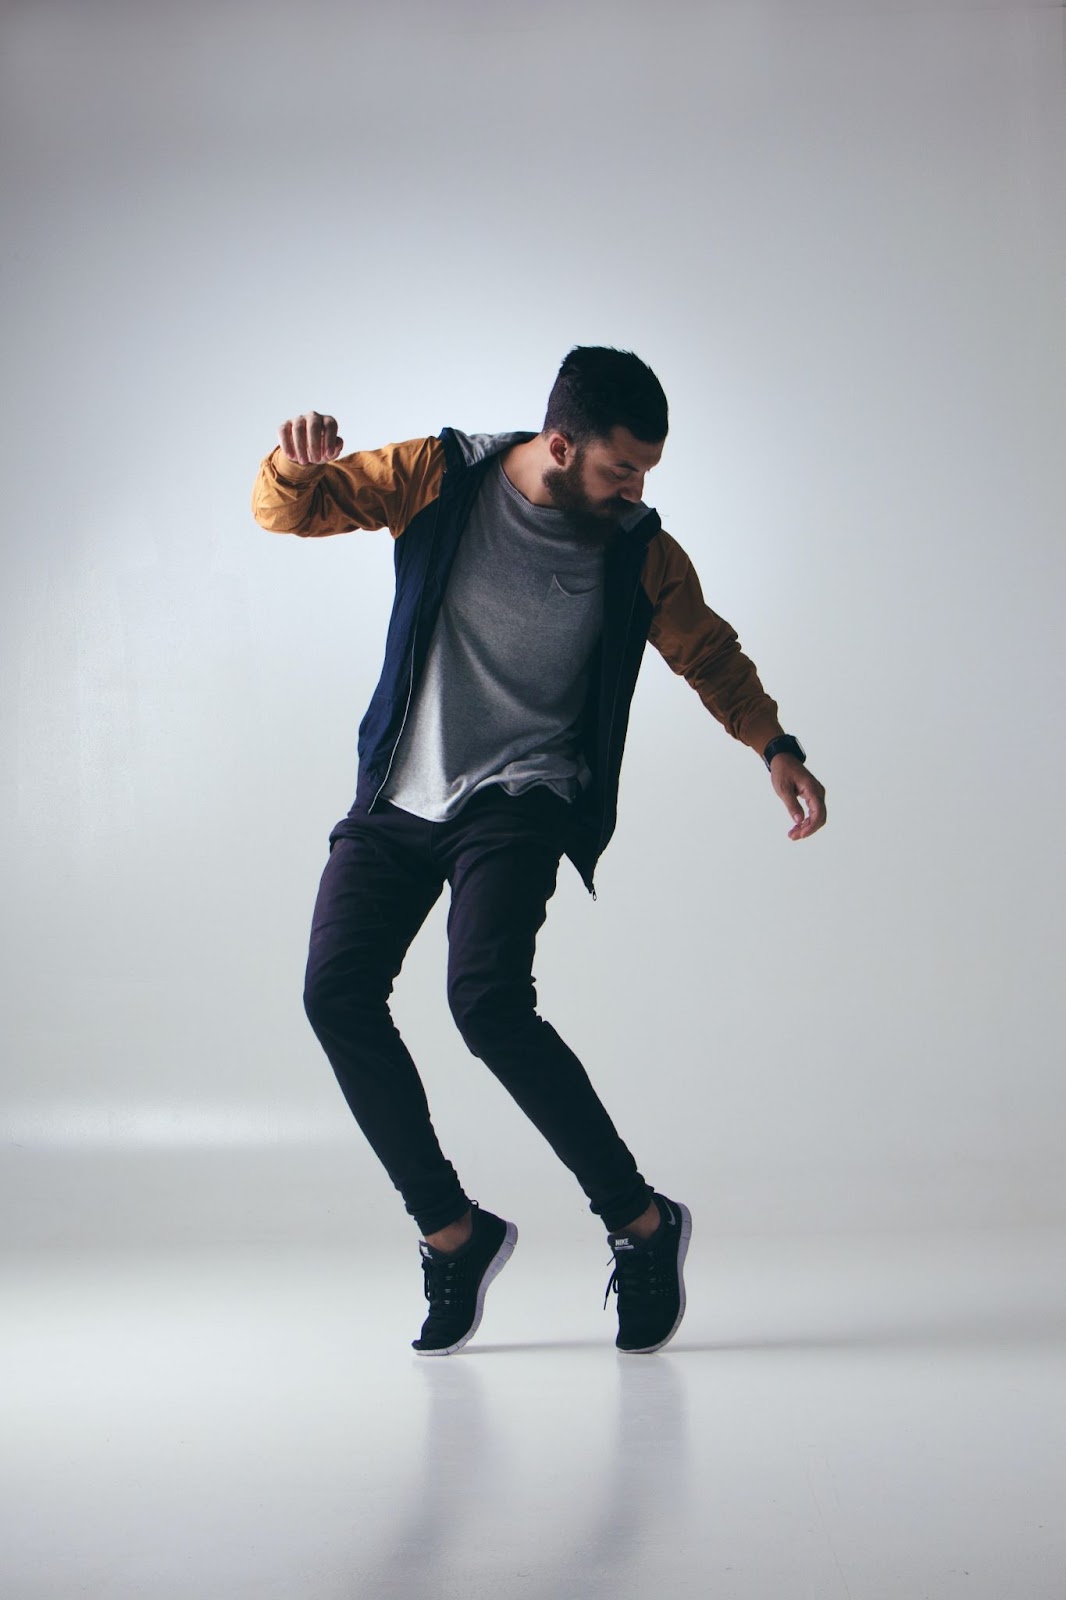
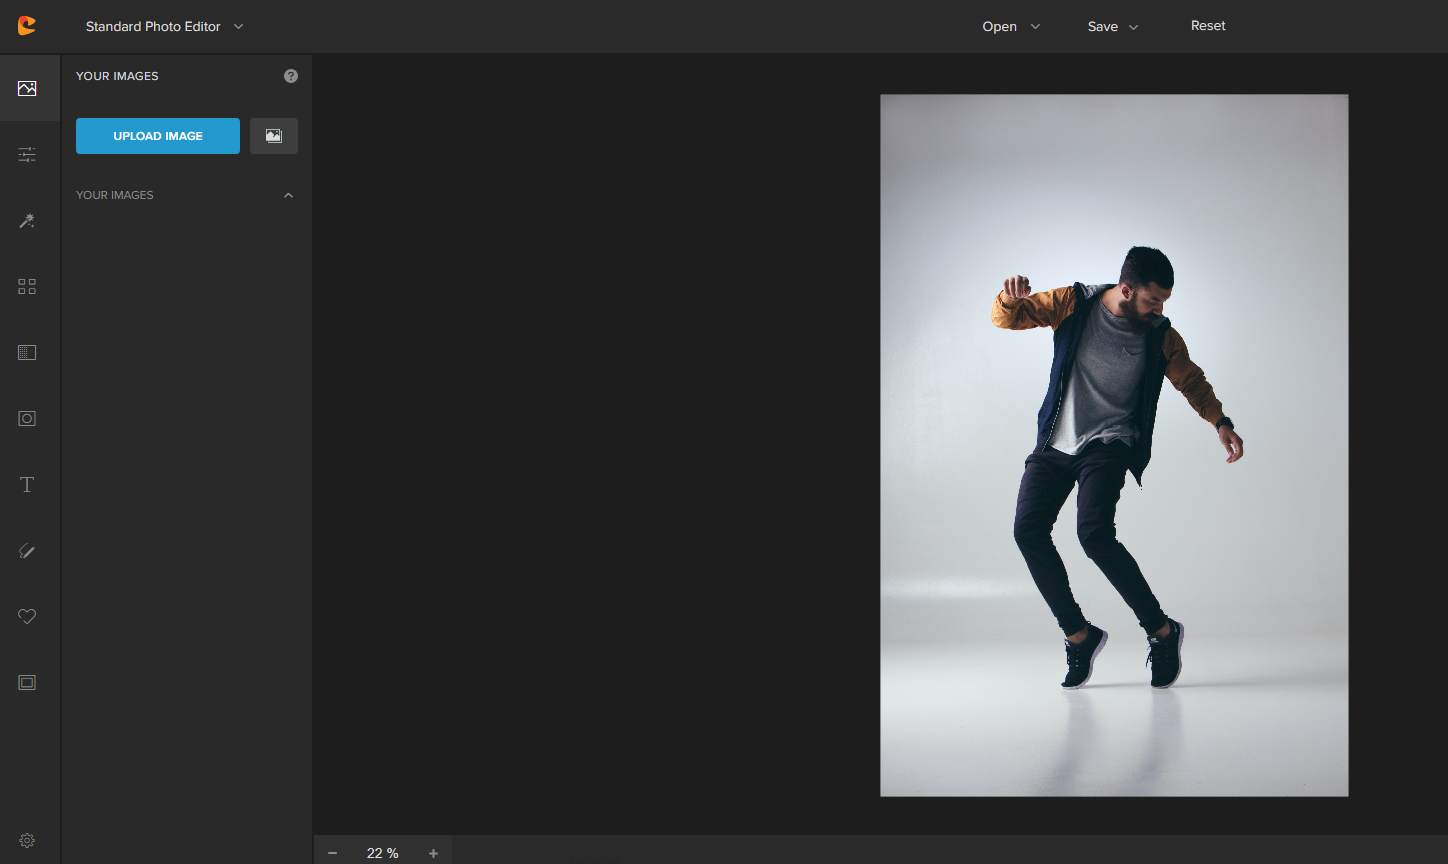
For this guide, we’re using this gorgeous photo by Patricia Palma. It has a lovely sense of movement from the guy mid-dance, making it a good base for glitch filters!
Here’s what it looks like after the file loads in the Colorcinch workspace:
Then, go to the “FILTERS” section of Colorcinch.
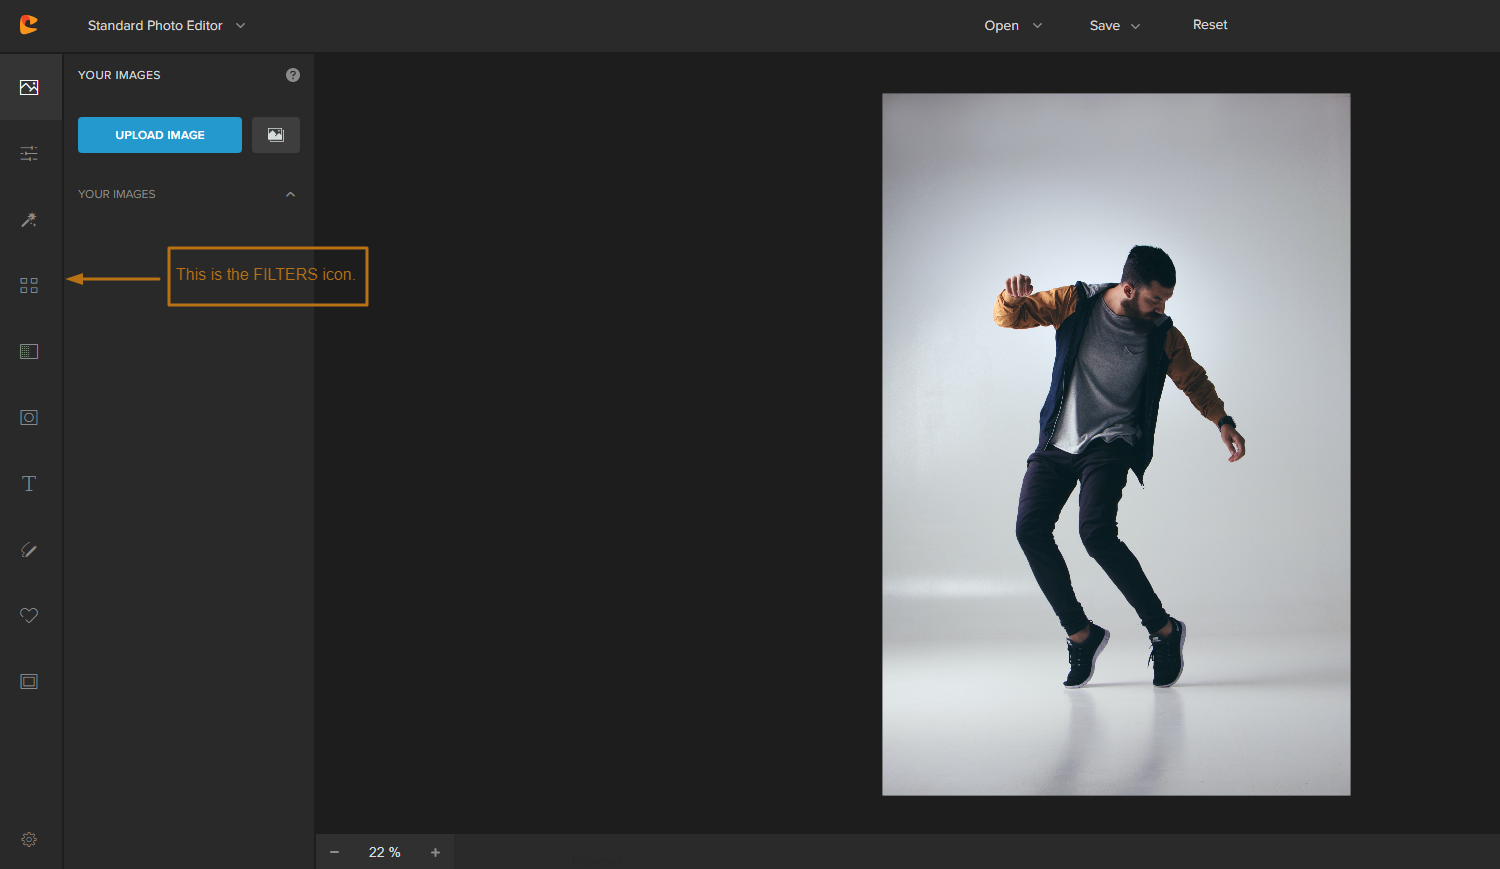
That’s where you’ll find the following filters: Glitch, Distortion, Liquify, and Pixelate. Those are the main filters you want to use to add glitch effects and make your photo look glitchy.
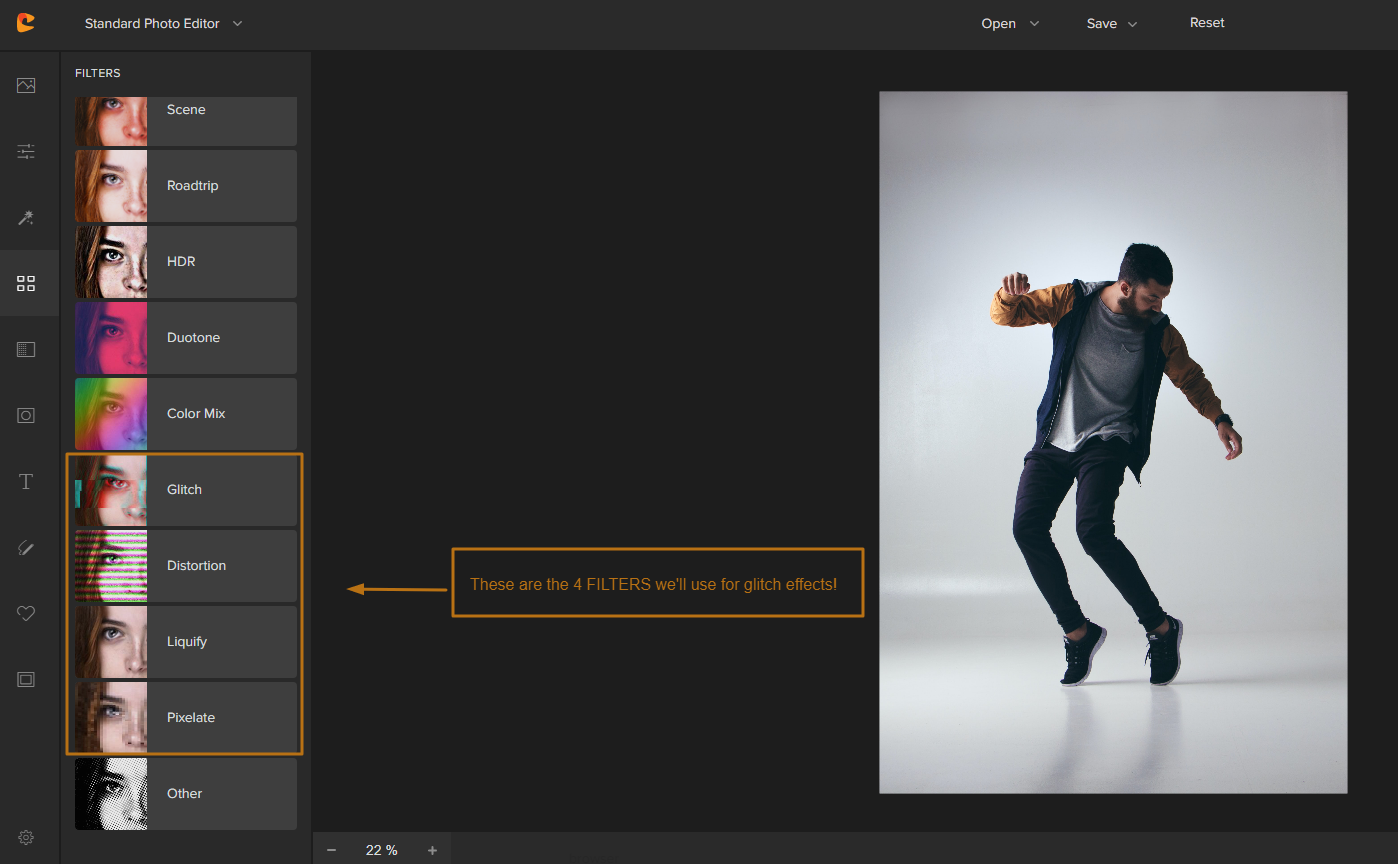
1. Colorcinch Glitch Effect: Use the “GLITCH” Filter
The first glitch tool you want to try is the “Glitch” filter. It’s the easiest way to add glitch effects to any photo with one click.
To use it, click on the “Glitch” filter and then choose from the 9 different glitch styles available:
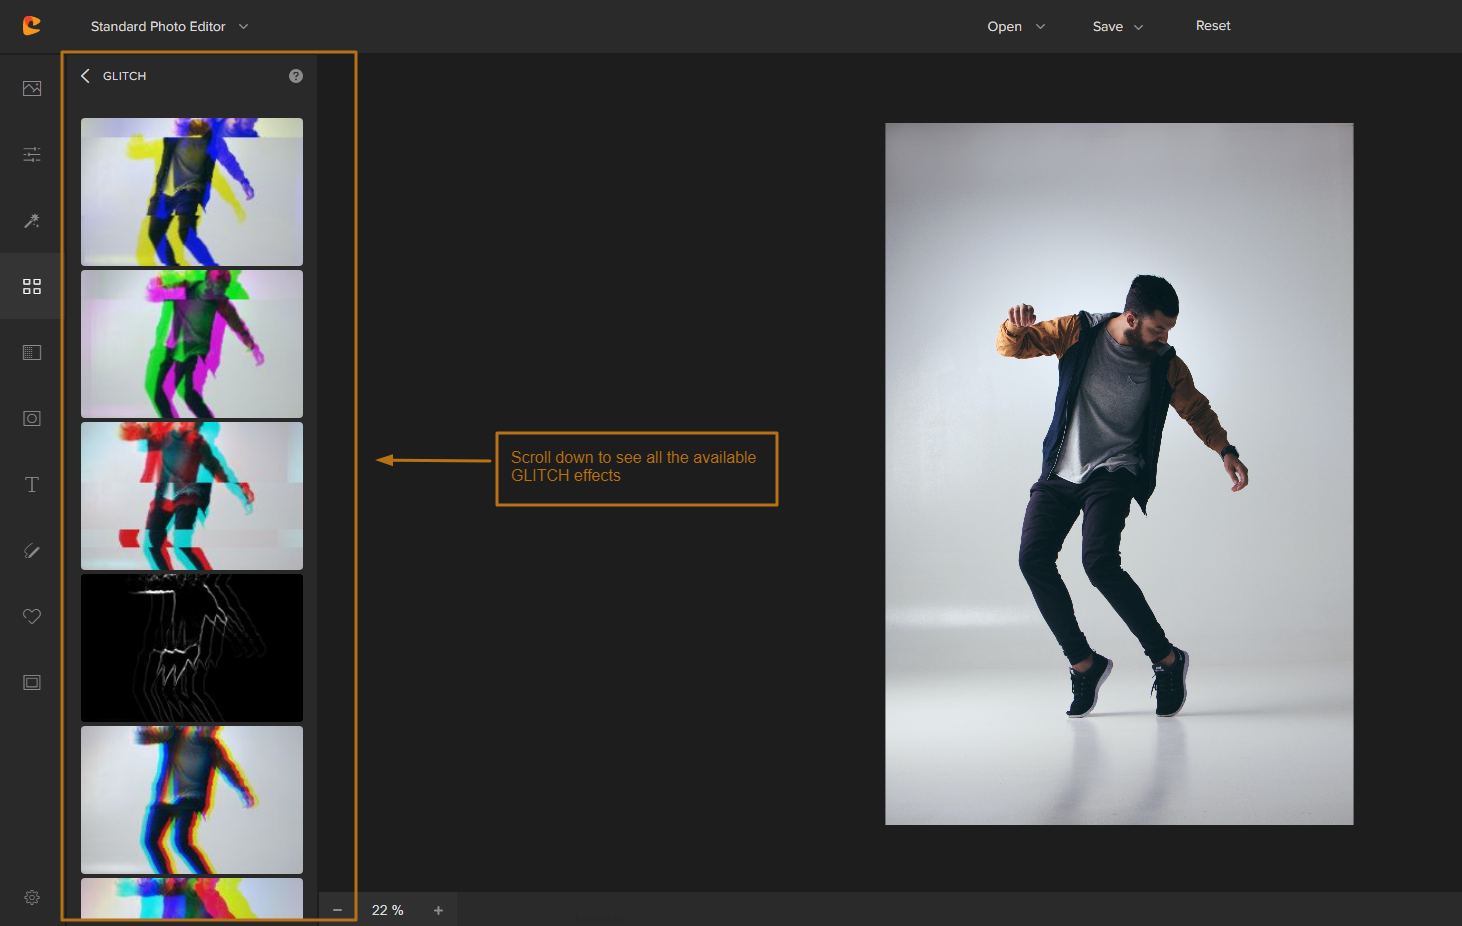
You can preview what the real glitches will look like by clicking on each one:
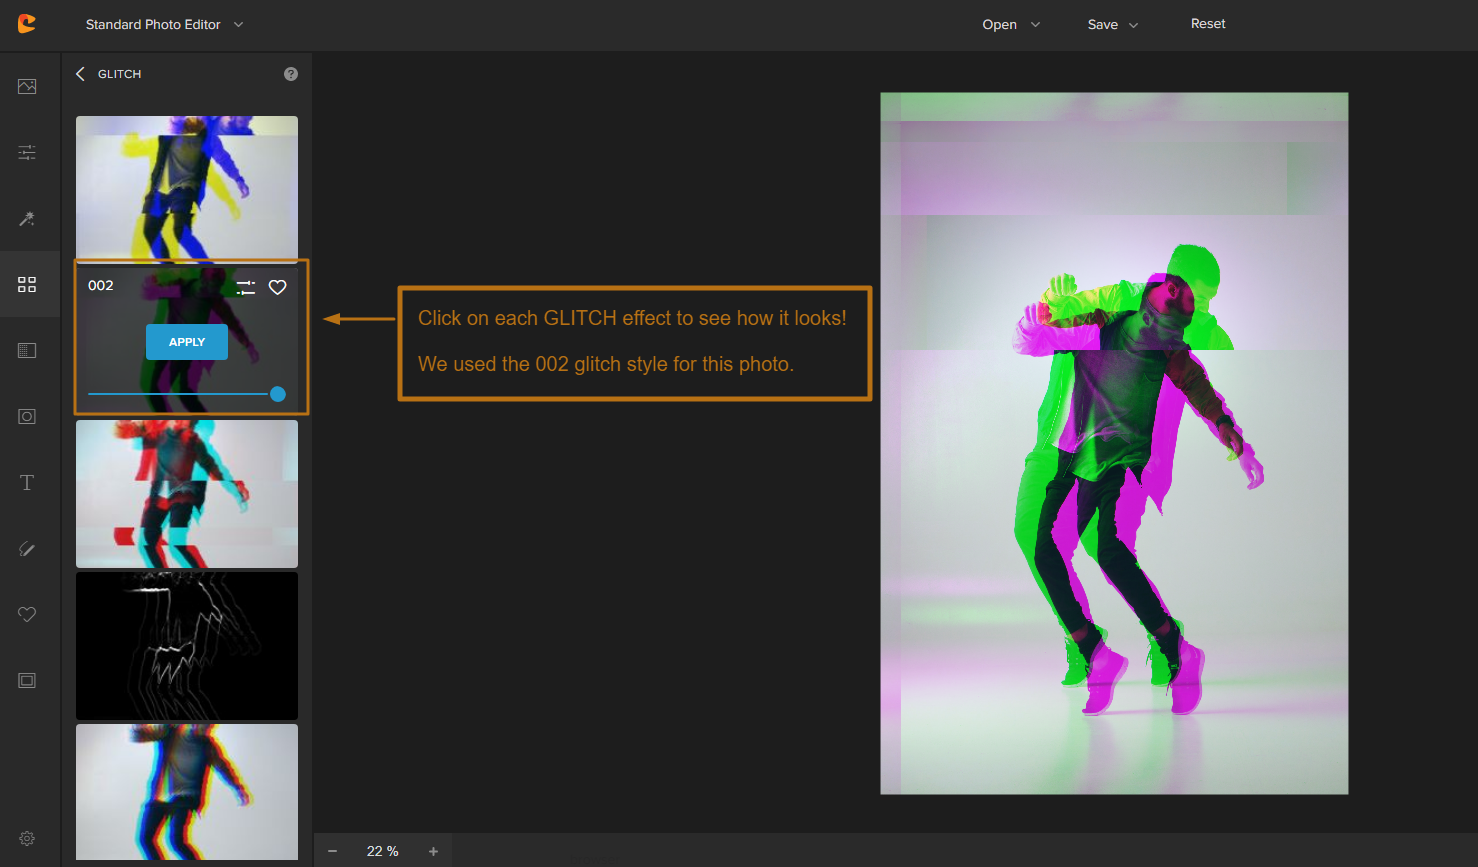
Slide the bar to adjust the Opacity of the filters. The less opaque it is, the more subtle the glitch effects will be:
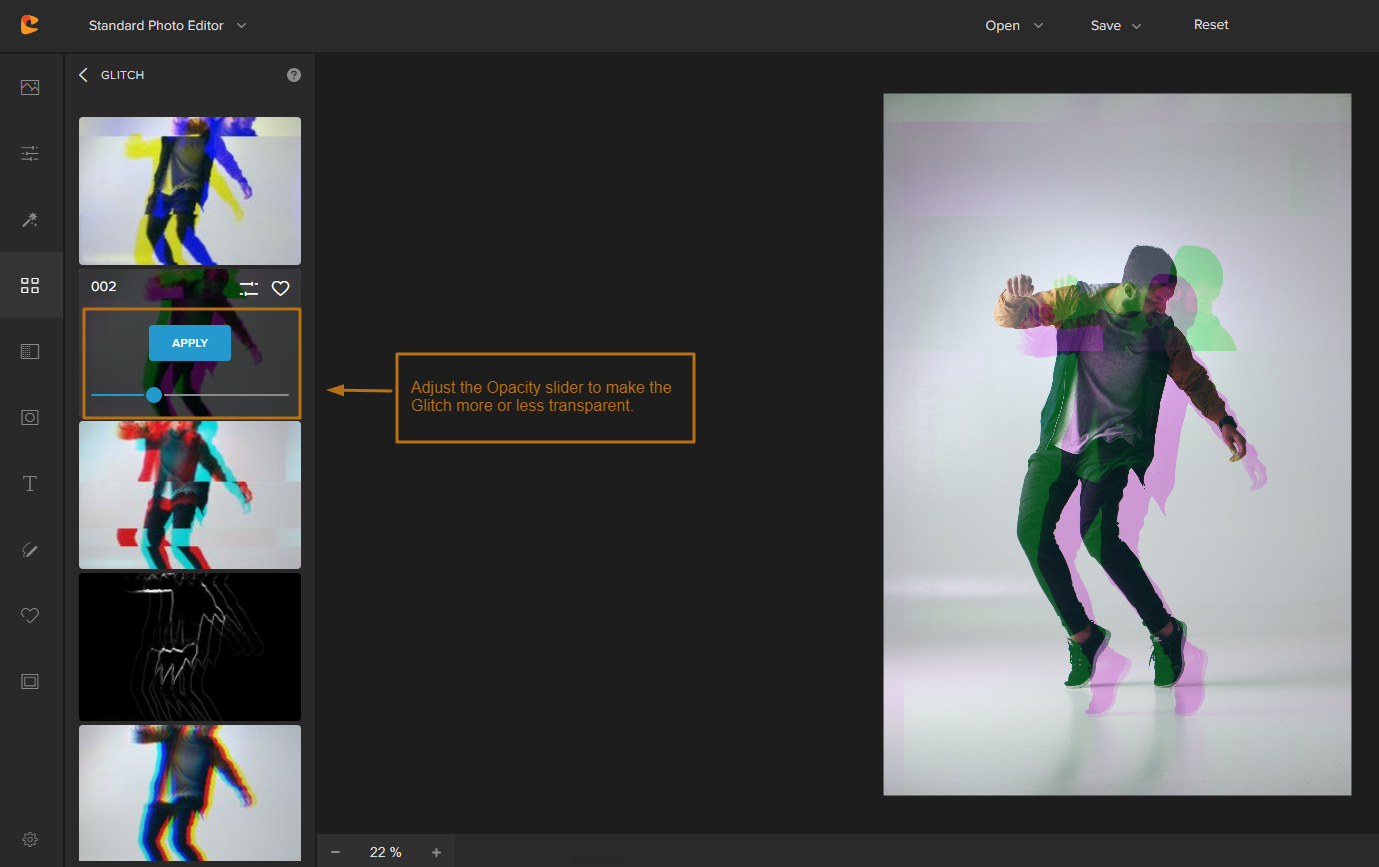
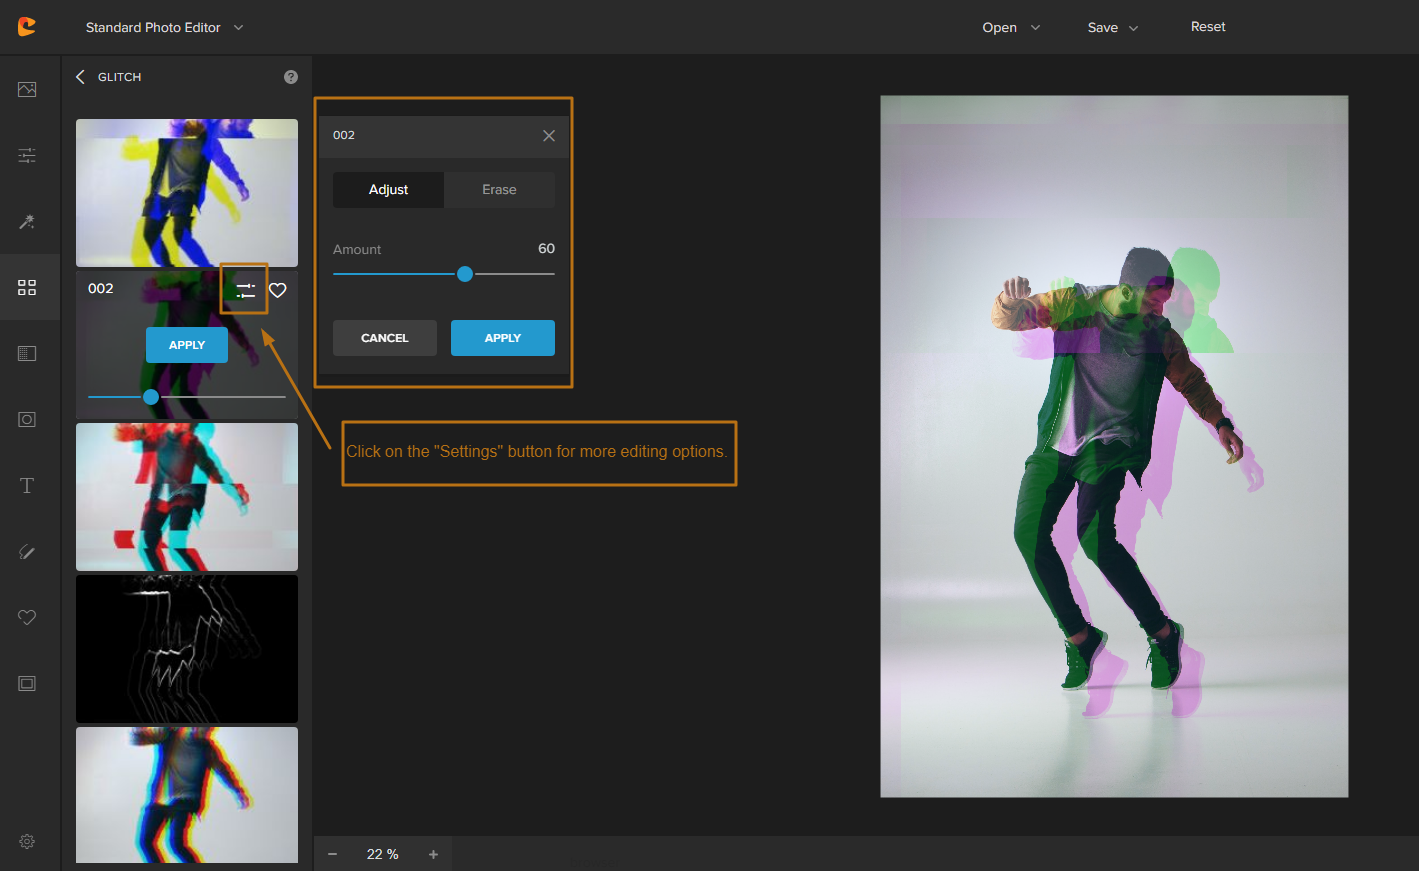
Click on the “Settings” icon to open up even more options:
- Use the “Amount” slider to control the intensity of the glitch effect and separate colors through RGB shift.
- Click on the “Erase” setting. This will allow you to erase the glitch effect from certain areas of your subject using the Eraser tool or the Brush tool.
- You can also change the Brush Size, Brush Softness, and Brush Intensity to get the perfect look.
- Toggle the “Show Mask” button on and off to see how the erased section looks:
- Toggle the “Invert Section” button on and off to invert the glitch effect:
Happy with how it looks?
Click on the “APPLY” button to add the glitch effect to your photo:
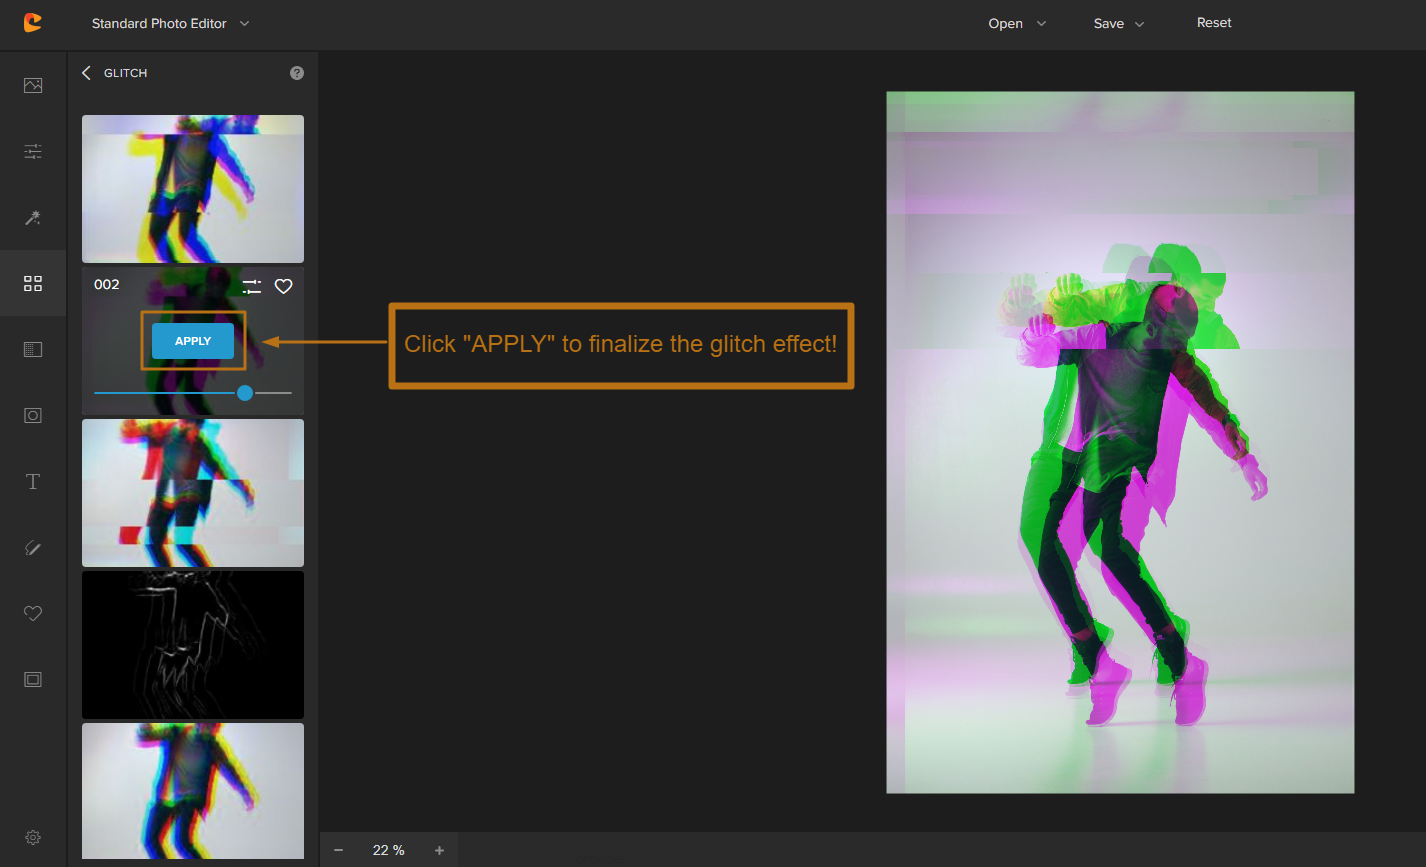
At this point, you can save your brand-new glitch art to your computer as a . JPG file, a .PNG file, or if you’re a Colorcinch Plus subscriber, save it as a project.
You can also share it directly to Facebook, Twitter, or Pinterest as social media posts.
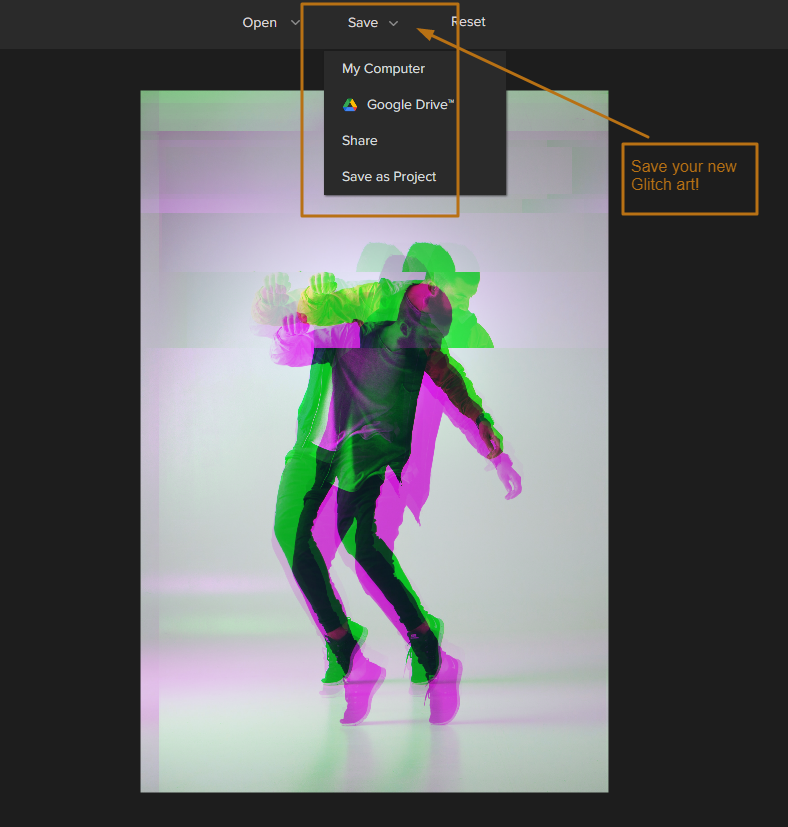
And that’s it for the Colorcinch Glitch filter – experiment until you arrive at a glitch photo effect you love!
2. Colorcinch Glitch Effect: Use the “DISTORTION” Filter
Second, let’s try using the “Distortion” filter to create a glitch effect.
The distortion effect works by warping and bending the pixels in your photo. This can create some pretty cool-looking glitch effects, especially when combined with other filters like Pixelate or Glitch. The scan lines in the photo below is a great example!
To use it, click on the “Distortion” filter and then choose from the 15 different distortion styles available:
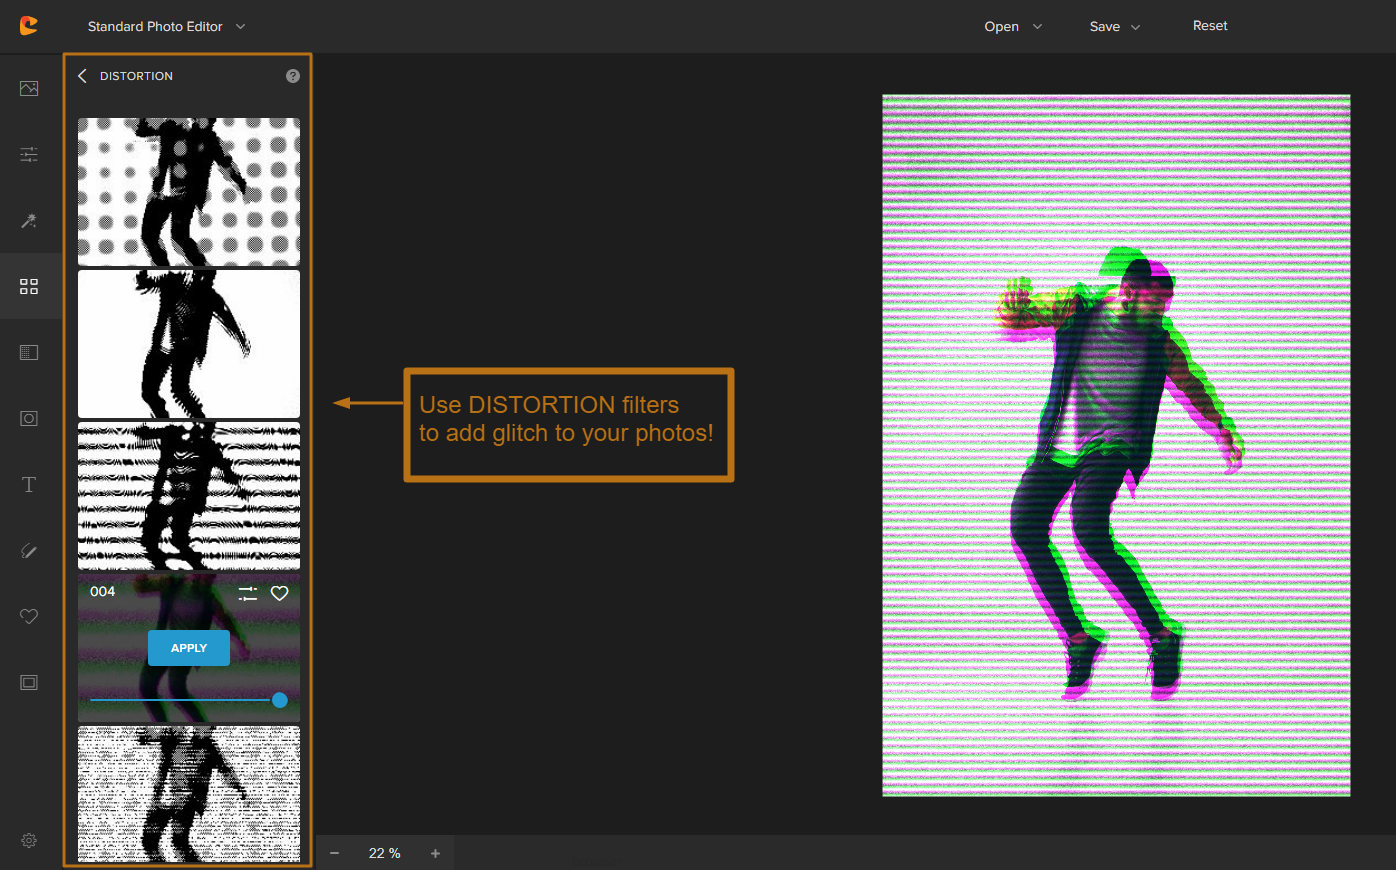
Similar to the “Glitch” filter, you can also adjust different settings to customize the look of the distortion:
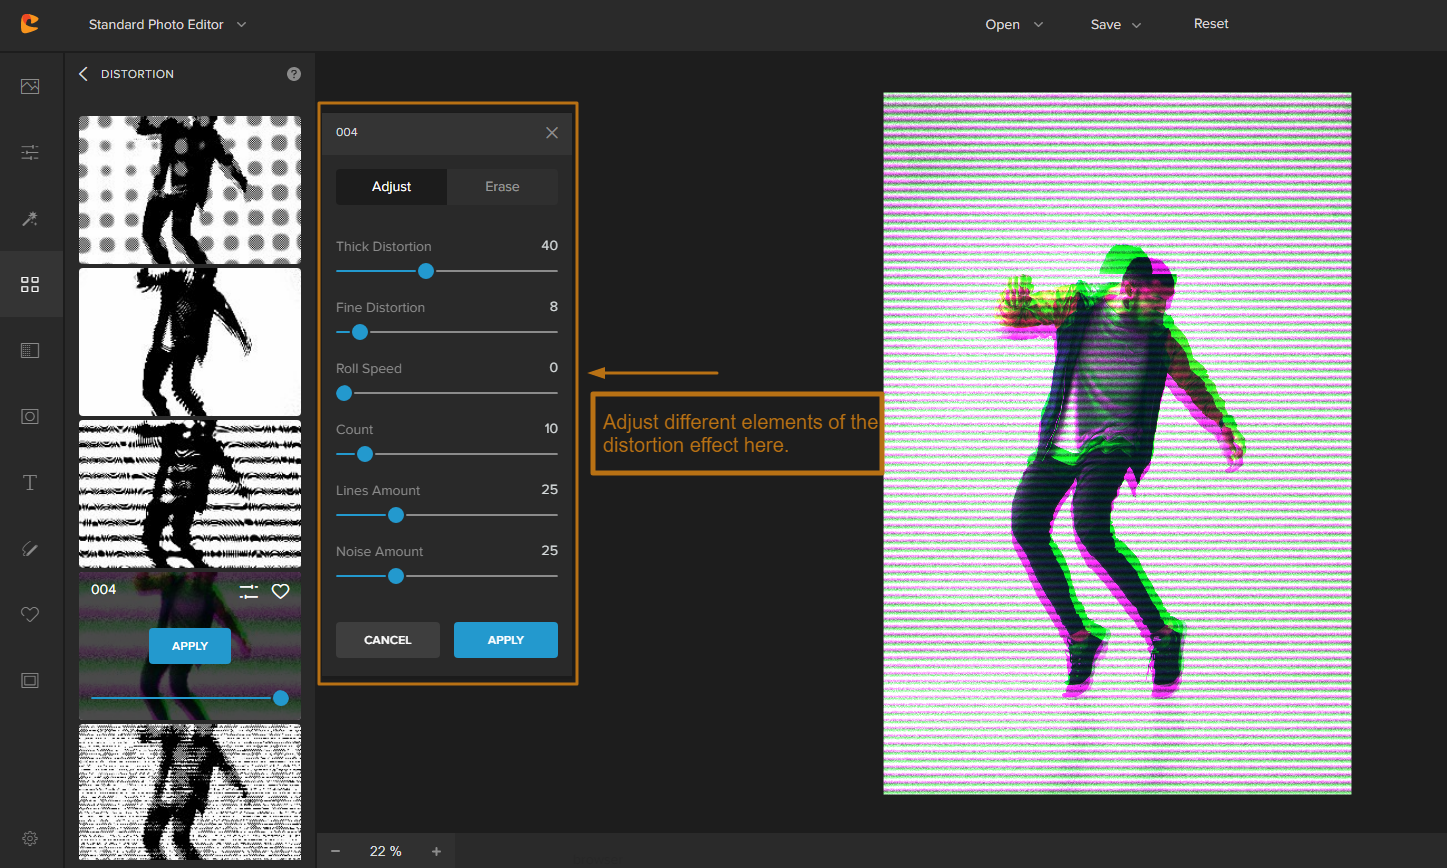
- You can adjust elements like ‘Thick Distortion” and “Fine Distortion.” These will make the distortion more or less pronounced.
- Adjusting the “Roll Speed” and the amount of Noise, Lines, and Count will also affect how glitchy or distorted your image looks.
- As a general rule, the more you increase these settings, the more glitchy your image will become.
Click apply if you want to keep the changes.
From there, you can stack on even more effects or save it if you’re happy with the results!
3. Colorcinch Glitch Effect: Use the “LIQUIFY” Filter
You can also create glitch art effects using the “Liquify” filter in Colorcinch.
As the filter name implies, it makes photos look like they’re made of liquid. This can create some really cool and trippy effects, especially when combined with other filters like Pixelate or Glitch.
To use it, click on the “Liquify” filter and then choose from the 7 different liquify styles available:
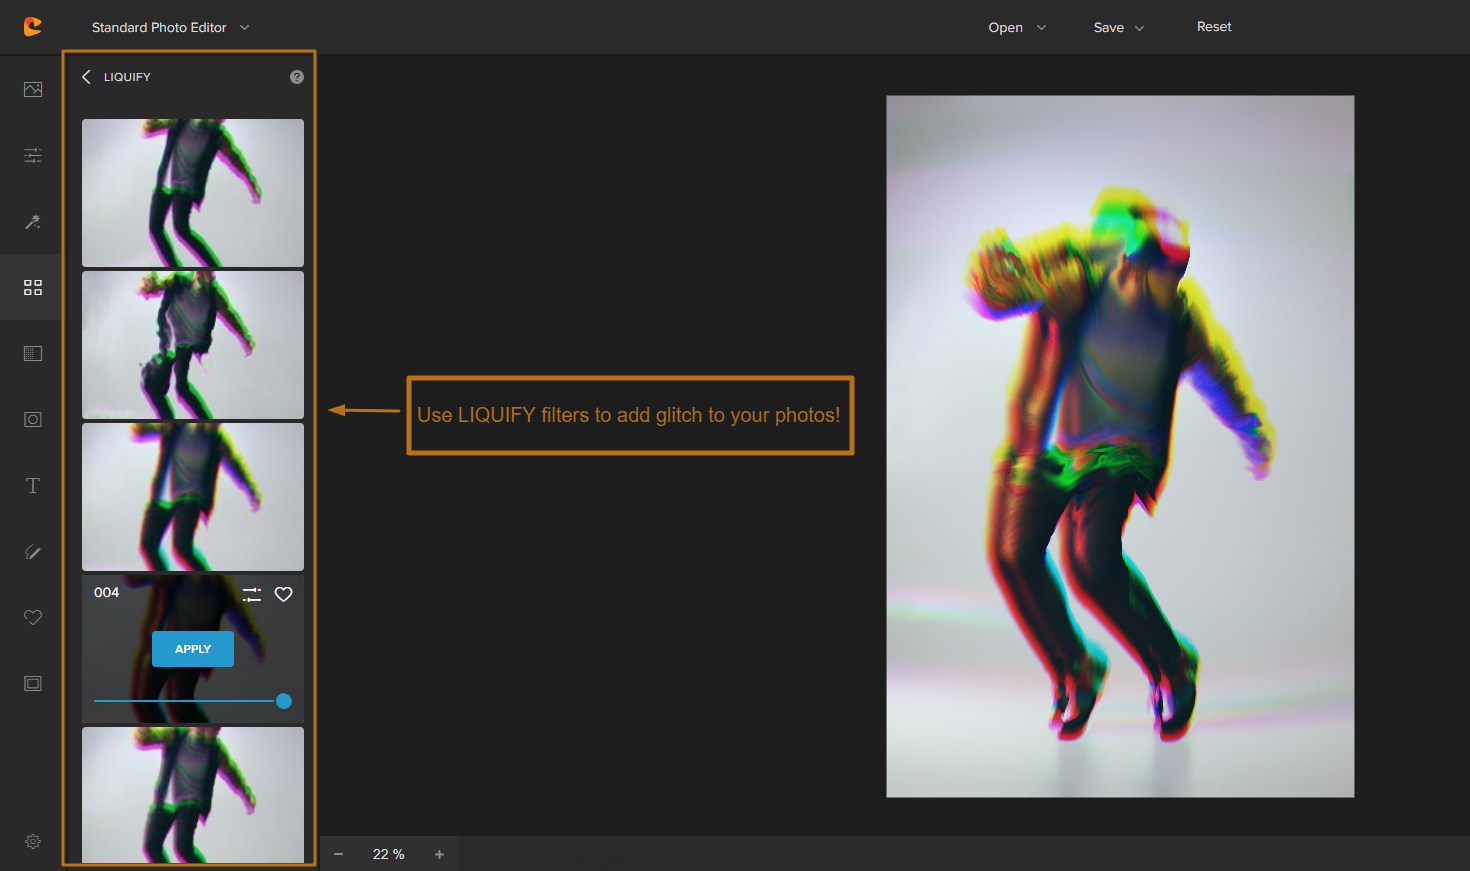
You can also adjust different settings to customize the look of the liquify effect:
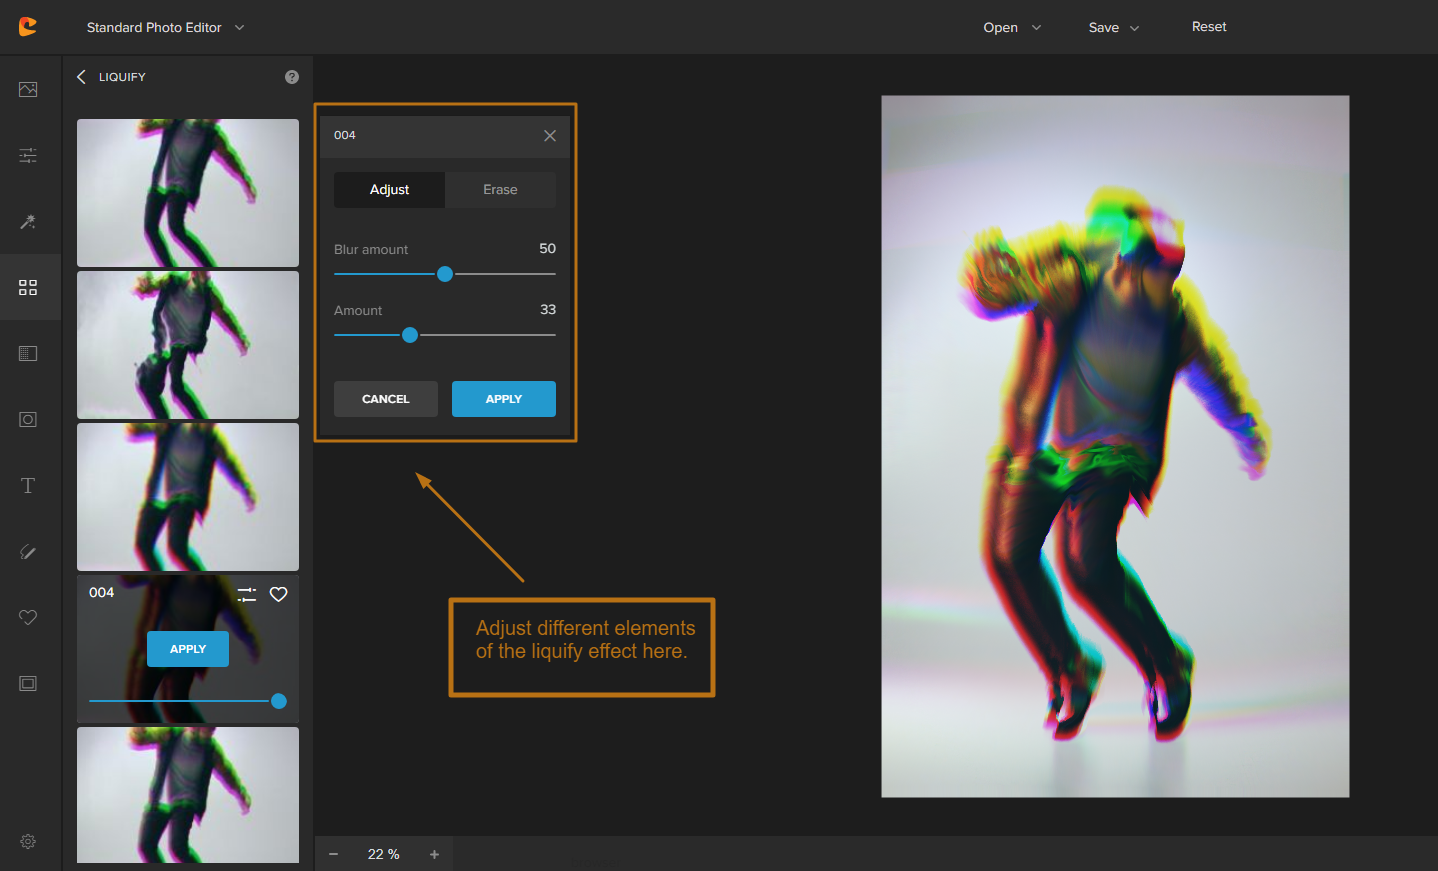
Adjusting the “Amount,” “Scale,” and distortion will change how pronounced the liquify effect is.
Similar to the other filters, you can also use the “Erase” settings to remove the liquify effect from certain areas of your photo, show the mask, and invert your selection.
From there, you can continue to edit your image or save it if you’re satisfied with the aesthetic!
4. Colorcinch Glitch Effect: Use the “PIXELATE” Filter
Last but not least, let’s try using the “Pixelate” filter to create glitch art photos the easy way.
Pixelating an image means breaking it up into tiny little squares, or pixels. This technique creates a glitch effect that’s somewhat symmetrical and geometric.
To use it, click on the “Pixelate” filter and then choose from the 8 different pixelate styles available:
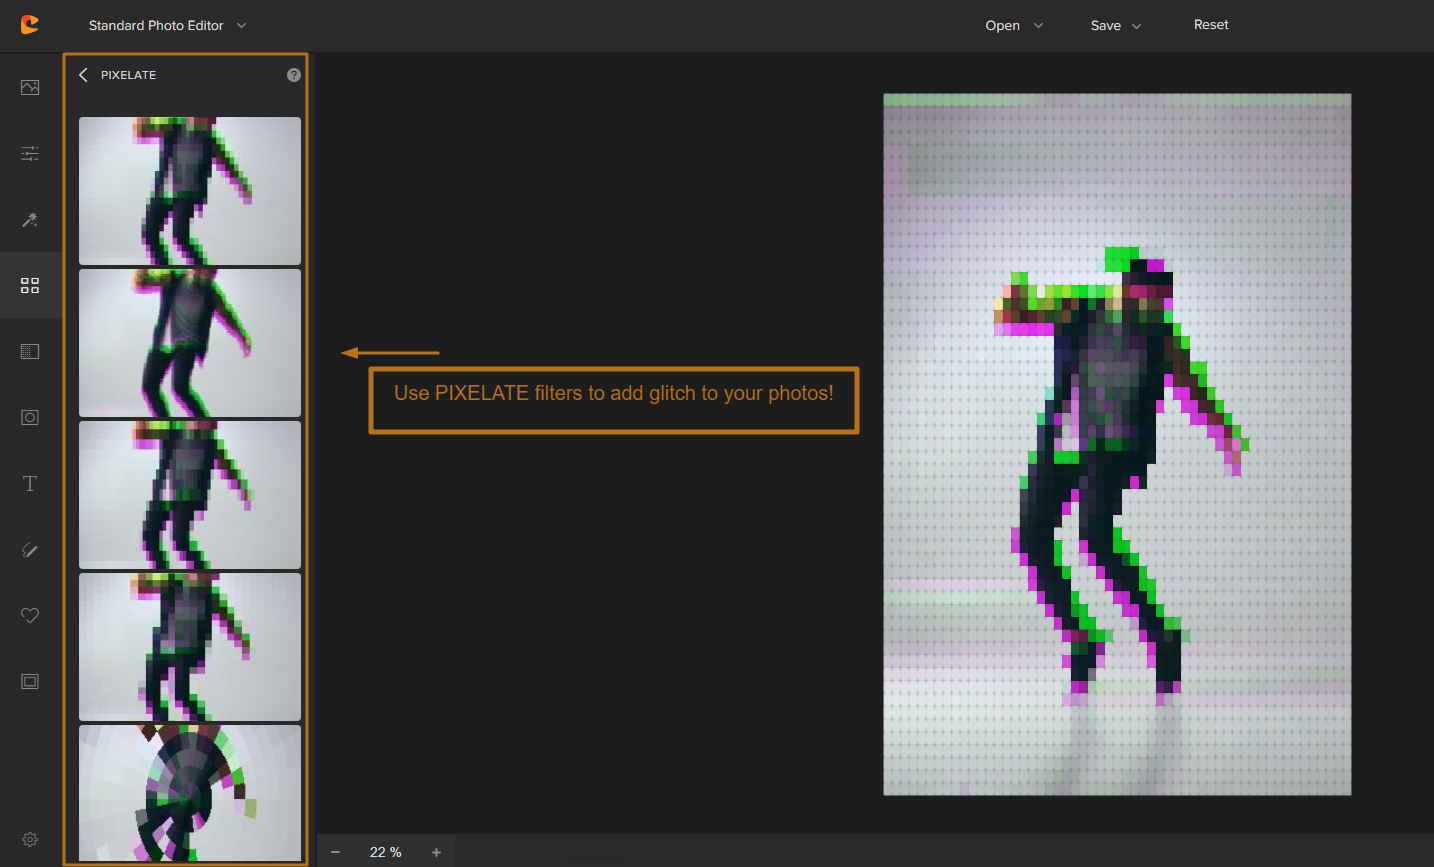
You can also adjust different settings to customize the look of the pixelate effect:
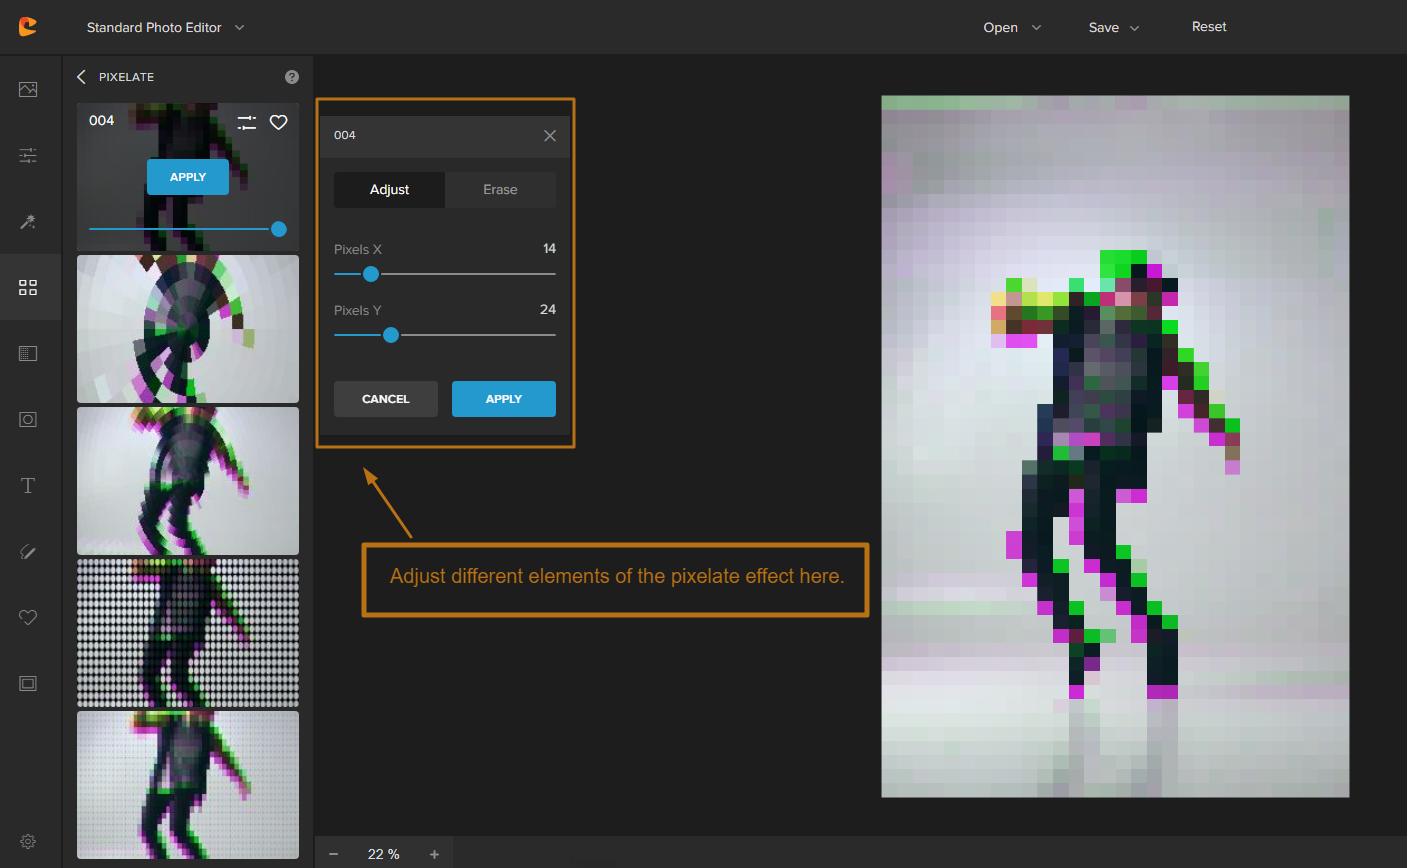
- Adjusting “Pixels X” and “Pixels Y” makes the pixels more or less pronounced.
- The Pixelate filter also has an “Erase” option. Try using this to remove the pixelate effect from certain areas of your glitch art.
After that, you can use other Colorcinch editing tools to further customize your image or save it if you’re done!
There you have it – all four ways to make glitch art using Colorcinch.
We hope you had fun experimenting with these effects!
If you’re interested in learning more about how to edit photos, be sure to check out our other tutorials on Colorcinch. Happy editing!
FAQs about Glitch Effects
How do you make art glitchy?
There are a few different ways to make art glitchy. You can do it from the ground up using software like Photoshop, but it’s difficult especially if you don’t know how to code. A much easier way is to find an app that offers pre-made glitch art effects like Colorcinch.
With Colorcinch, you can quickly add glitch effects to your photos using the “Glitch,” “Distortion,” “Liquify,” and “Pixelate” filters.
It only takes a few clicks to try on a filter, adjust the settings, and see how it looks. And if you don’t like the results, you can always undo your changes or start over with a new filter.
How do I make a picture look old and glitchy?
You can combine different filters in Colorcinch to achieve this look. For instance, start with the “Glitch” filter to set the primary glitch effect, then add a “Vintage” filter to make the colors more muted and give the photo an old-timey feel.
You can also use other Colorcinch tools like overlays to add texture to your glitch art. Make it look like an old, cracked photo or a piece of damaged film by adding an appropriate overlay.
How to add colorful glitch effects to photos?
The Glitch filter selection on Colorcinch actually has a lot of different color combos to choose from! You can also stack other filter effects like Color Mix, Duotone, and even overlays like Light Leaks to create a bright and colorful glitch art photo.


