I know a lot of people who want to learn Photoshop. It’s a great skill to have, and it can make you more attractive to employers.
However, learning photoshop is difficult. This program’s many features and options can be intimidating for beginners!
Photoshop’s zoom function is powerful. Zooming gives you a greater view of the image, which is useful for touching up details like eyes and lips and ensuring the picture appears right.
However, even the most fundamental editing tasks, such as zooming, are considered by many users to be unnecessarily difficult in Photoshop, despite the fact that there are other, easier ways to accomplish the same goals.
This article will cover both the straightforward approach of zooming in and out using Colorcinch, as well as the more complex method of utilizing Photoshop.
Zooming In and Out Using Colorcinch
There are two simple ways for you to be able to zoom in and out around Colorcinch.
- Using the built-in zoom function
- Using your mouse
Even first-time users will be able to pick it up quickly. So let’s get started.
1. Built-in Zoom Function
Step 1: Open Colorcinch and Upload an image.

Step 2: Go to the lower left portion of the screen and you will see the – and + buttons. You may click on these buttons to be able to zoom in and out.
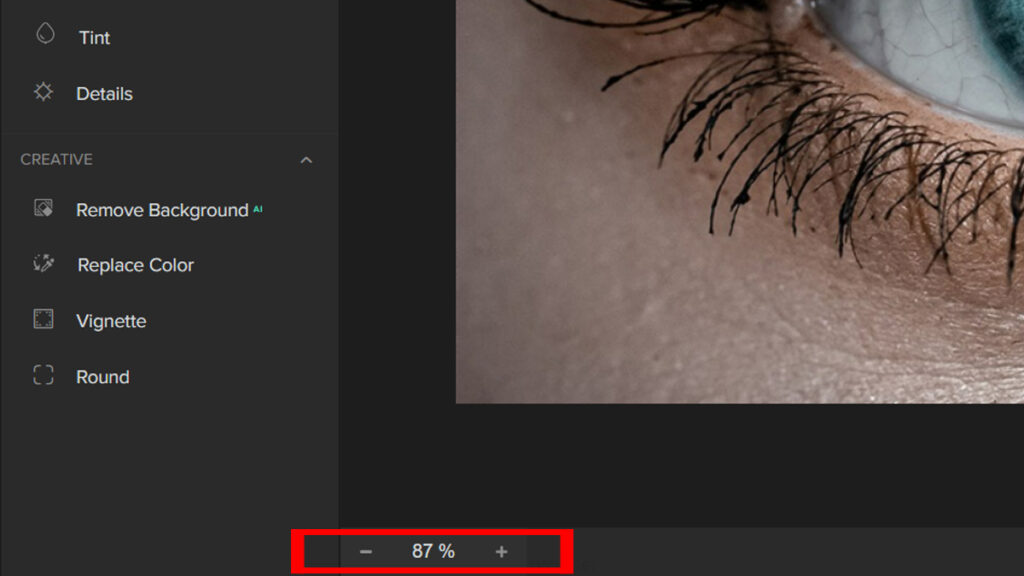
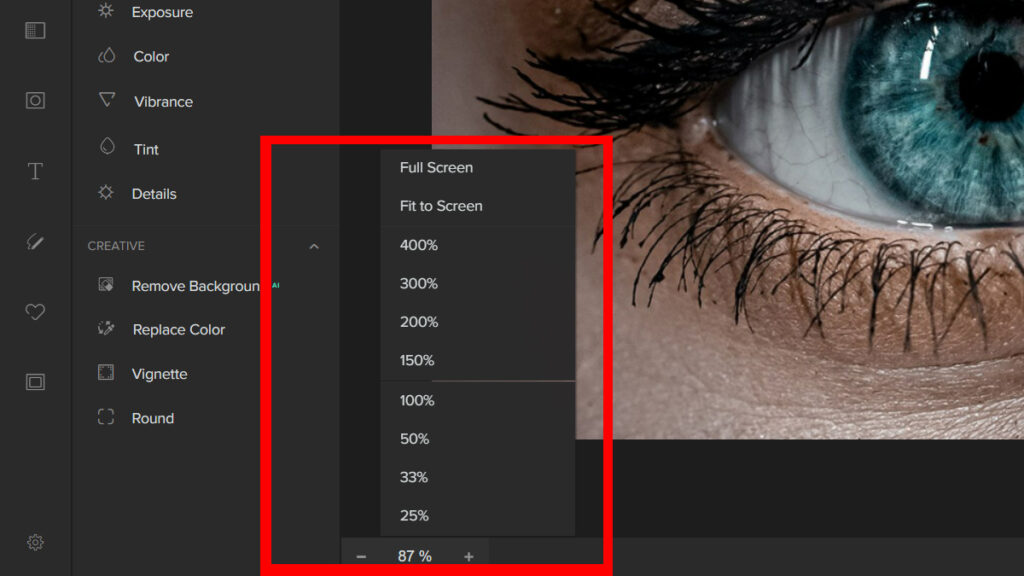
Step 3: You can also click on the numerical value to zoom in and out. There are pre-defined values for you to choose from.
2. Zooming In and Out Using Your Mouse Scroll
The mouse scroll button is usually located in the middle of your mouse, and it not only controls how far you move your cursor across the screen but also acts as a zoom tool.
Zooming in by scrolling up magnifies your view while zooming out by scrolling down makes things smaller. This is especially useful when you need to see details that are hidden behind bigger objects or have too much on your screen at once.
Additionally, the image can be dragged about by clicking and dragging while holding down the Ctrl key.
How to Zoom In and Out Using Photoshop?
Learning Photoshop can feel like too much. Even when all you’re trying to do is something basic. Even so, I have laid out some methods for zooming using Photoshop.
Using the Zoom Tool
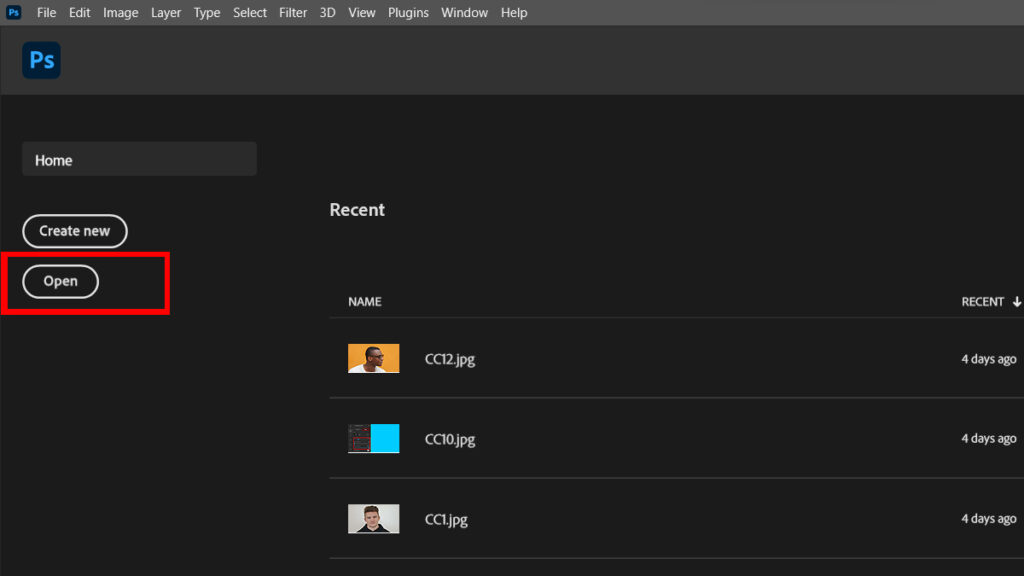
Step 1: Start by opening an image in Photoshop.
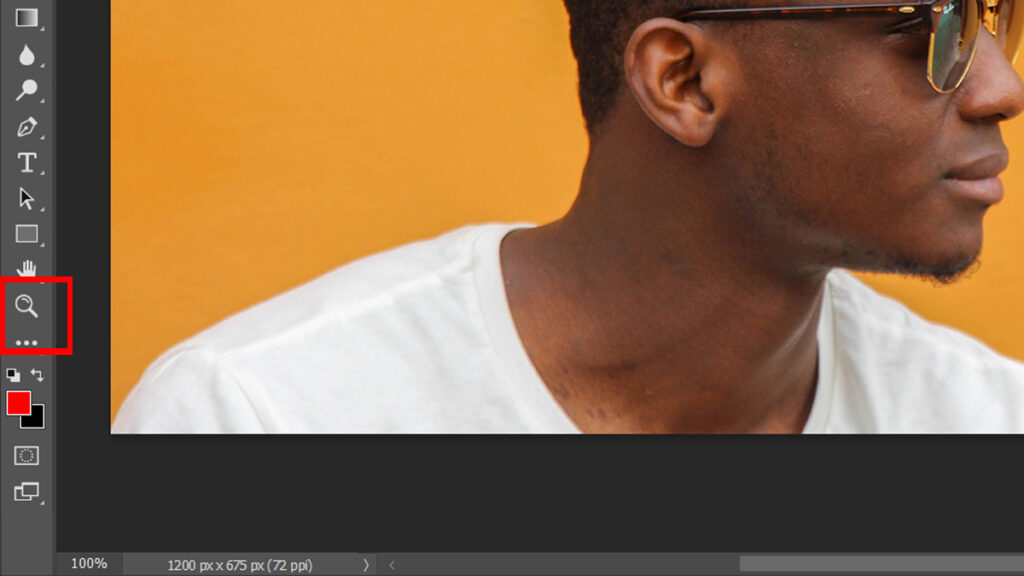
Step 2: Click the Magnifying Glass icon located towards the bottom of the toolbox on the left side of your screen.
By the Percentage
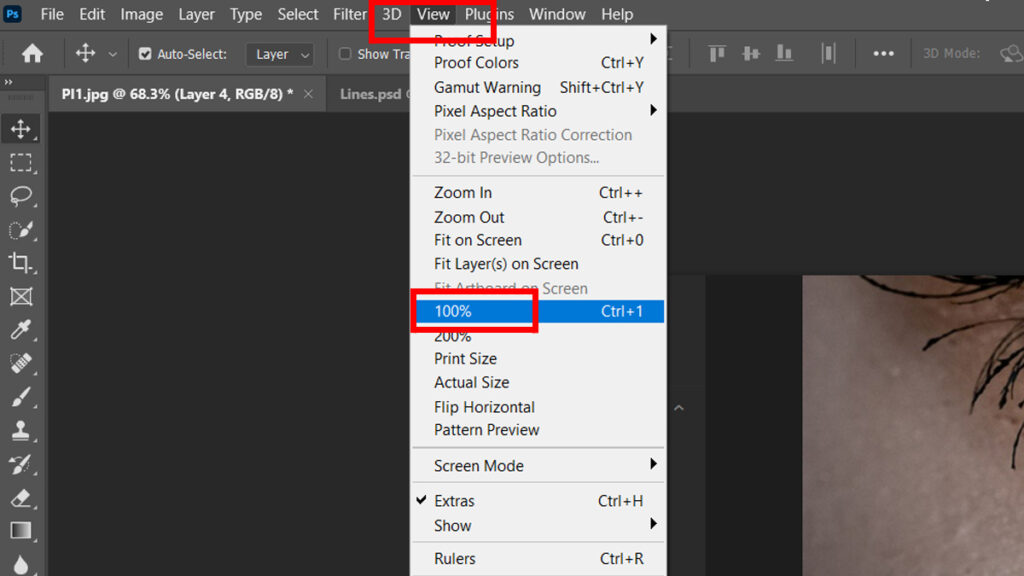
Viewing photos at 100% gives the most accurate view. So here’s how to zoom in at full 100%.
Step 1: Open an image in Photoshop.
Step 2: Go up to View in the menu bar and choose 100%. Another quick way is to press Ctrl + 1 (Cmd + 1).
Summary
As a summary of what has been discussed, we have outlined methods for zooming in and out. The first is to use the simpler and more effective method for beginners using Colorcinch. The second method employs Photoshop and is more complex and conventional. It is up to you to experiment and determine which option best suits you.
Feel free to like and share this article if you find it helpful.


