Exposure is one of the most important things when it comes to photography. It’s also one of the most frustrating things because there are so many settings and controls on your camera that can adjust it, but it’s hard to know which are the best ones.
The good news is, you can adjust it in post. We will show you how to easily adjust the exposure and darken your image using Colorcinch.
Darken Your Image by Adjusting the Exposure in Colorcinch
Step 1: Open Colorcinch and Upload an image.

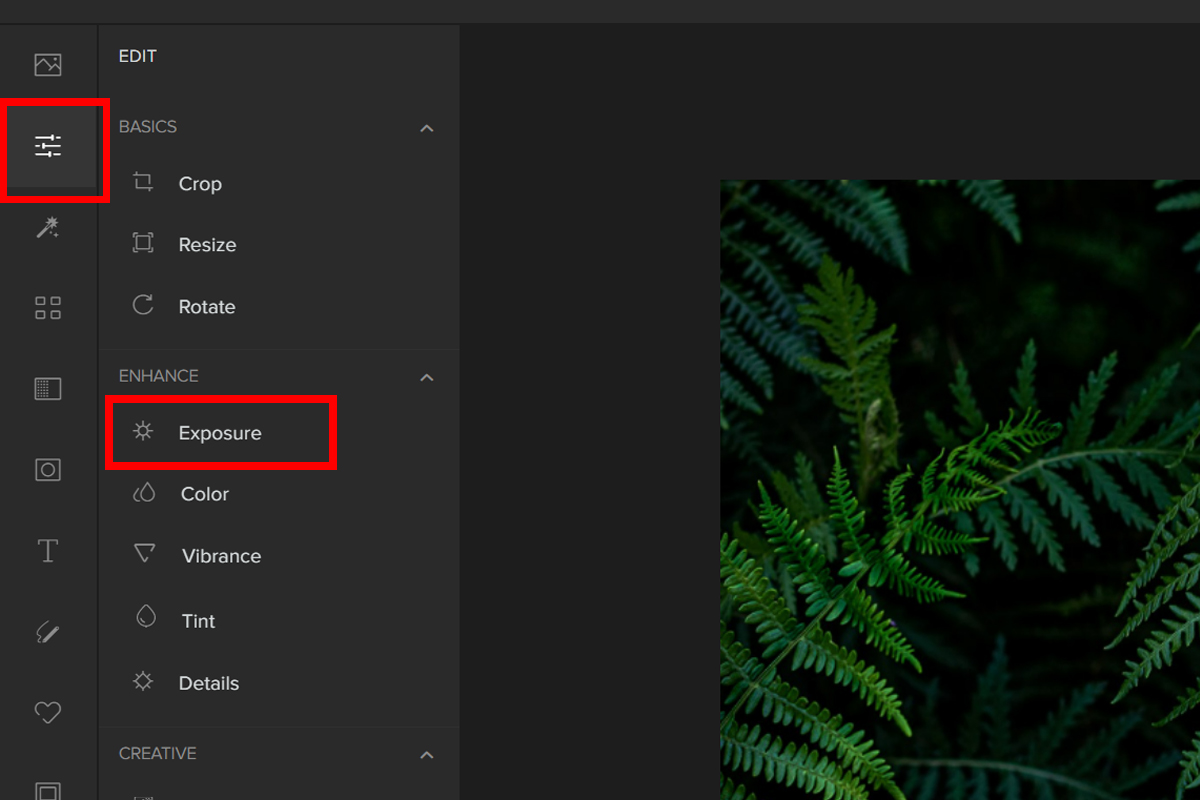
Step 2: Navigate to Edit — Exposure.

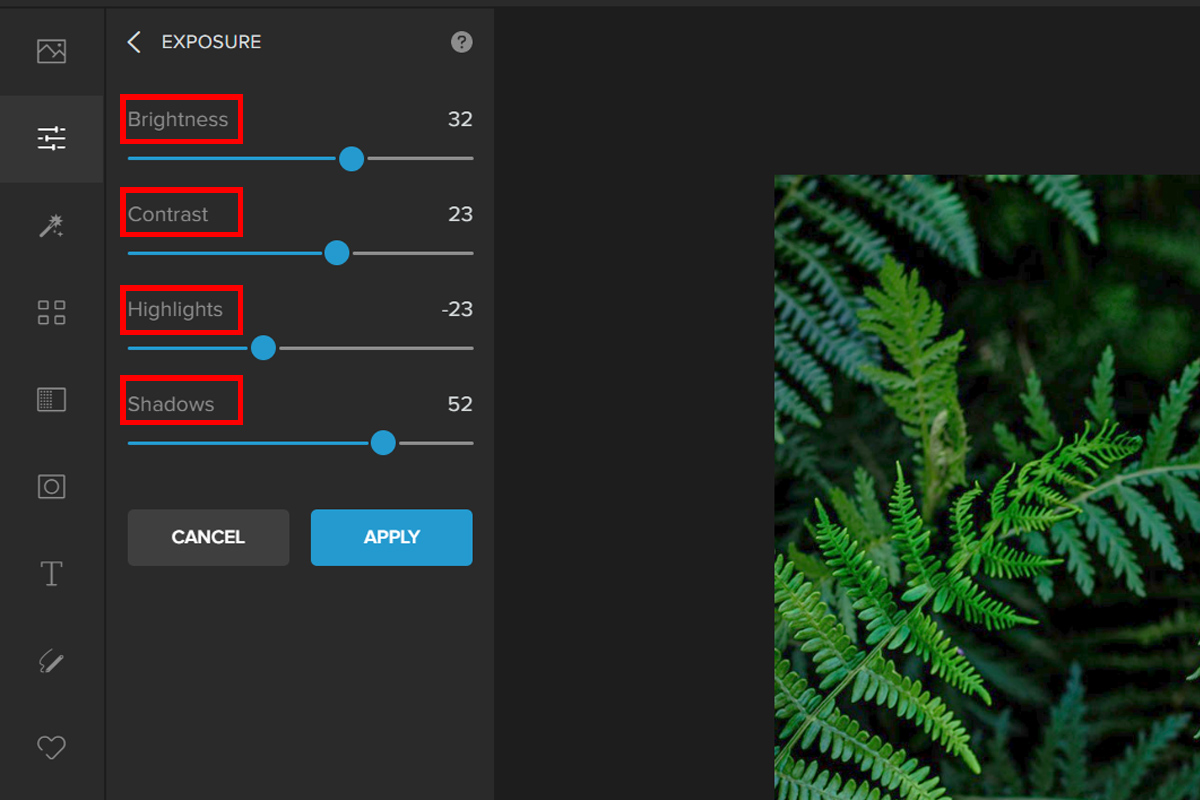
Step 3: Using the Exposure tab, you may fully edit your photo’s exposure. It includes four key components for adjusting exposure.
The four components that you can easily adjust using the Sliders are:
- Brightness – Brightness is how light or dark the complete image is. When the brightness is increased, every pixel brightens.
- Contrast – Contrast is an image’s brightness difference. Increasing contrast makes lights brighter and darks darker.
- Highlights – When it comes to photography, a “highlight” is the brightest part of an image.
- Shadows – In photography, the shadow is the darkest part of the photo that still has some detail.

You can experiment with the Sliders to darken your photo.
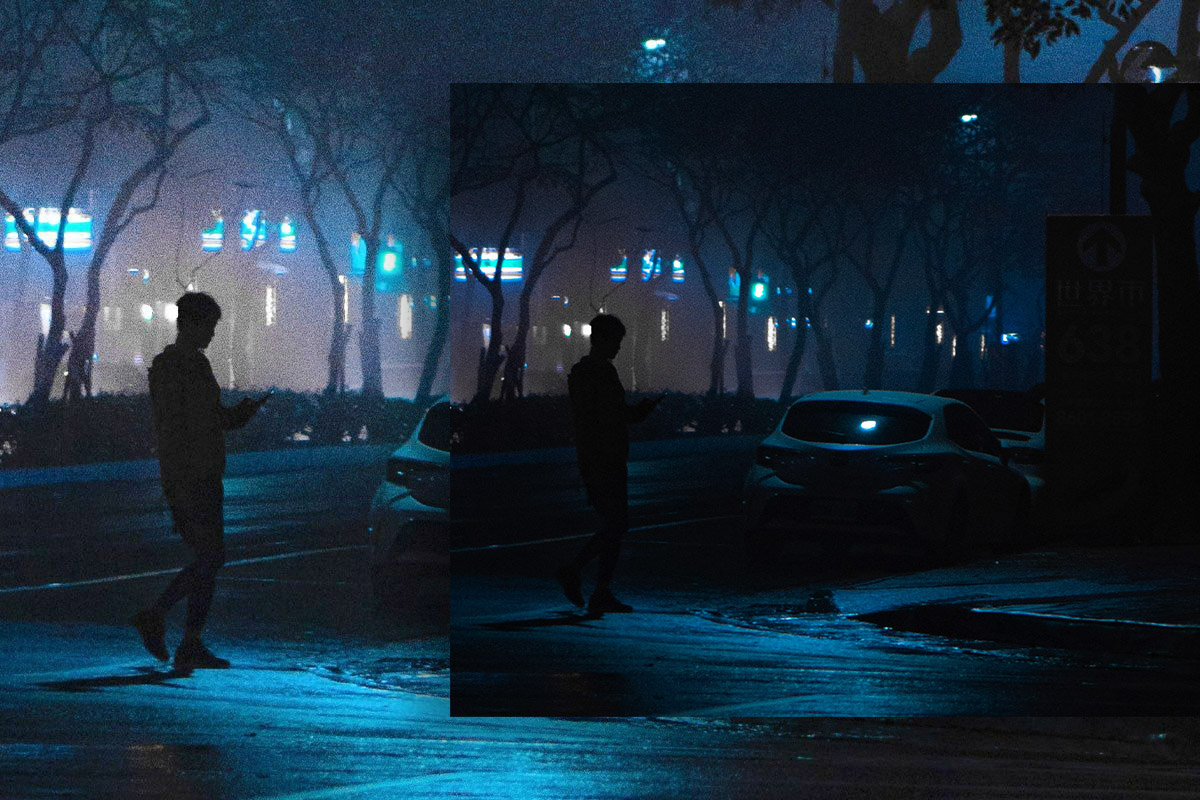
Here are the before and after:


Conclusion
So, to sum up, getting exposure right on your camera is important because it can help you take better pictures. If you want to play safe, there are a few simple rules that will make sure that the photos you take look great.


