As a photographer, one of the most basic but important tasks is color correction. If you’re not familiar with Photoshop, it’s a popular image editing program that allows users to manipulate images in all sorts of ways.
One of these ways is changing the background color—which can be useful for everything from making your images look more professional to creating custom color schemes for your website or social media profiles.
Photoshop is a powerful tool, but it’s not easy to learn. Learning Photoshop requires patience and persistence. It can take a long time to master the software. For a simple task like changing the background color, it’s best to start with a less complex editor.
In this article, we will cover ways to change the background color using the complex tool Photoshop and a more simple and beginner-friendly tool, Colorcinch.
2 Easy Ways to Change the Background Color Using Colorcinch
We all want to get our jobs completed the easiest way possible. Like a simple background color change. However, Photoshop will be hard to navigate if you are a beginner.
Now we will cover two easy ways to change the background color in Colorcinch. Let’s jump right into it.
1. By Using the Background Remover
Step 1: Start by opening Colorcinch and Upload your image.
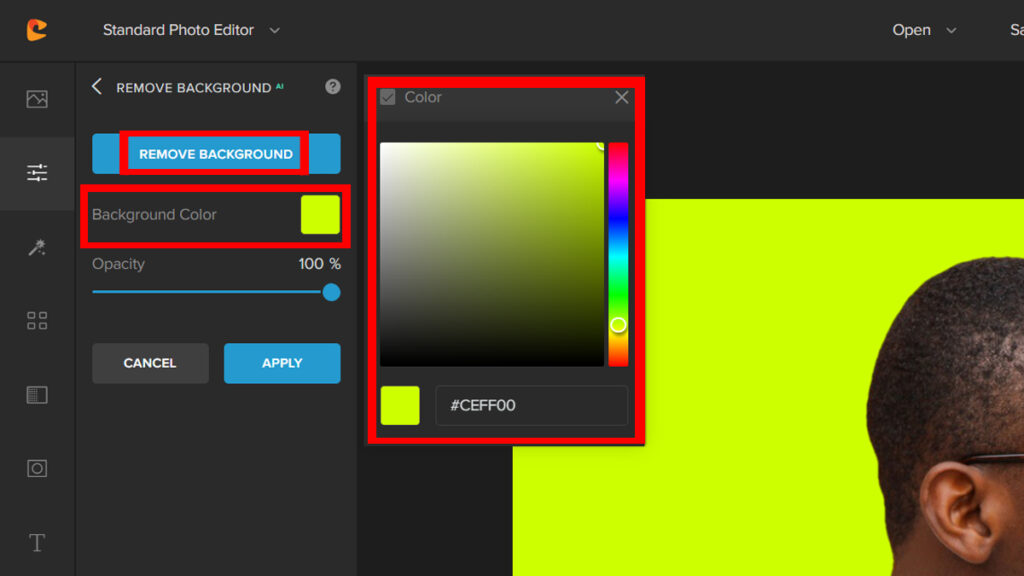
Step 2: Go to Edit and click on Background Remover AI.
Step 3: Click on Remove Background. The AI will automatically remove the background. Once the background has been removed, click on Background Color and pick any color of your choice.
It’s that easy! Let us see the final result:


2. By Using Replace Color Tool
Step 1: Open Colorcinch and Upload your image.
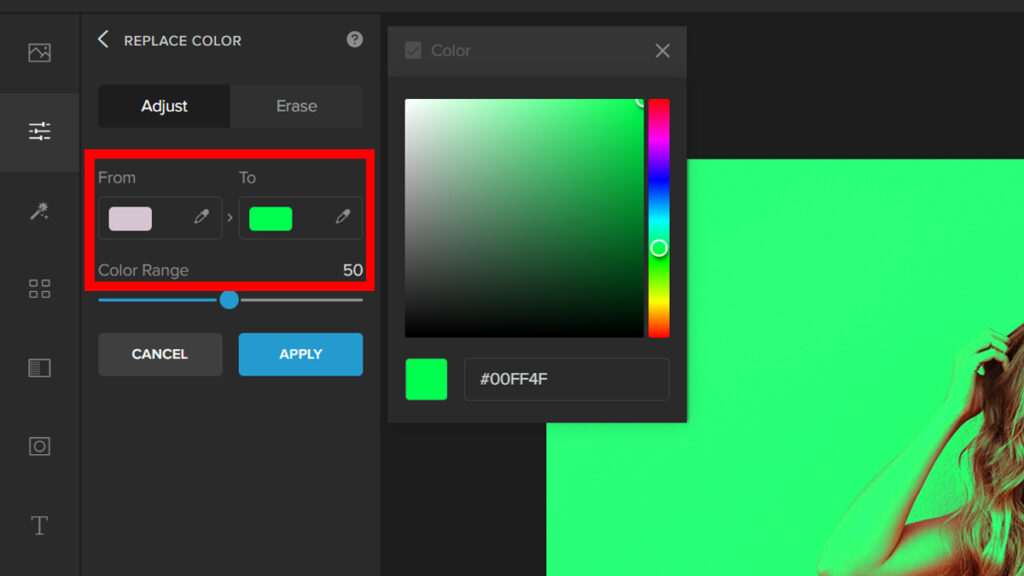
Step 2: Navigate to Edit — Replace Color.
Step 3: On the Replace Color panel, start adjusting the From Color Picker and the To Color Picker to your desired color. What it will do is it will automatically change the whole picture’s color.
Step 4: We will have to separate the subject from the background because it is the same color as the background. To do this, click on the Erase Tab. Adjust the Brush Settings and brush over your subject to erase the color.
Let’s take a look at the result:


Changing the Background Color in Photoshop
Photoshop is the go-to editor for many graphic artists. However, it is a bit complicated for beginners. Nevertheless, here’s a step-by-step guide on how to change the background color.
Step 1: Open an image in Photoshop.

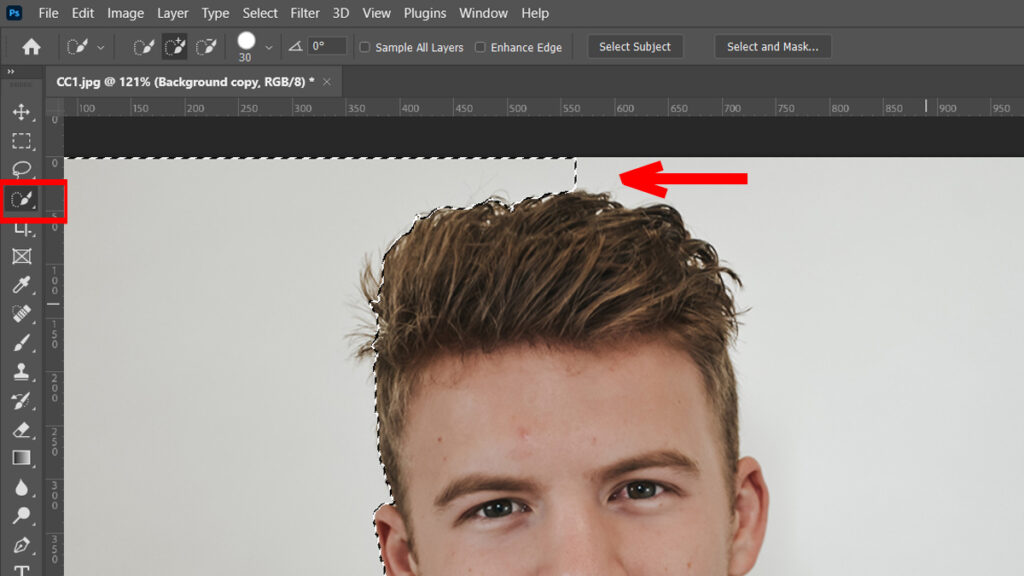
Step 2: Separate the subject from the background. To do this, use the Quick Selection tool and drag your cursor all over it. A moving dashed line, known as the “marching ants,” will automatically indicate the tool’s marks. Have patience in doing this step as it can be time-consuming to cover some areas accurately.
Step 3: Click on the New Adjustment Layer icon in the Layers panel and choose Solid Color.

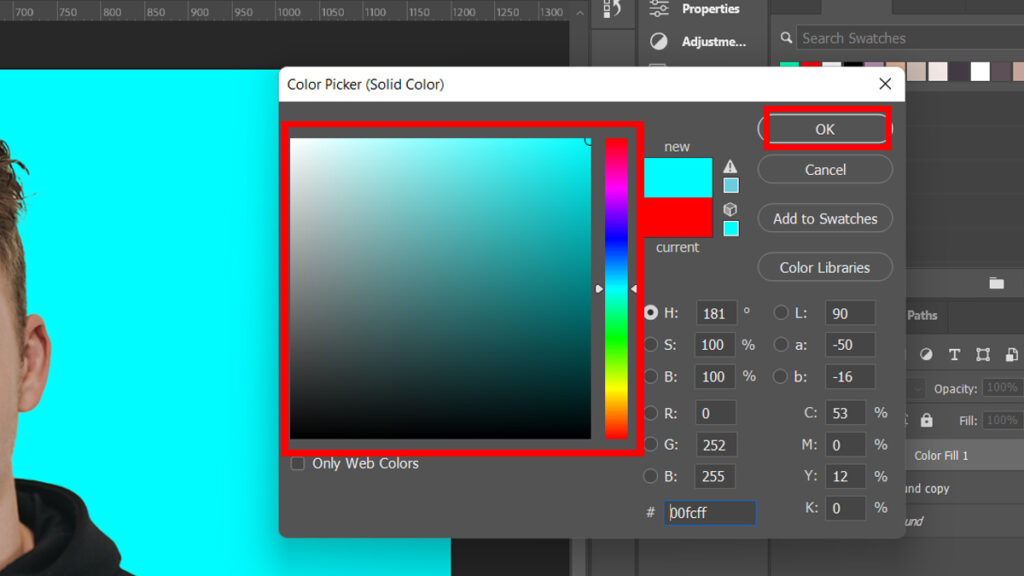
Step 4: When the Color Picker window appears, choose any color you want because you can always change it later. Then press OK.
Here’s the before and after:


Conclusion
Changing the background color is a common task that a graphic designer does. Photoshop could be the obvious choice for professionals. However, it could be daunting to use for beginners.
In this article, we learned that a simple task like this can be done easily even without using Photoshop; thanks to the two easy methods to change the background color in Colorcinch.
If you find the article helpful, feel free to leave a comment!


