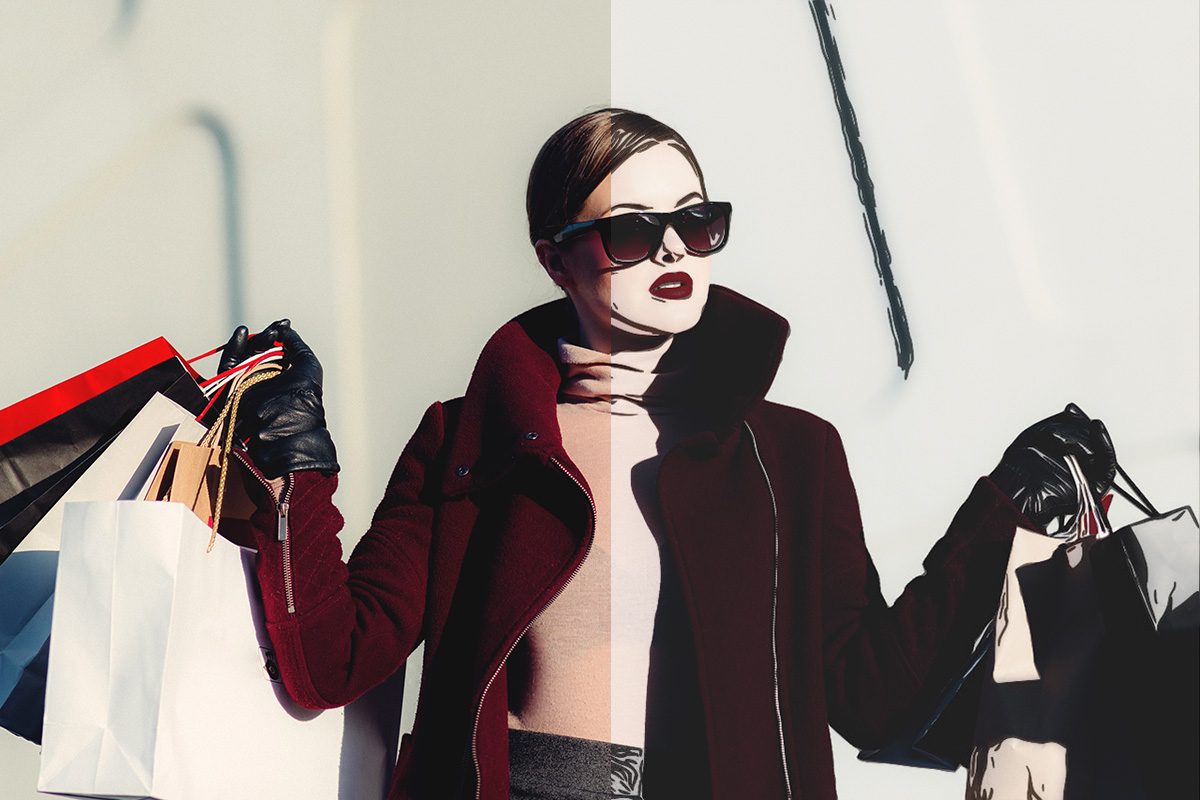
Filters are an integral part of photo editing, and they can also be a powerful way to enhance your photos. Whether you’re looking for some basic color correction or want to add a bit more flair with artistic edits, we’ll show you how to do it all using Colorcinch—and in less than five minutes.
Adding Filters Using Colorcinch
Colorcinch offers a wide array of filters you can choose from. Here’s how you can apply it easily.
Step 1: Open Colorcinch and Upload your image.

Step 2: Navigate to Filters — Vintage.
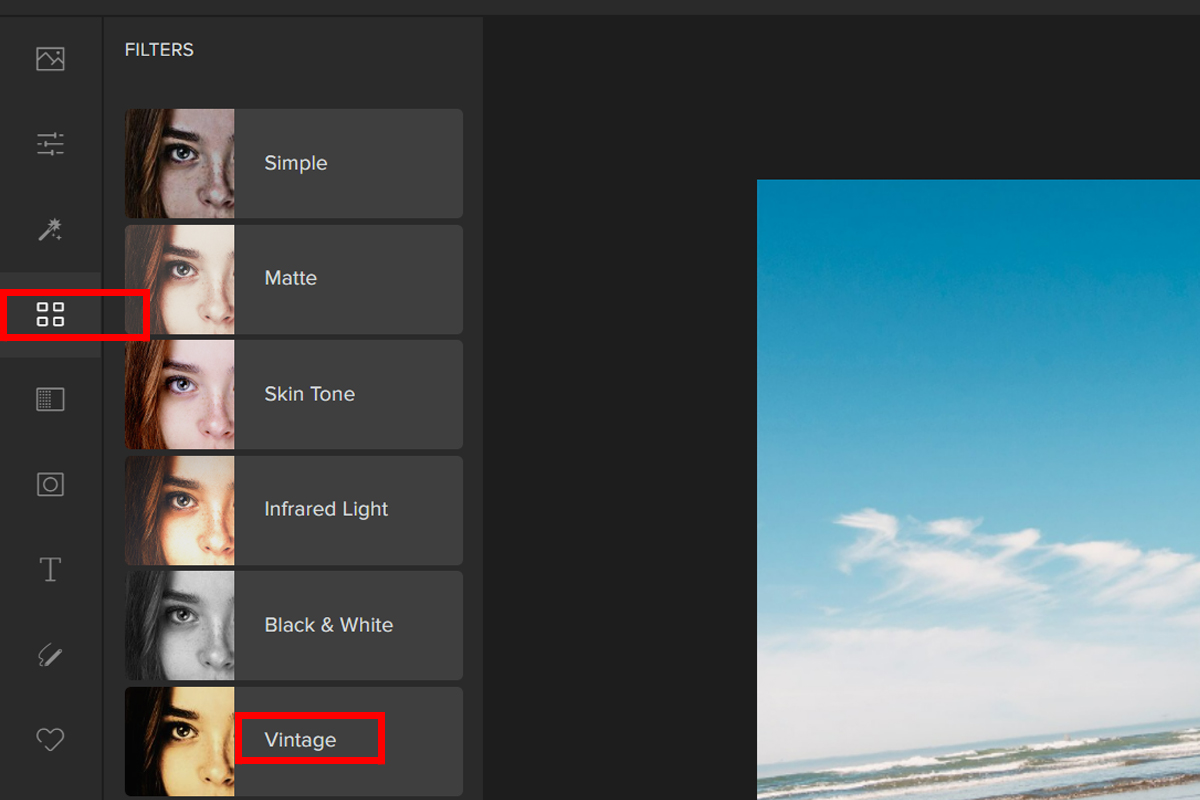
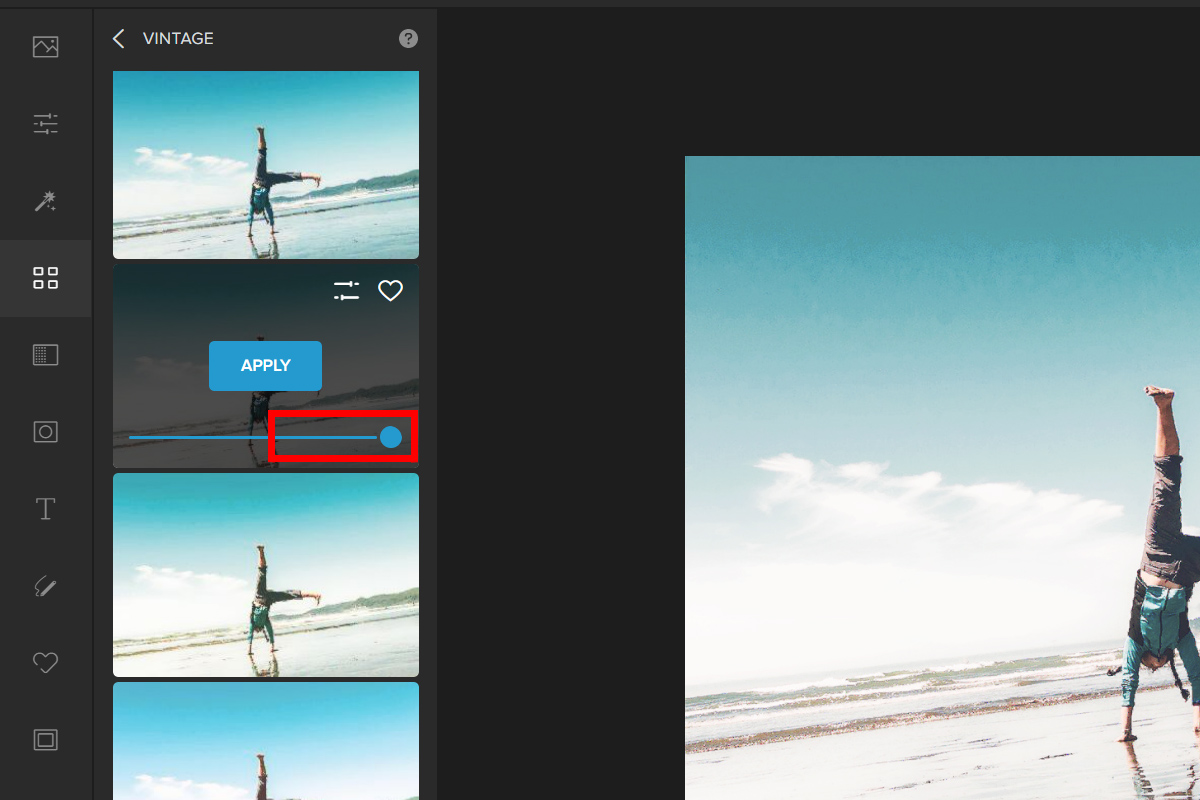
Step 3: Choose a Vintage filter and adjust the Slider to change its effect.
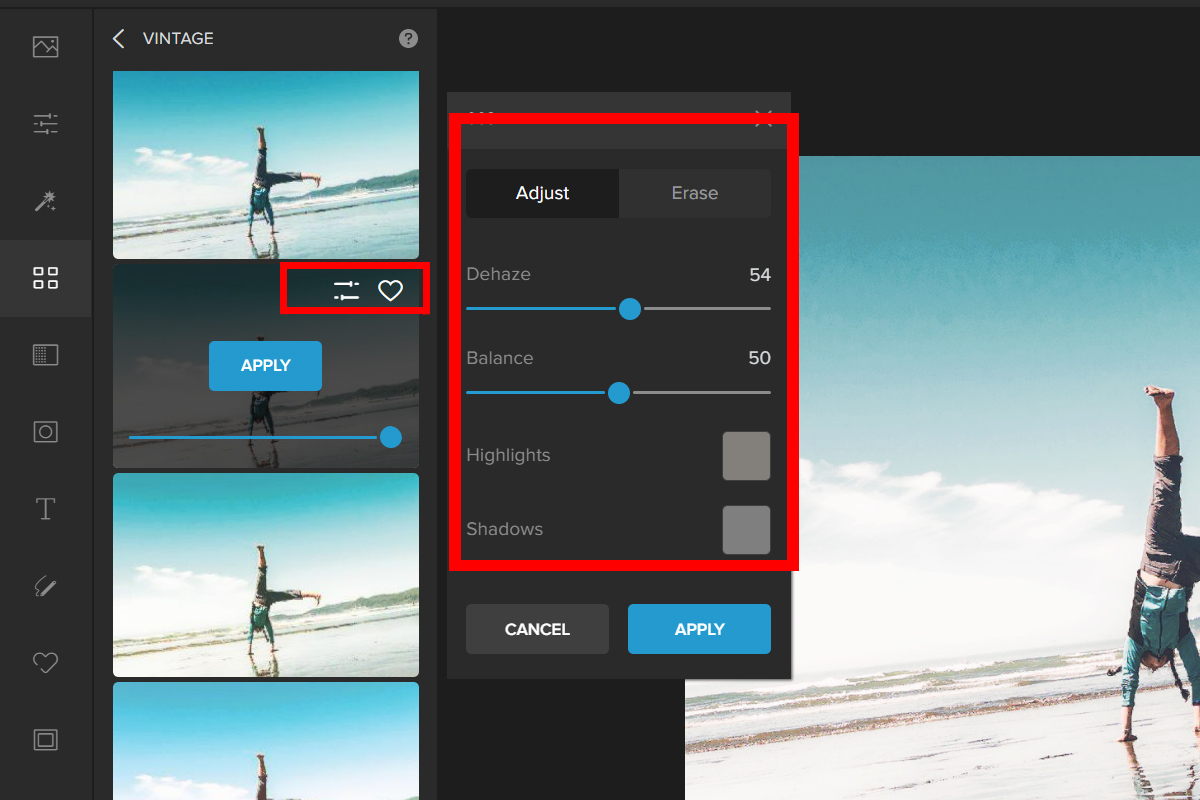
Step 4: If you want more control over the filter you chose, you can use the “Advanced” option. Just click on Settings and try moving the Sliders around. Once done, hit Apply.
Here is the before and after:


These are some filters you can use:


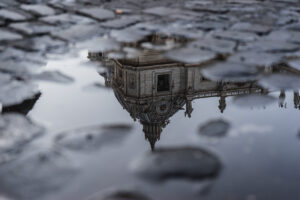
Spice Up Your Photos With Colorcinch
Apart from the fiilters you can level up you photos using Colorcinch’s diferrent Effects.
Cartoonizer Effect
You can easily turn your photos to comics with Cartoonizer. Let’s us show you how:
Step 1: Go to Effects and click on Cartoonizer.
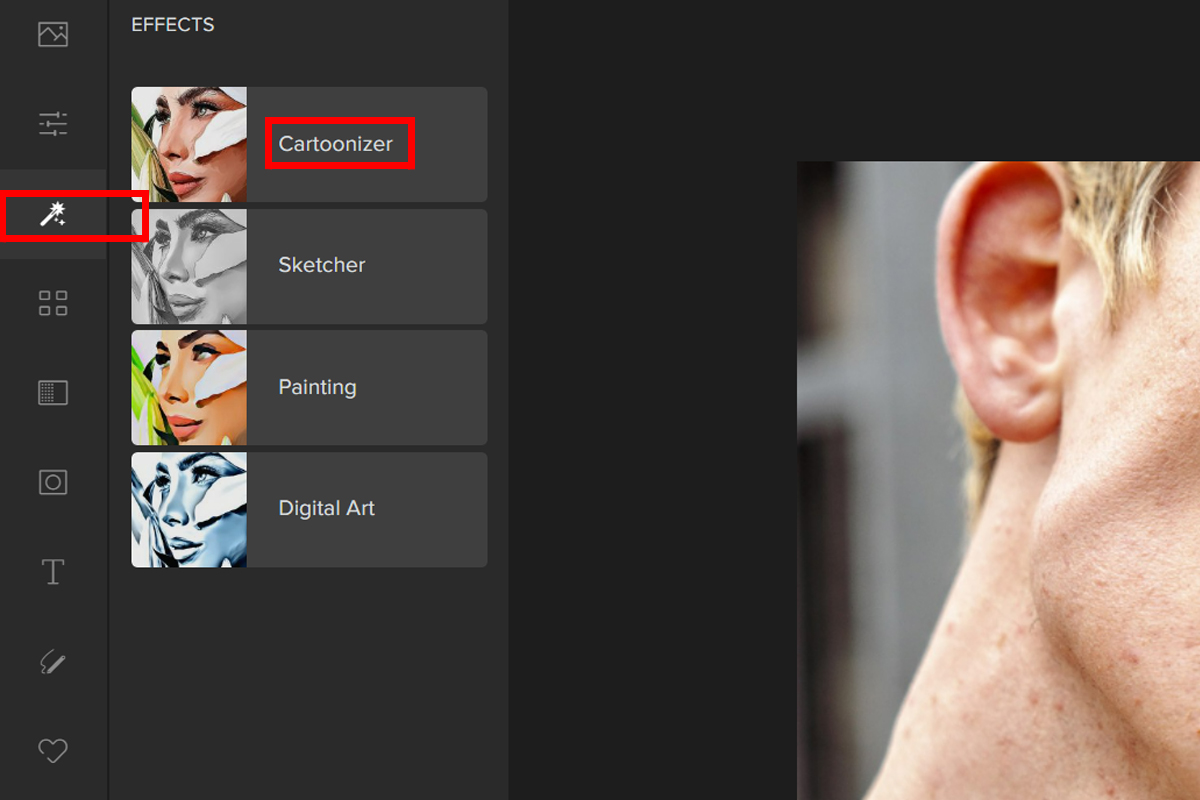
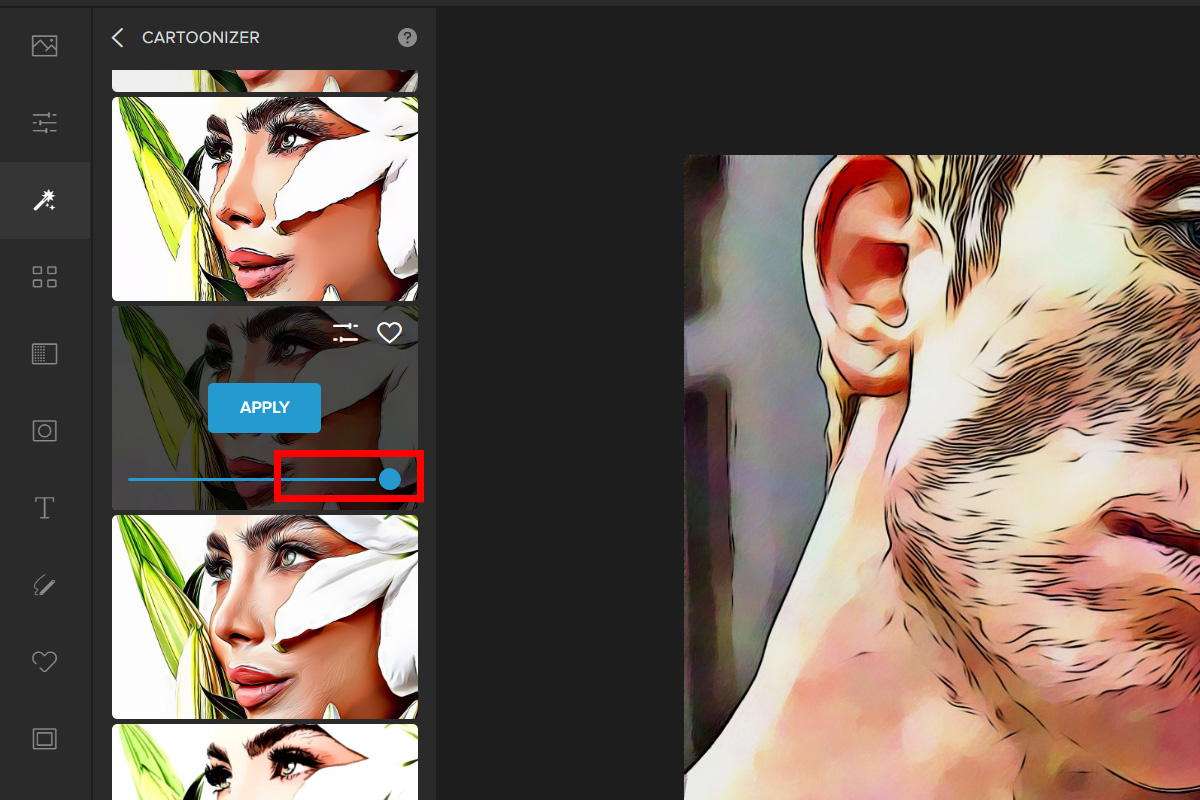
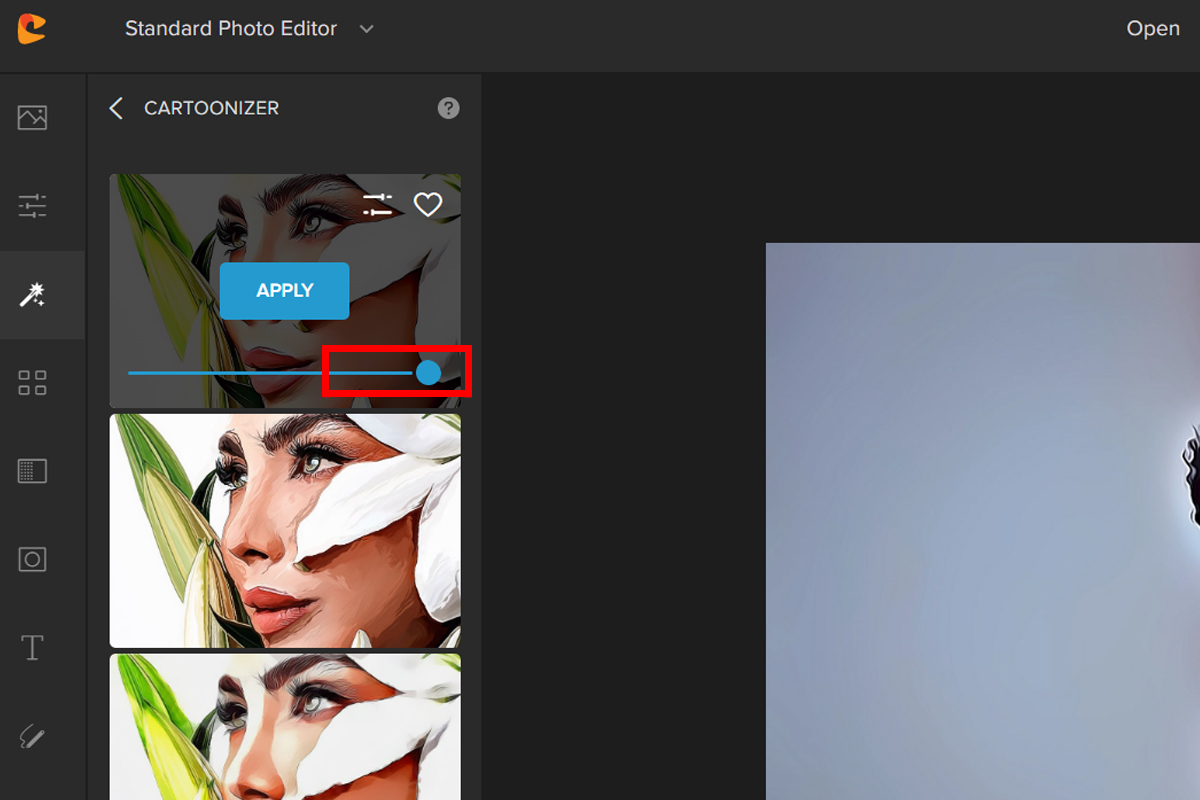
Step 2: Choose a filter from the Cartoonizer. CA031 will be used as an example in this case. Use the Slider to change how strong the filter is.
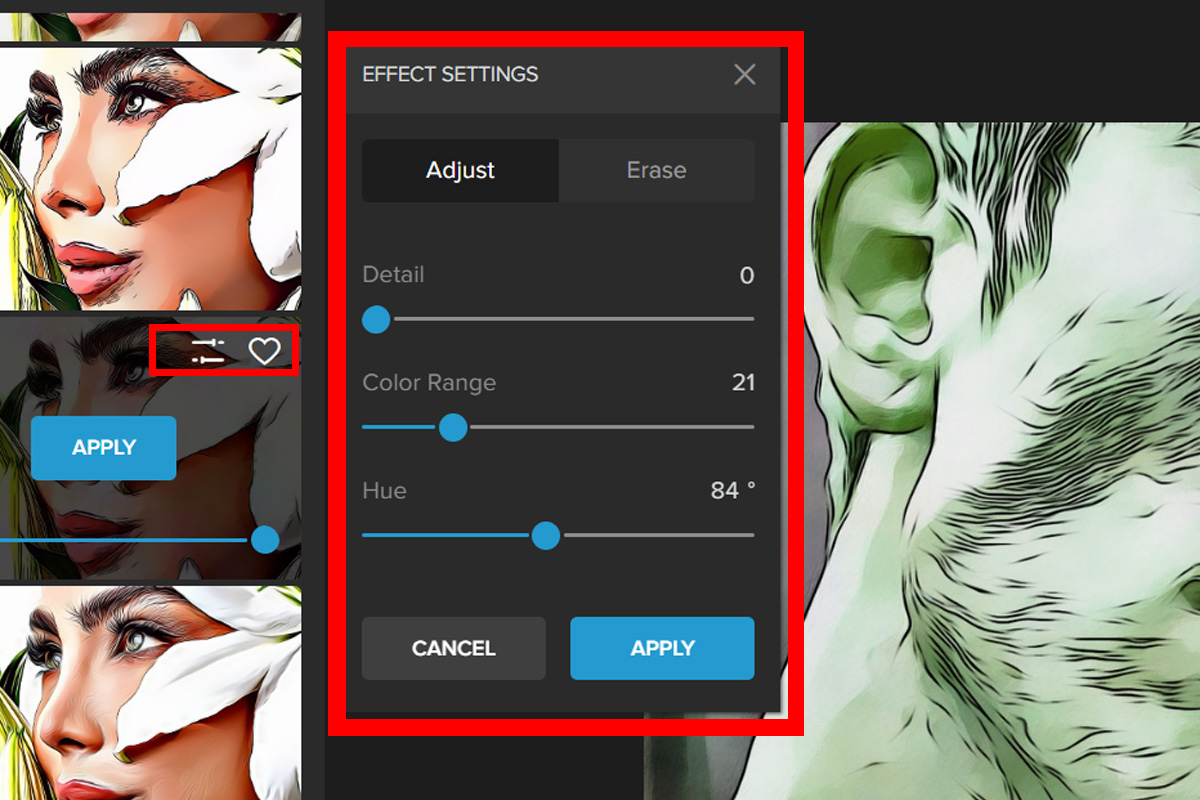
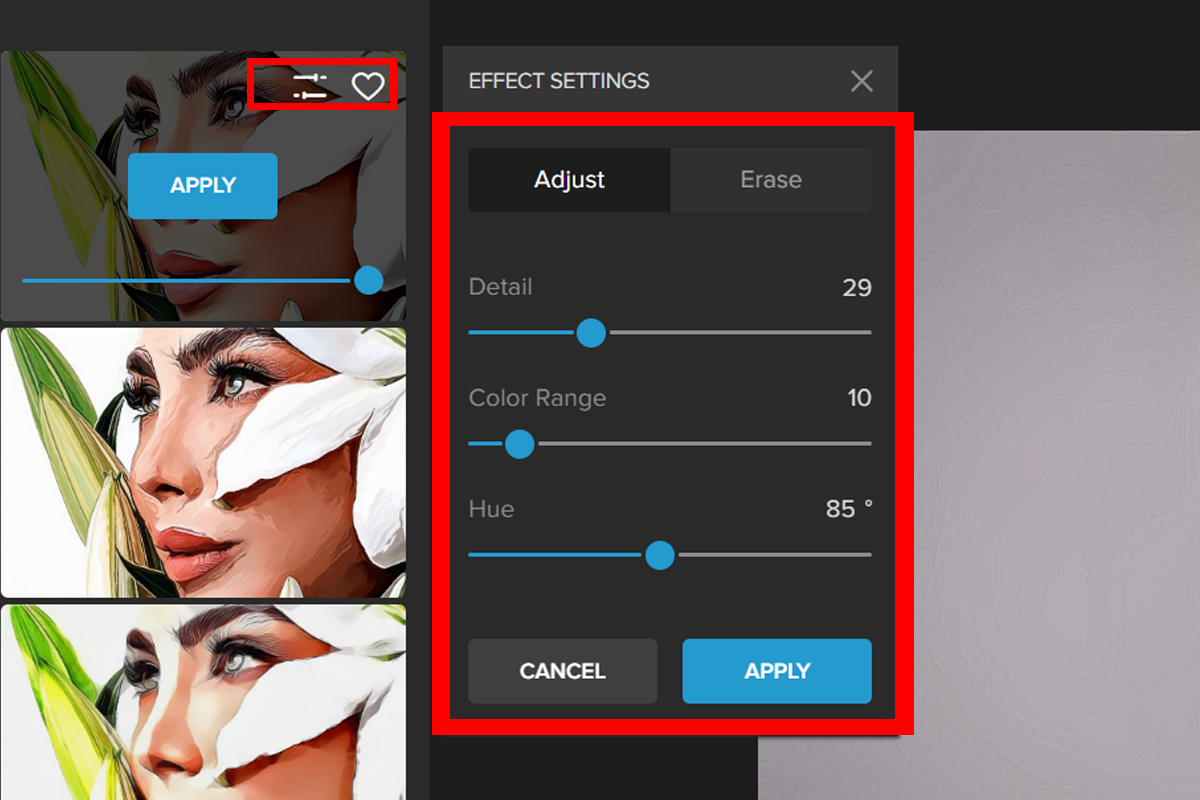
Step 3: If you want more control over the filter you chose, you can change the settings for the “Advanced” option. Just click Setting and play with the sliders.


Sketcher Effect
Turn your photos into a handrawn masterpiece.
Step 1: Click on Sketcher in the Effects menu.
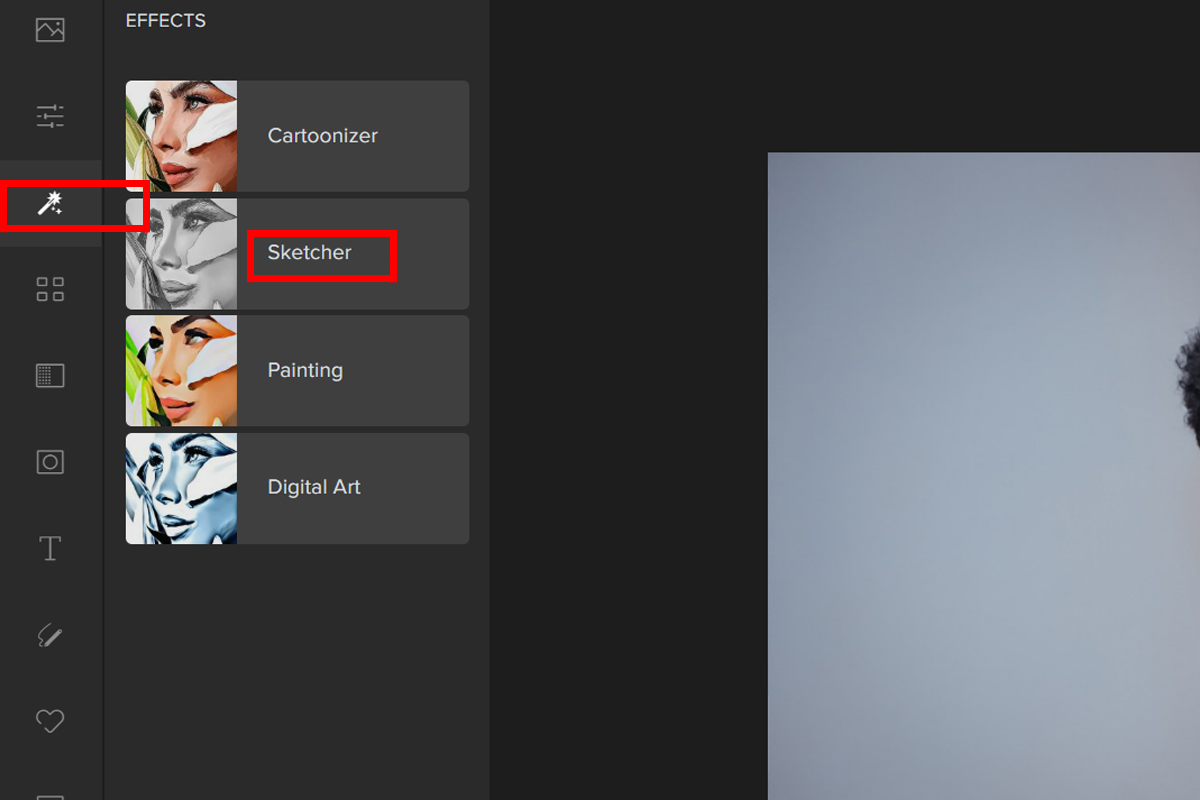
Step 2: From the Sketcher, choose a filter. You can change how strong the filter is by moving the Slider.
Step 3: You can change the settings for the Advanced option if you want more control. Just click the Settings button and move the sliders around.
Here is the result:


Painting Effect
Just like the Sketcher Effect, turn your photo into a canvas with splash of colors.
Step 1: Go to the Effects menu and click on Painting.
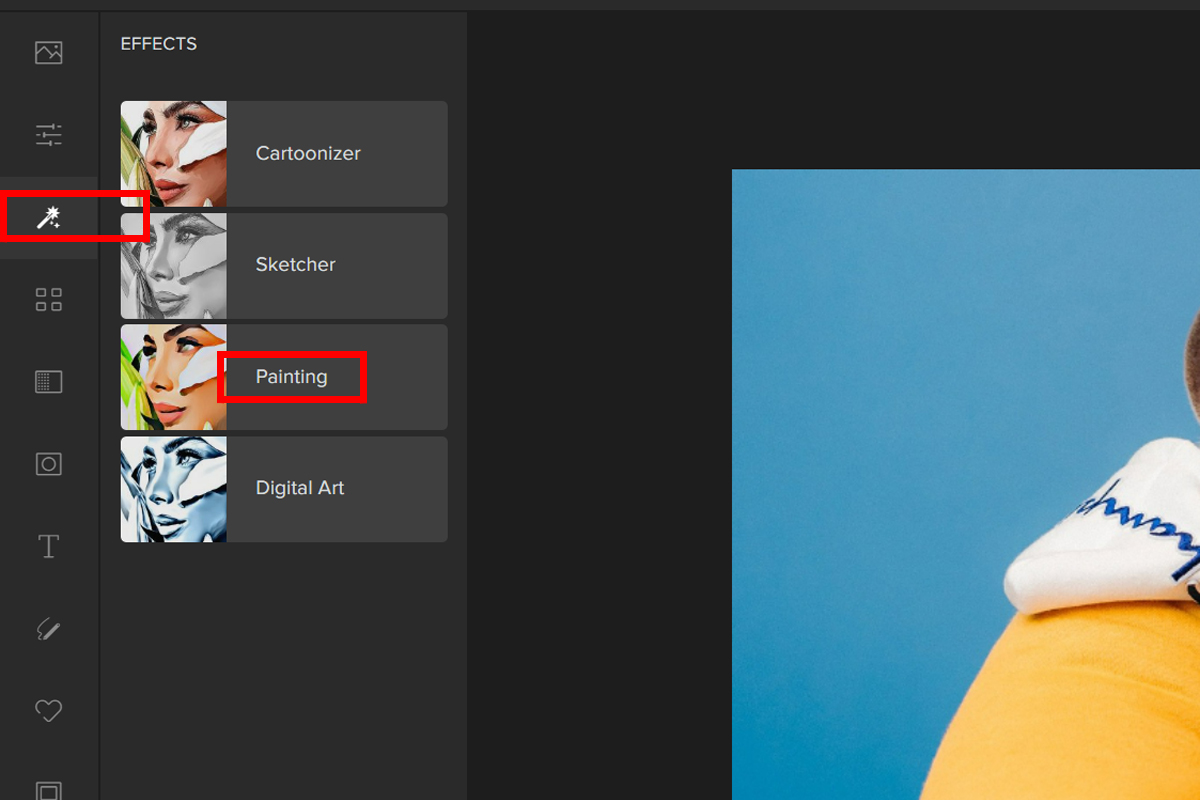
Step 2: Choose a filter on the Painting tab. By moving the Slider, you can change how strong the filter is.
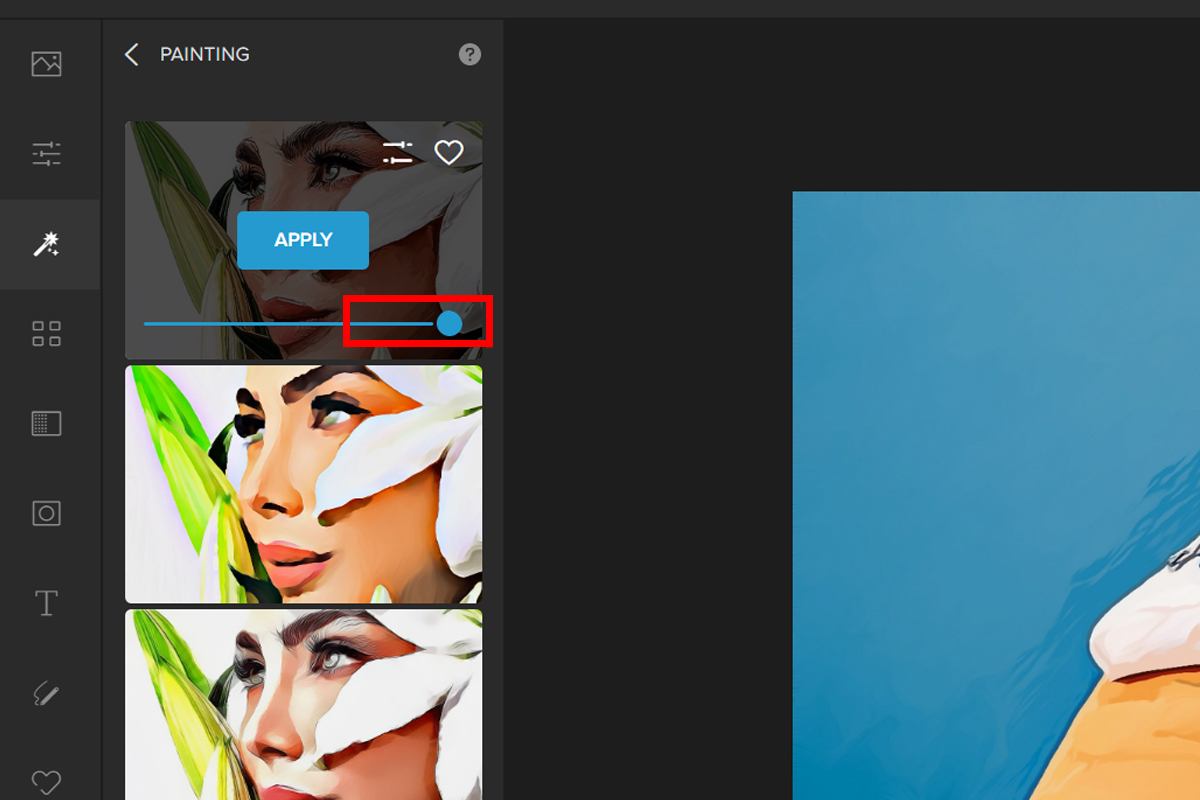
Step 3: If you want more control, you can change the settings for the Advanced option. Just select the Settings button and move the sliders.
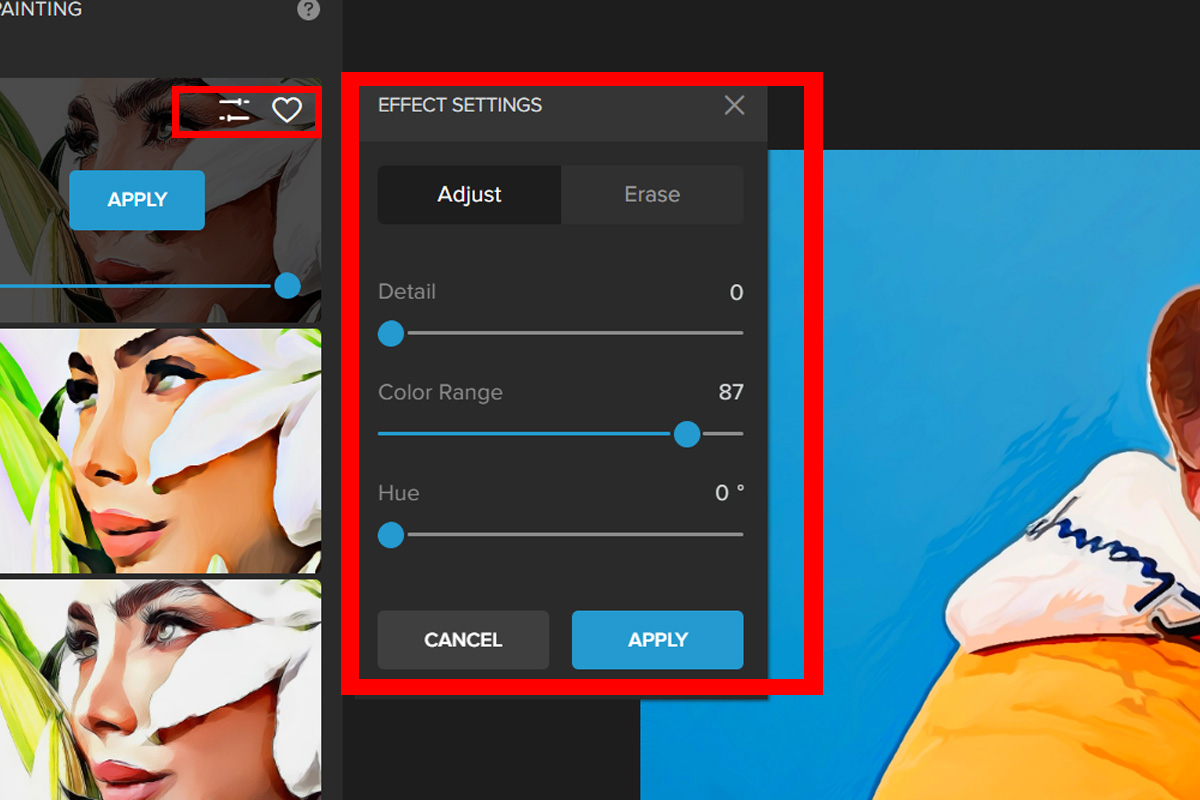
Let’s take a look at the result:


Level Up Your Photos Using Overlays
We are sure that you’ve heard about the cool effect that Overlays can add to your photos. Here’s how you can do it with Colorcinch.
Texture Overlay
Step 1: Navigate to Filters — Texture.
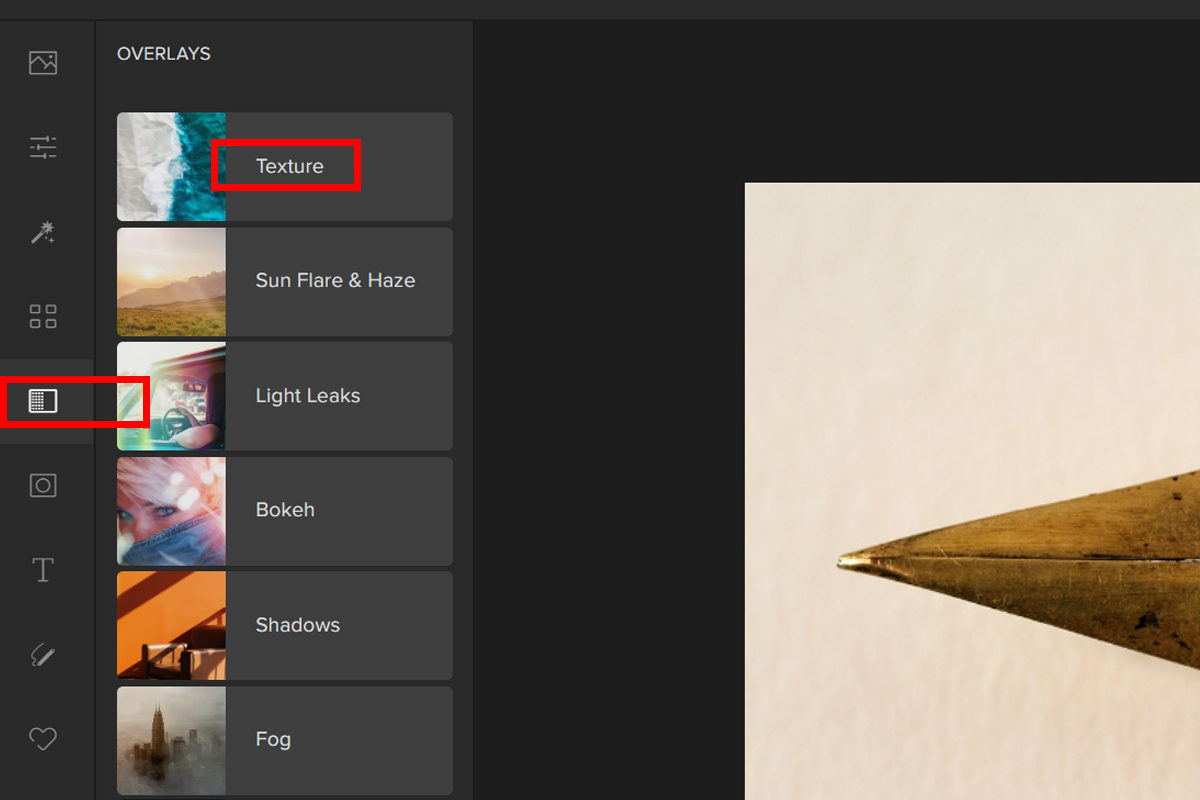
Step 2: Pick a Texture. Adjust the filter by the Slider or by clicking on the settings button and experiment with the different Blend Modes.
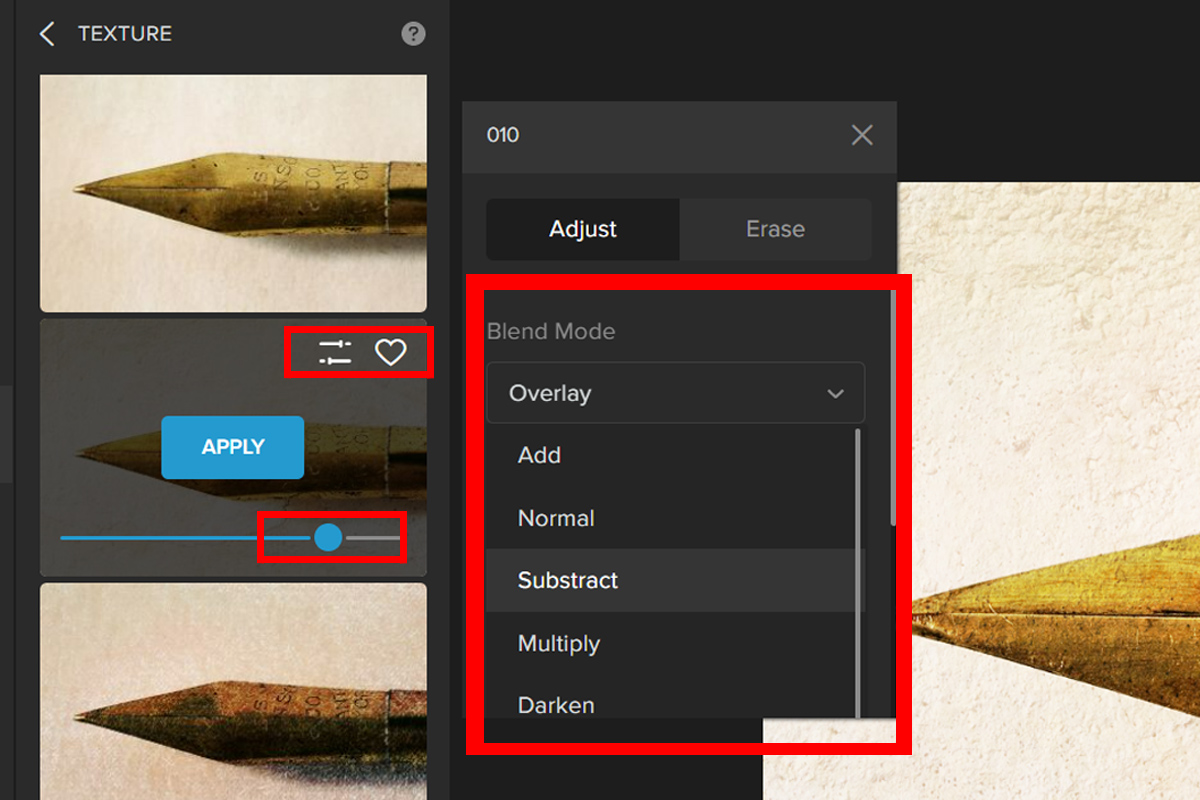
Here’s the before and after:

Falling Snow Overlay
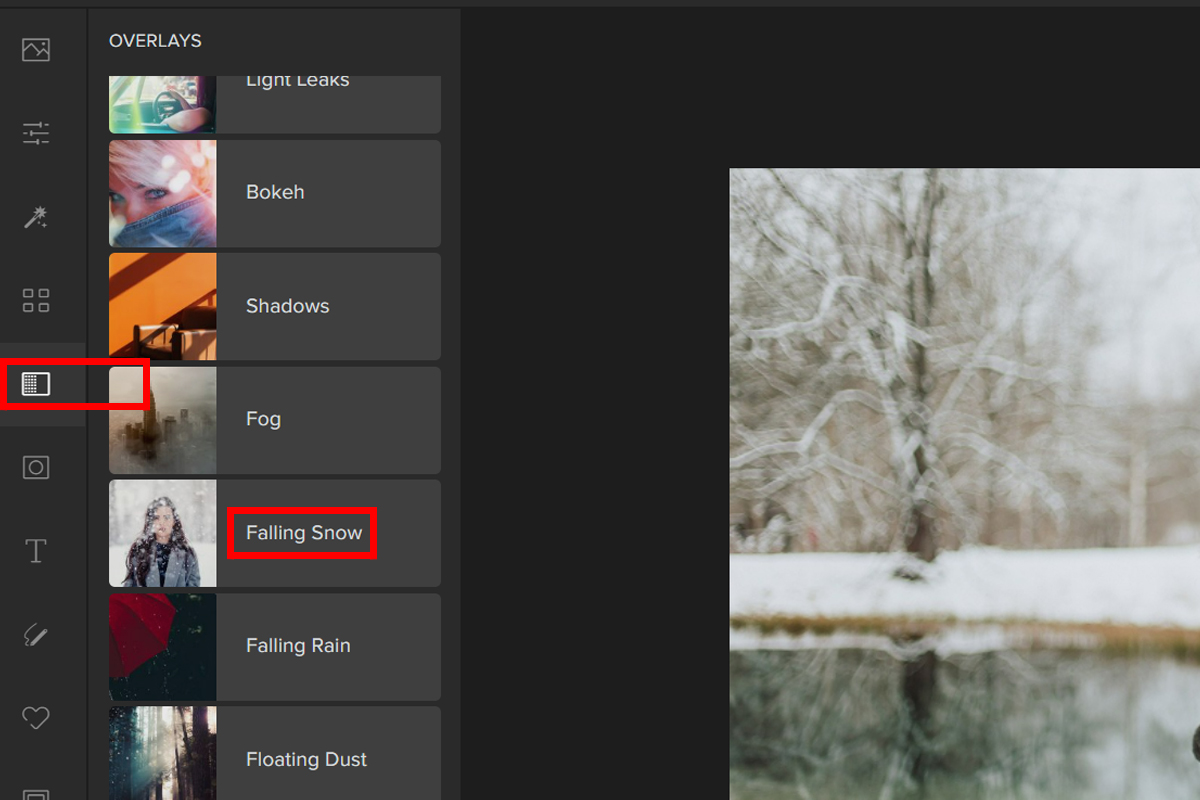
Step 1: Select Overlay. Pick Falling Snow.
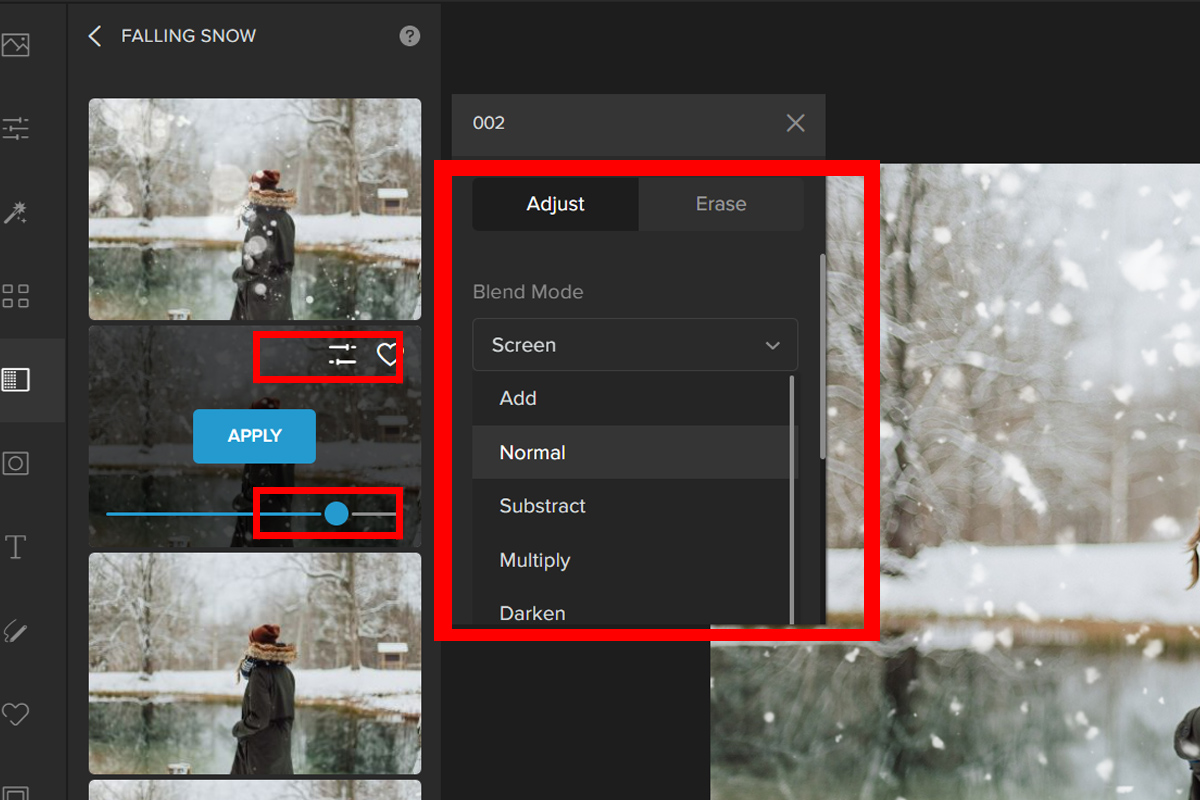
Step 2: Select a Falling Snow filter for your image. Adjust the Slider or click the Settings button to adjust the effect. Try different Blend Modes.
Let’s take a look at the before and after:


Conclusion
There are many ways to enhance your photos and make them more appealing. In this article, we talked about quick and easy ways to use Colorcinch to spice up your image. Now is the time to have fun, be artistic, and use these filters and overlays on your photos.


