
What Is Golden Hour?
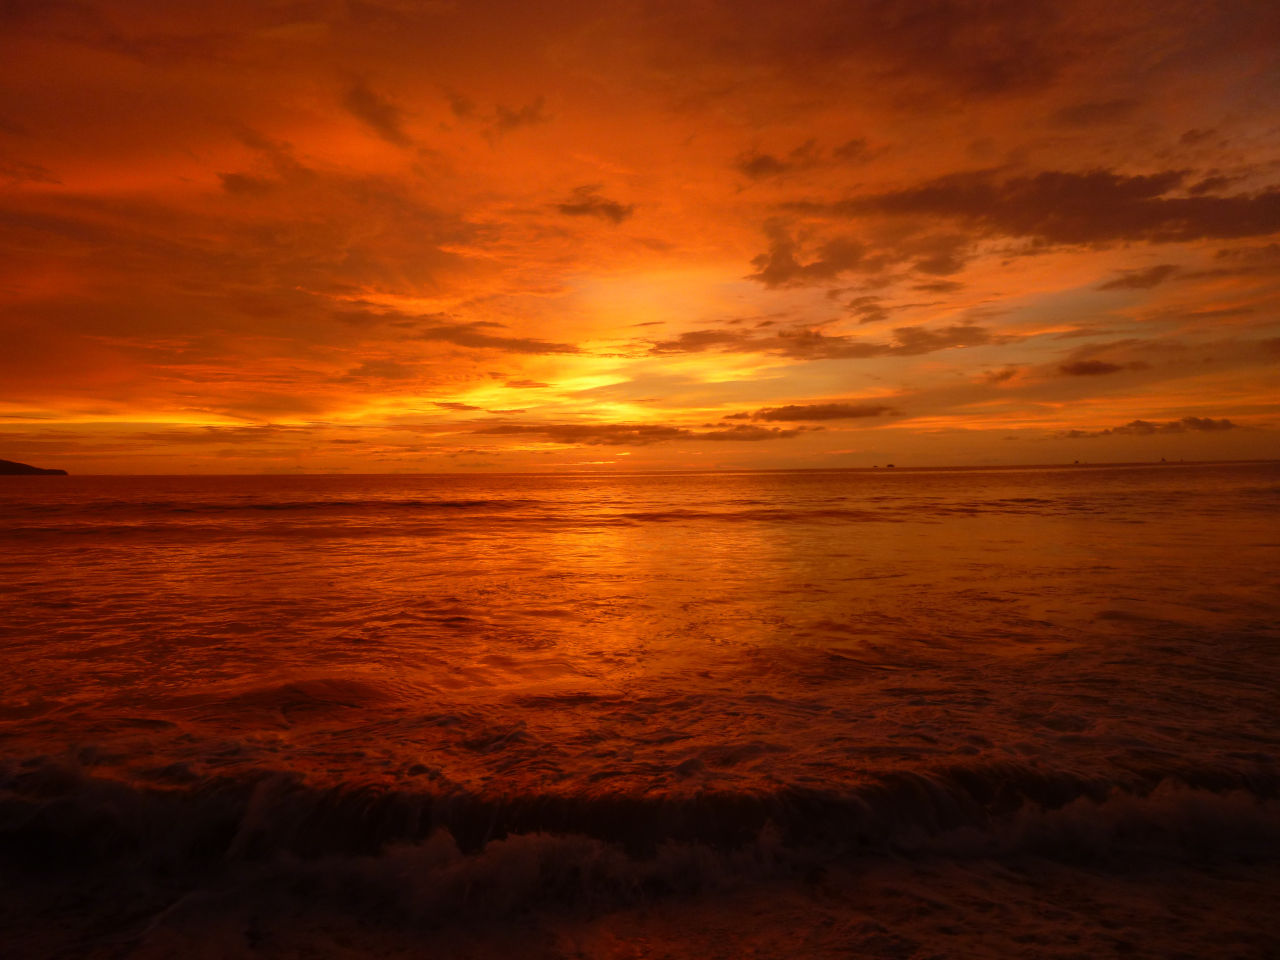
Golden hour is the window of time right before sunset and after sunrise.
The golden hour in photography is also considered by many to be the magic hour. And if you’ve ever had an opportunity to witness one, you’d know the reason why.
When the sun is low, it’s the longer wavelengths of light (orange and red) that have the strongest presence. Anything that the light touches then appear to have a golden glow to them. This is what makes it desirable for the photographers to work during golden hour.
And don’t be fooled by the term “hour” as the golden hour doesn’t last precisely for an hour. Based on where you are and the weather conditions there, the time and duration will vary drastically.
However, as a general “rule” you can consider that the golden hour in your locality will occur an hour before sunset, and an hour after sunrise.
The Importance of Golden Hour in Photography
Golden hour in photography has its own special place. Photographers of any genre and any level of experience just love being outside and taking photos during golden hour.
There are a couple of reasons for this:
- As the sun is low during the golden hours, any shadows formed on the ground are thus long and won’t appear in the image
- The light during golden hour is highly diffused and thereby soft – perfect for any sort of photoshoot
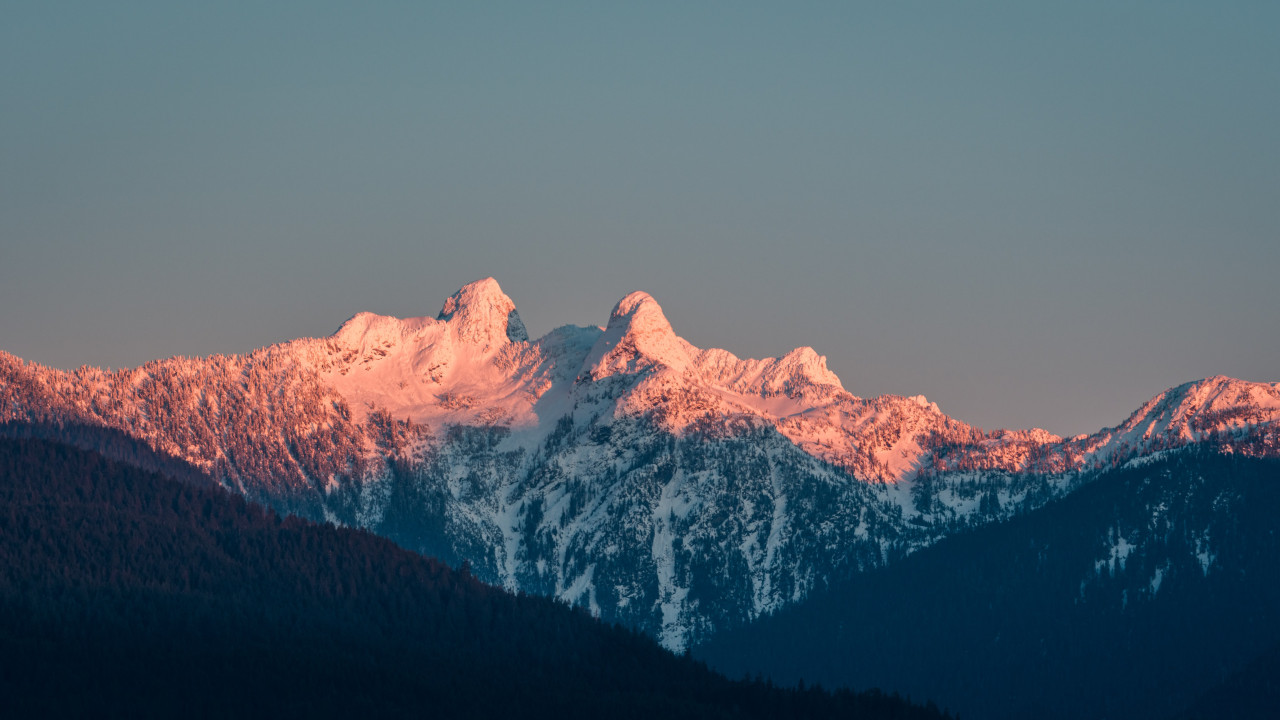
- Thanks to the longer wavelengths, the light adds a golden glow to whatever it falls on; subjects thus have a happy and warm feeling to them
Top 5 Tips to Photograph During Golden Hour
The lighting during golden hour is probably the best light you can shoot in. And the best part is that it’s absolutely free. So, what are you waiting for? Head out and make the most out of it.
If you’re unsure about how to benefit your photography using golden hour, here are our top 5 tips to get you started:
1. Plan for Golden Hour
When planning for golden hour photography, the first thing you’d want to know is the time of its occurrence. While taking the local sunrise and sunset time as a reference is a good idea, there are other apps and online golden hour calculators that’ll help you do this more precisely.
Some popular tools include Goldenhour.One, Photopills, and Photo Ephemeris.
Once you know when the golden hour is happening, make sure that you reach there ahead of time. This way you will get ample time to scout the location and work out your composition beforehand.
Remember, you have a very narrow window of time to take photos in the golden hour. Also, the light changes very quickly when the sun is low. So, whether you’re shooting portraits or landscapes, be sure to work quickly.
2. Set Correct White Balance
When the camera is set to auto white balance (AWB), it’ll always adjust the white balance in a way that the white will appear white. But this is not something that we want during golden hour photography.
Since the light itself carries a rich yellowish tone, even white will appear golden during the magic hour. It is thus best that you either set your white balance manually or use the Shade or Cloudy white balance setting.
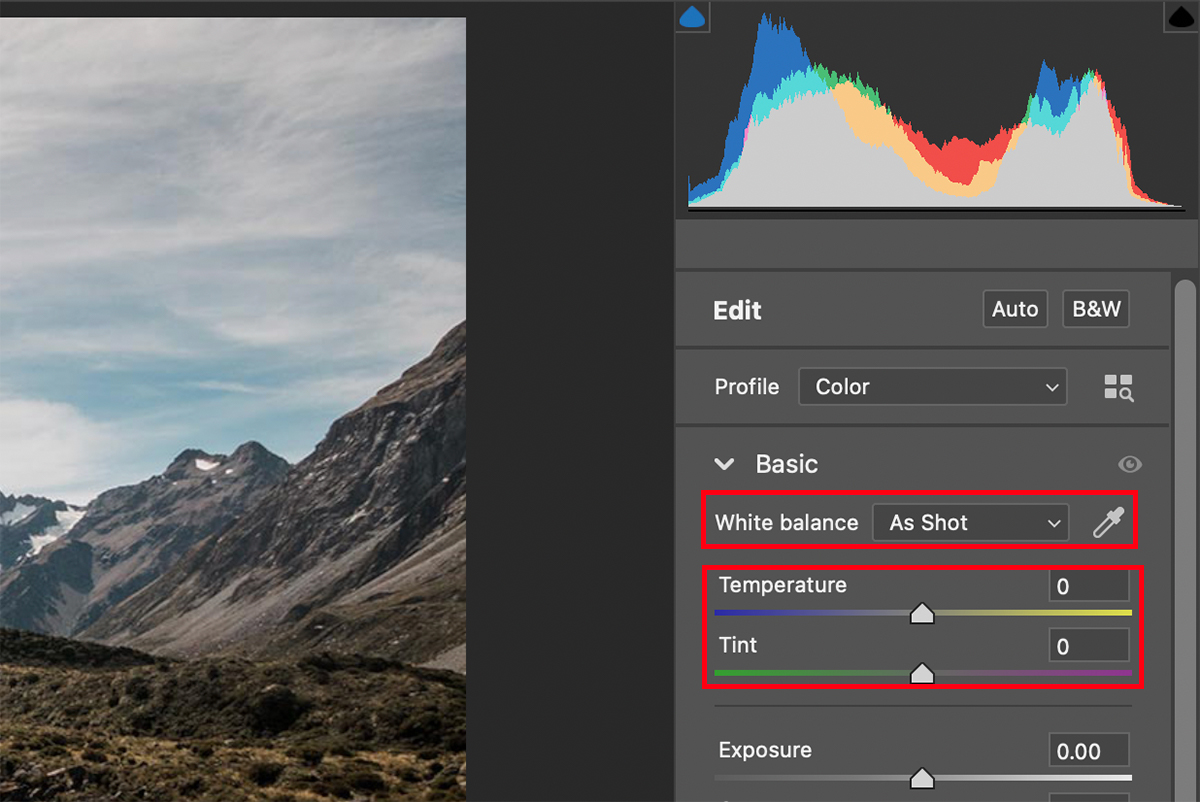
If you have a raw file, you can easily adjust the white balance using the White balance dropdown menu, or the Temperature and Tint sliders in software like Photoshop or Lightroom.
While jpeg files are not so flexible as far as white balance adjustment is concerned, you can still do it in Colorcinch or any other photo editing tool.
To adjust the white balance using Colorcinch, simply follow these steps:
Step 1: Upload the file to Colorcinch

Step 2: Navigate to Edit – Color
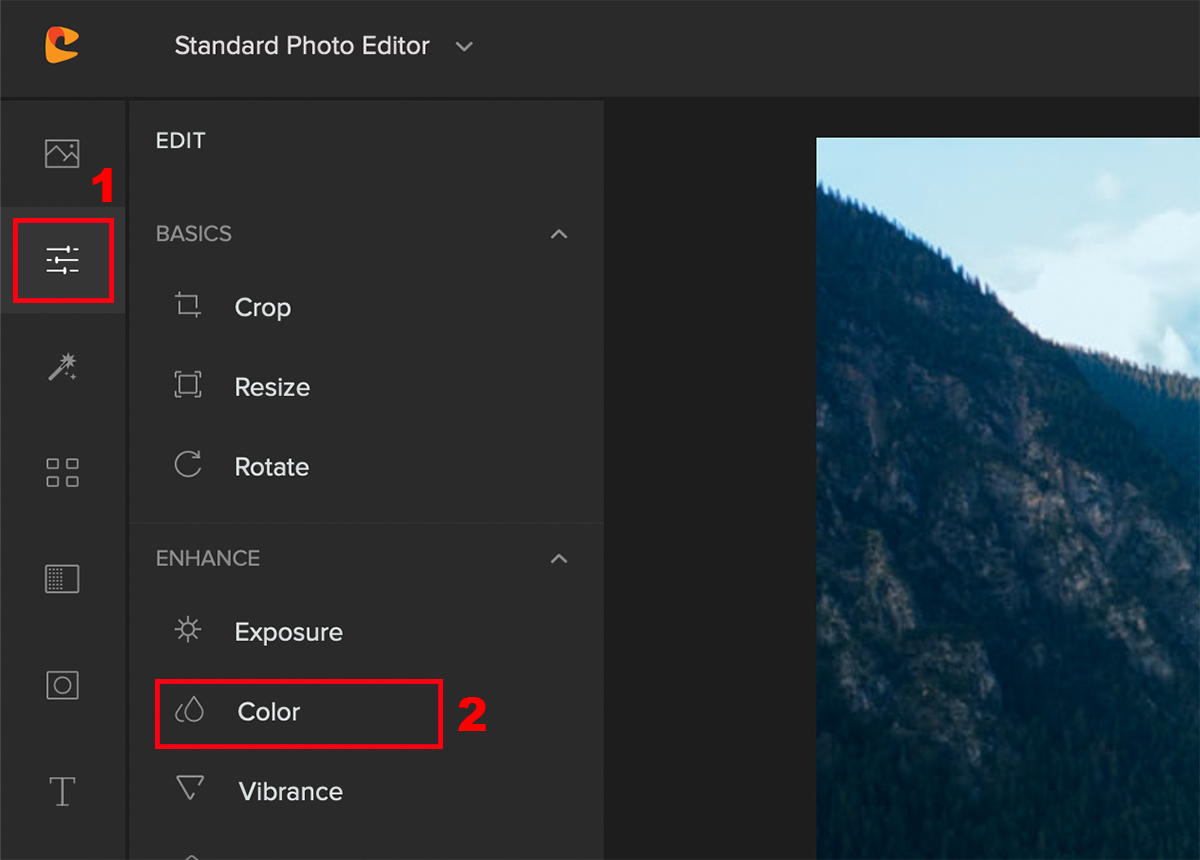
Step 3: Push the Temperature slider towards the right to give a warmer look to the image and press Apply
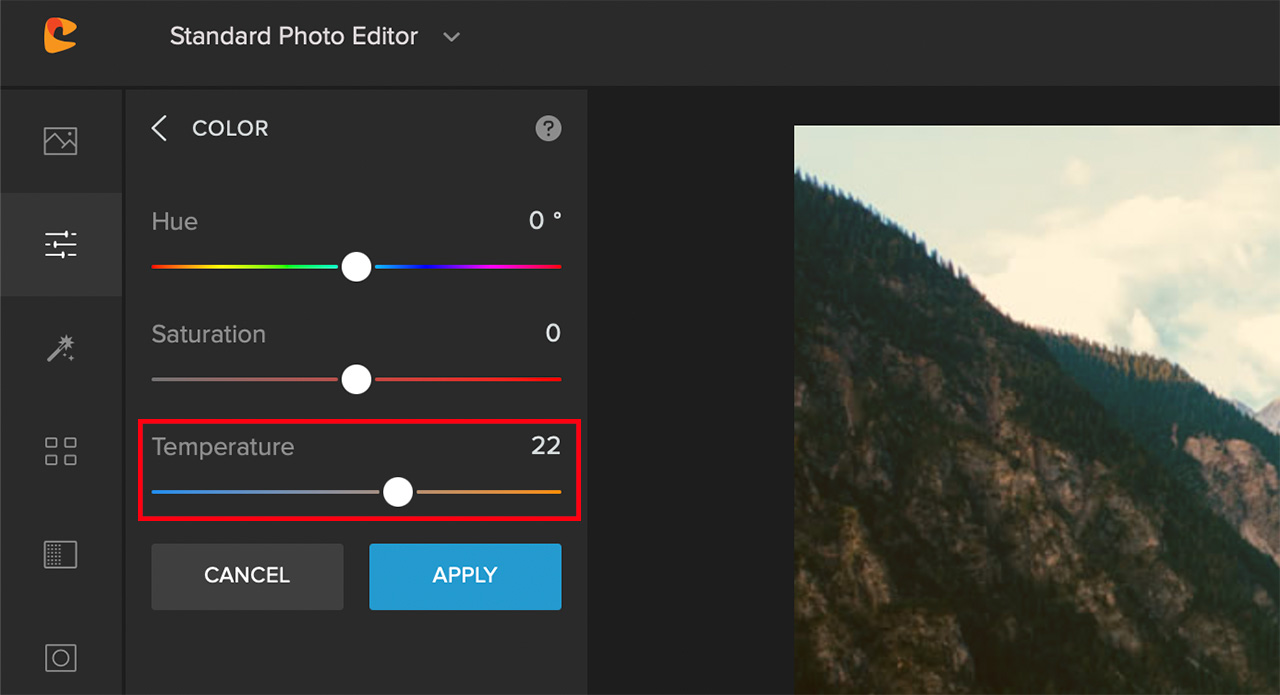
Here’s a before/after of an image after adjusting its white balance using Colorcinch:


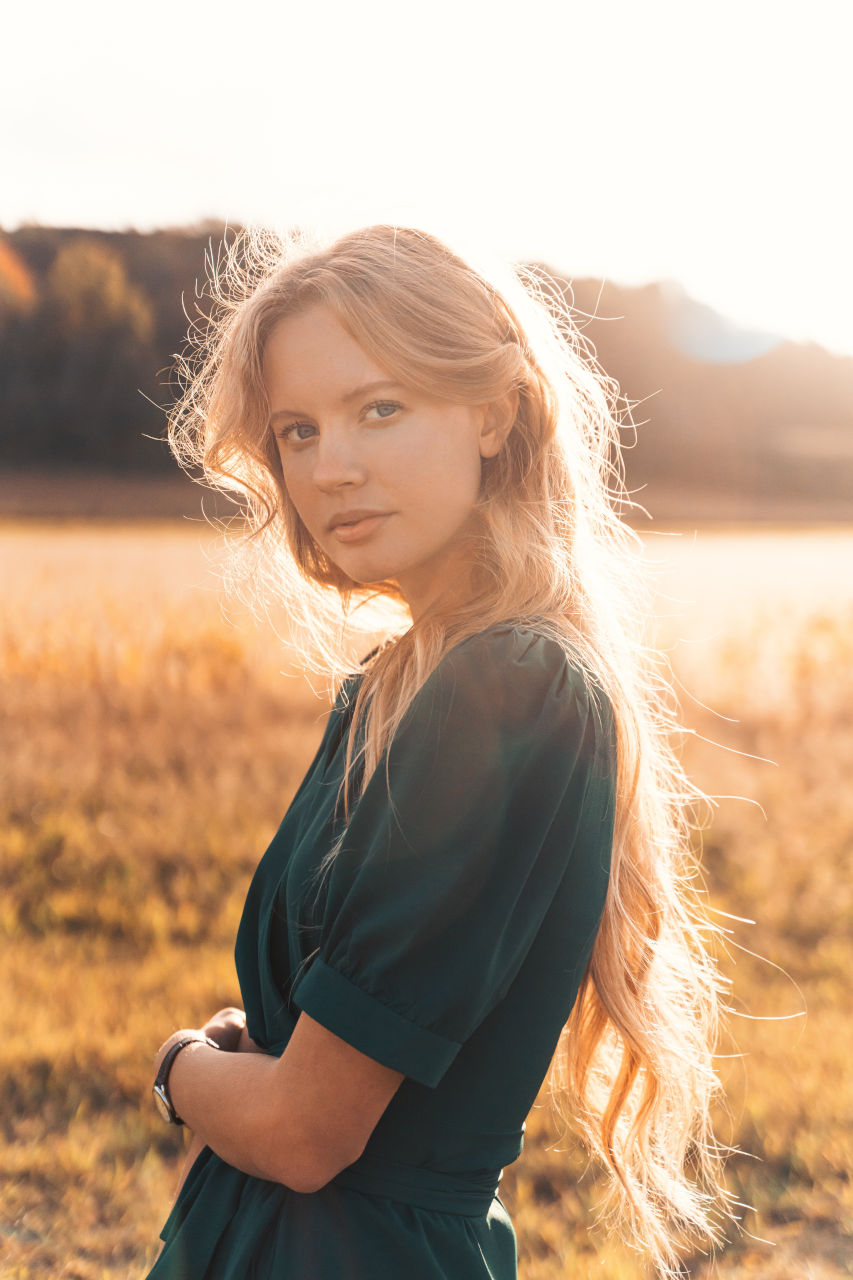
3. Use the Sun as the Backlight
Backlighting your subject is a technique you can use to elevate your image to the next level. With golden hour portrait photography, this technique yields even greater dividends.
When you backlight the subject during the golden hours, you can see a beautiful golden edge lighting on the subject. Similarly, you can notice that the subject’s hair too will flaunt a golden glow which simply appears beautiful.
4. Use the Sun as the Main Light
When doing outdoor photography, you’d often hear other photographers telling you to avoid direct sunlight. And that’s exactly what you should be doing as the harsh light only produces unflattering results.
But when it comes to photographing in the golden hours, it’s a great idea to embrace the sun as a front light. The soft light wraps beautifully on the subject, doesn’t cast harsh shadows, and even adds a soft glow to the subject.

And don’t worry if you already have an image that you wish you’d taken during the golden hour. There’s a quick way you can do so using Colorcinch. Here’s how:
Step 1: Upload the image to Colorcinch
Step 2: Navigate to Overlays – Sunflare and Haze; this will add a soft glow to your image
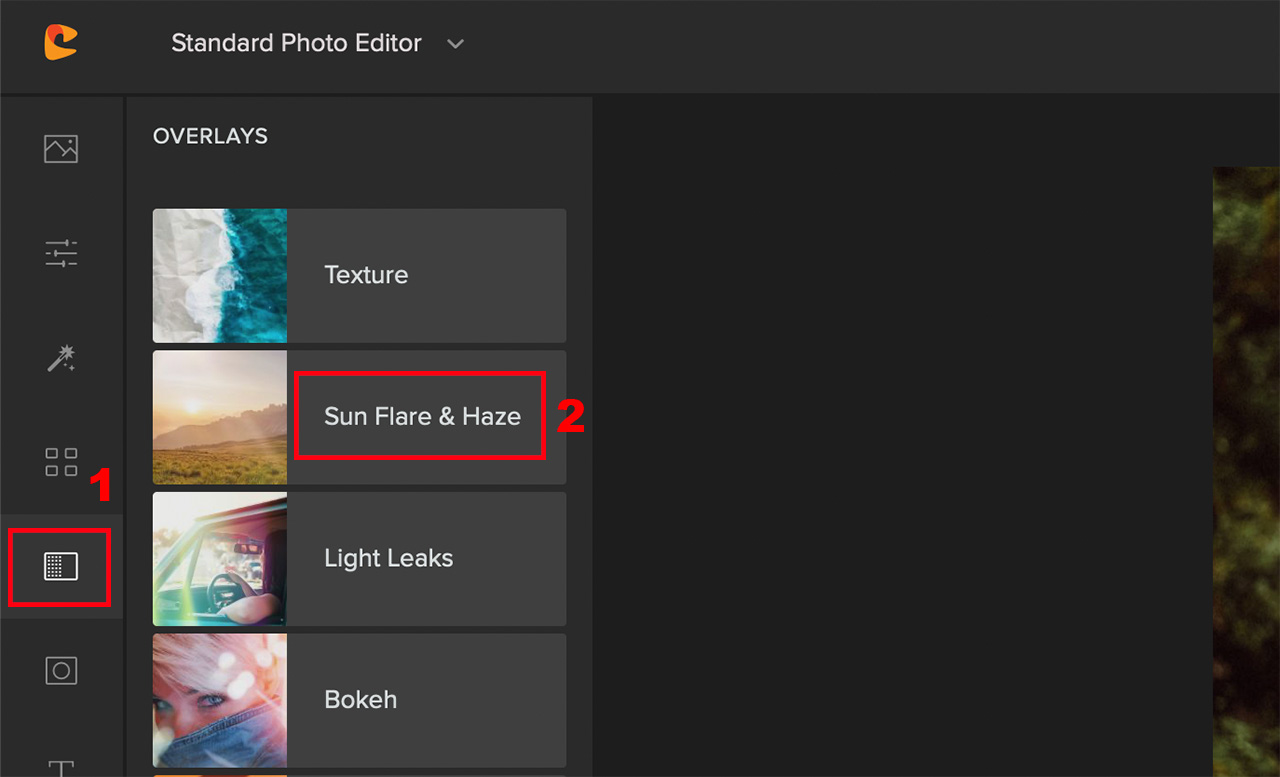
Step 3: Choose from a list of beautiful overlays, make any necessary adjustment, and click on Apply
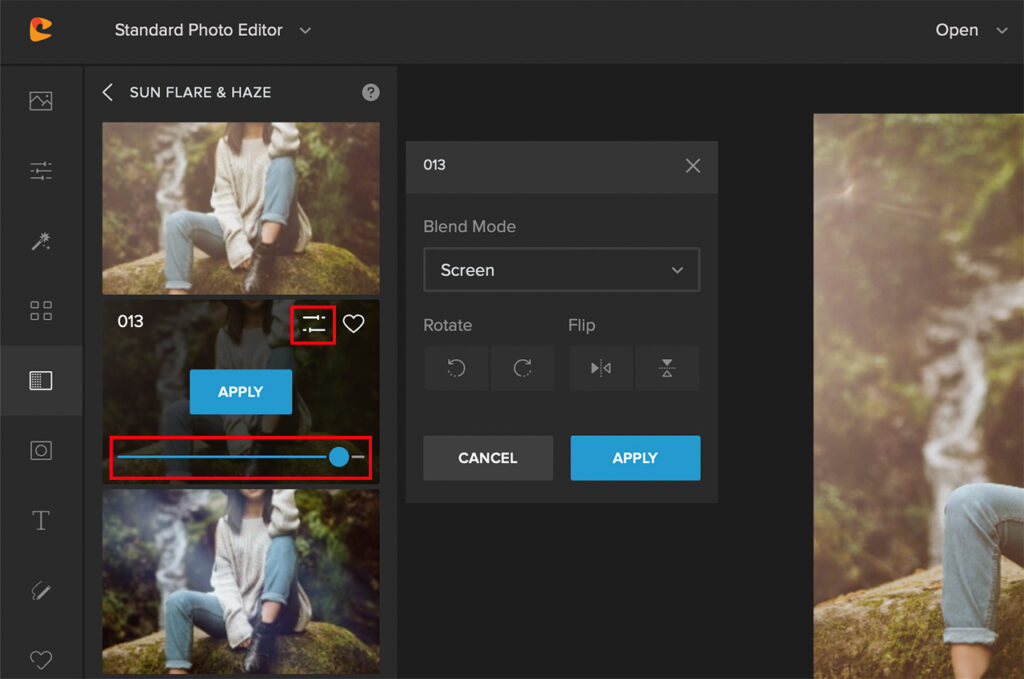
As you can see, the image appears so good with the golden hour vibe added to it.


5. Shoot Silhouettes During Golden Hour
The golden hour gives you a great opportunity to photograph silhouettes. By underexposing the foreground, you can accentuate the glow in the surroundings which makes the golden hour appear even more magical.
Moreover, if your position is just right, you can even capture the highlights on the edges of the subjects which creates a clean separation between the subject and the surroundings.

To Sum It Up
Golden hour in photography is indeed a golden opportunity for every one of us to create magical photos. And the great thing is that it comes around twice every day.
However, do keep in mind that depending on weather conditions, the magic of the golden light in those hours can vary. Nonetheless, if you’re looking to capture a beautiful soft contrast image in any genre, the golden hour will not fail you.