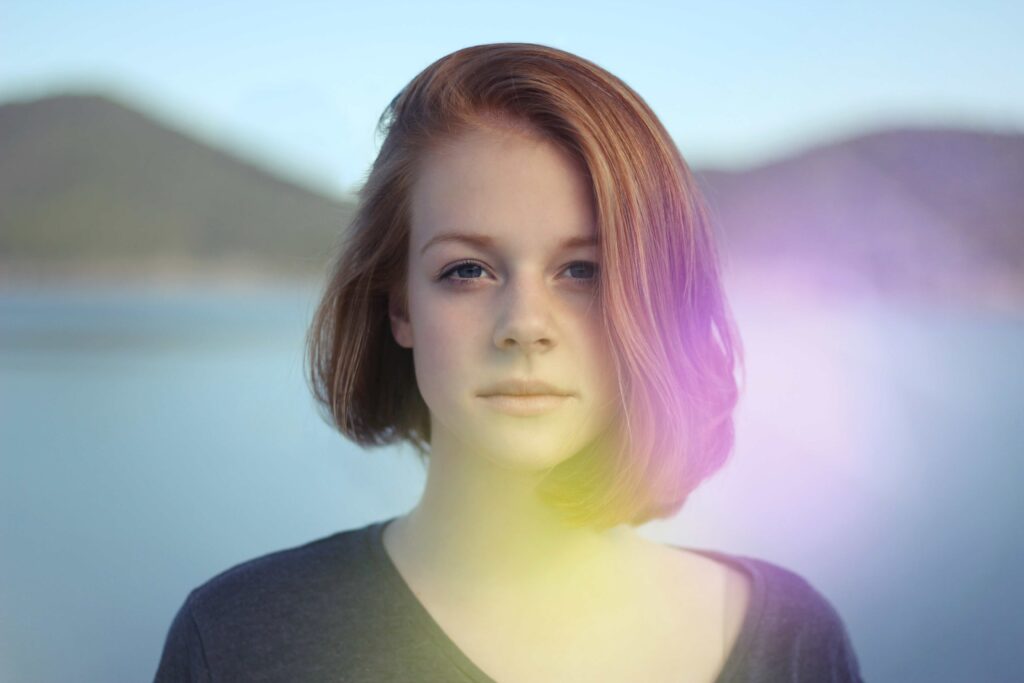
Colorcinch overlays can turn regular photos into works of art. Want to turn your selfie into a vintage painting? Use a grainy overlay with some light effects. Feeling edgy? Play around with sun flares, fire, or water ripples. It’s super easy and takes a few clicks!
Adding overlays in Colorcinch is just a matter of uploading your photo, clicking on the “Overlays” tab, and choosing from the many options available. You can even rotate and flip the effects around so that they fit your photo just right.
New to Colorcinch overlays? Follow this step-by-step guide and you’ll be a pro in no time!
How to Add Aesthetic Overlays in the Colorcinch App
Step 1: Go to the Colorcinch photoediting app.
No need to download anything – just open Colorcinch on your browser and you can start editing your photos right away! Once you’re on Colorcinch, you’ll see this:
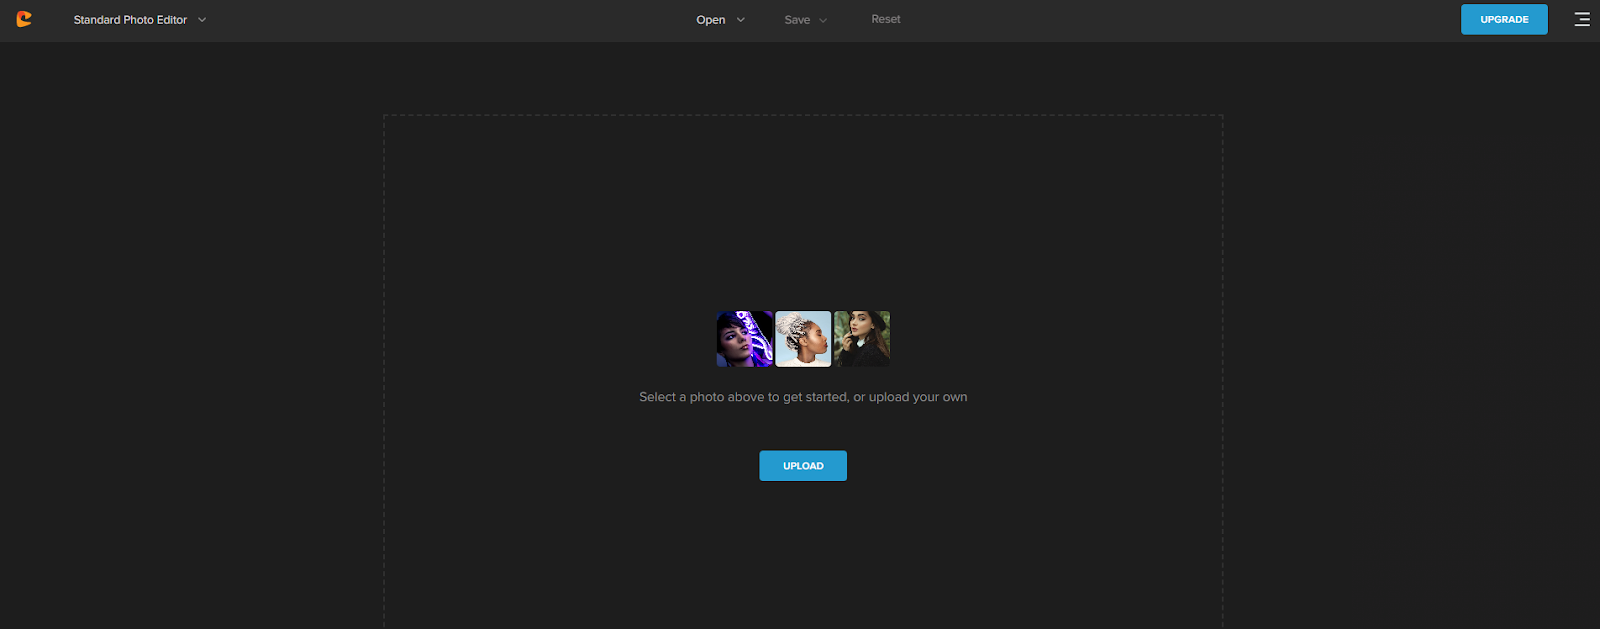
From there, you can click on one of the three photos to explore the Overlay feature.
You can also edit your own photo by clicking on “UPLOAD” and selecting a file from your computer.
Alternatively, you can click on the “Image Manager” icon to upload your images to Colorcinch.
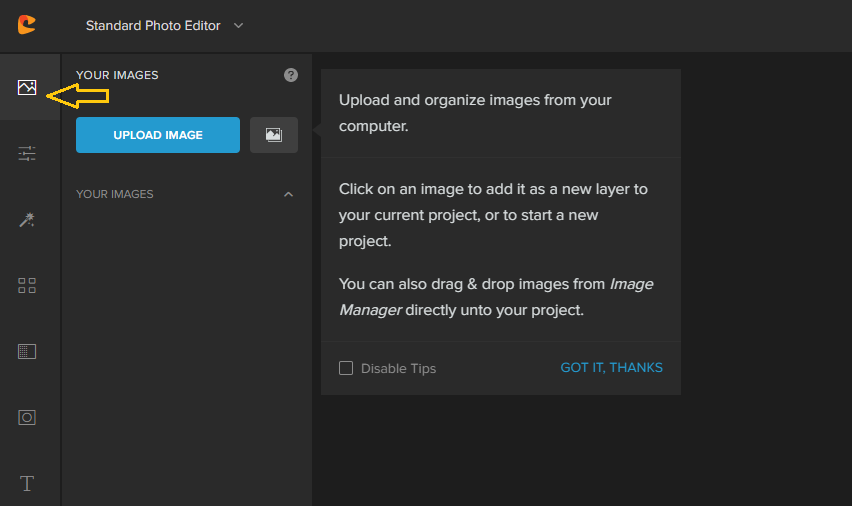
For this tutorial, we’re using this beautiful photo by Valerie Lendel.
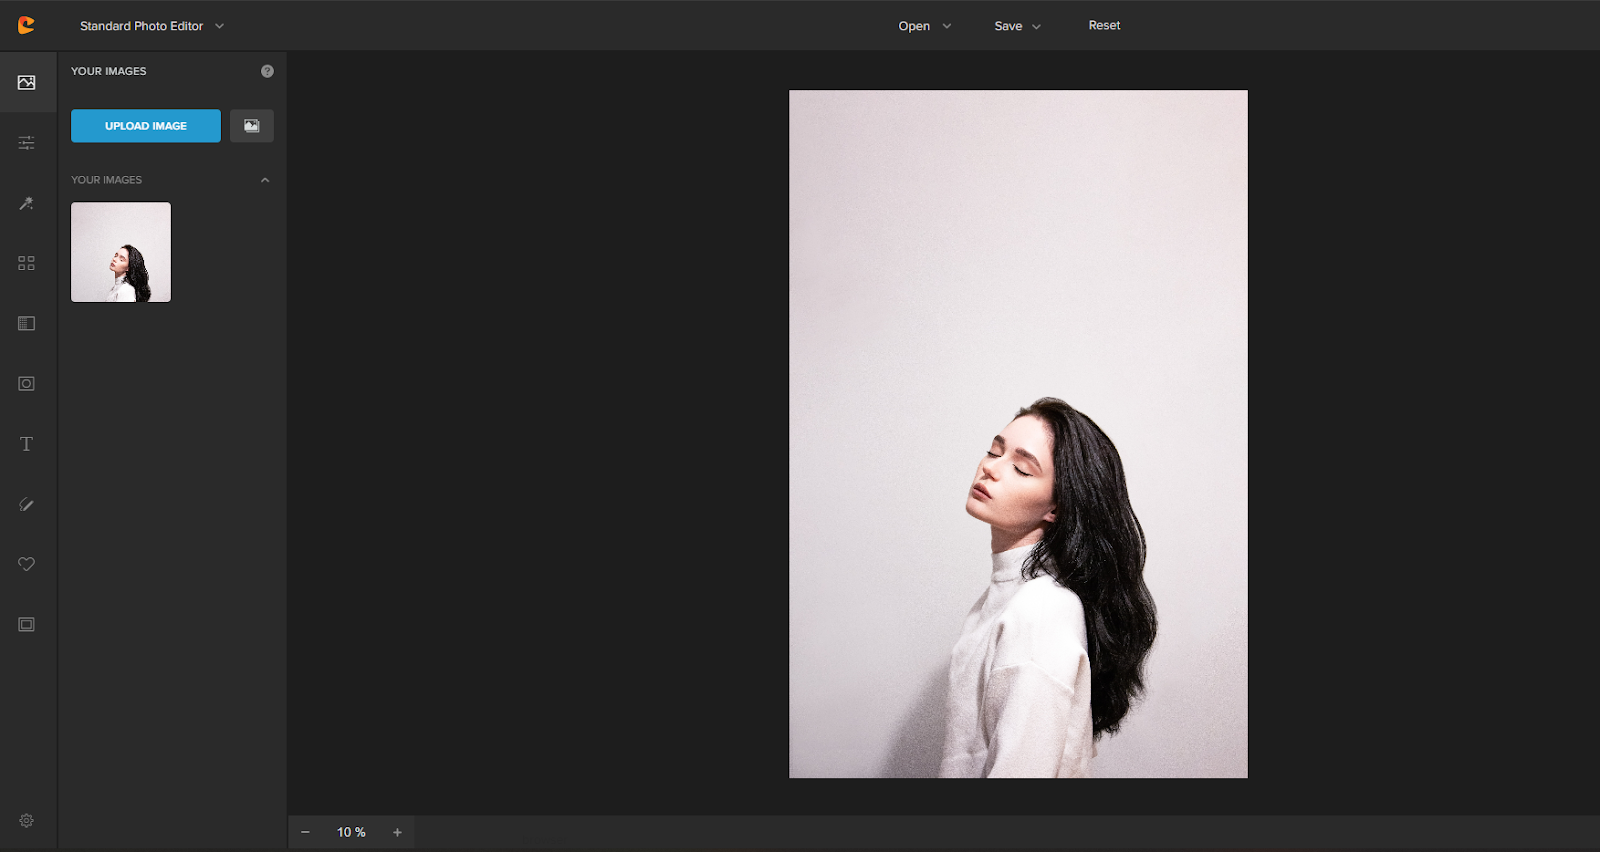
Step 2: Open the Overlay section on the Colorcinch app.
Once your photo is ready, click on the Overlay icon in Colorcinch.
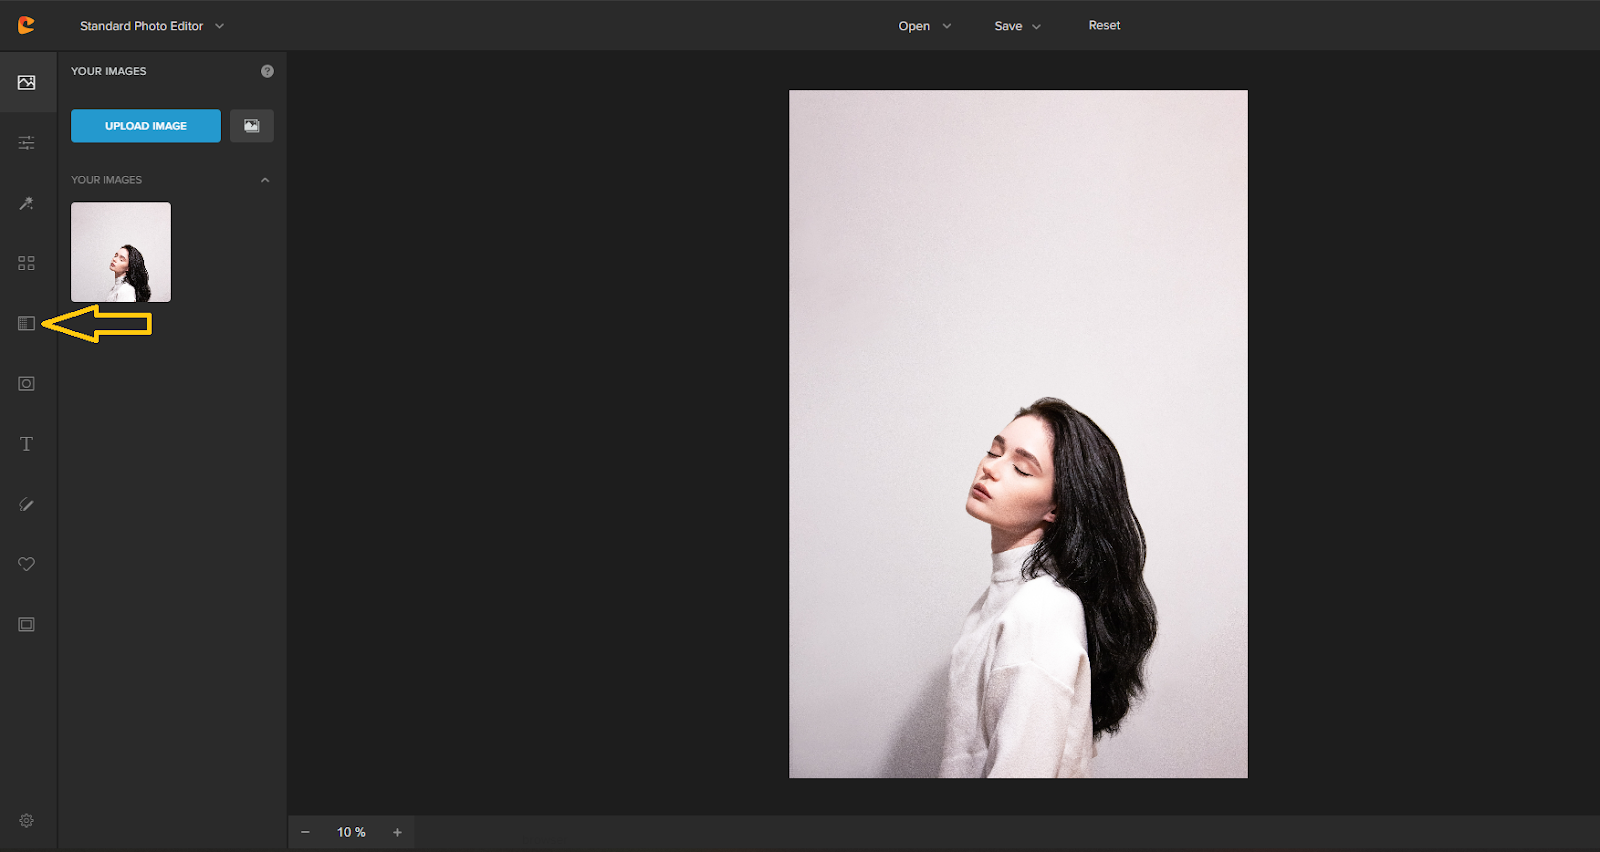
This will pull up all of Colorcinch’s Overlay categories for you to explore.
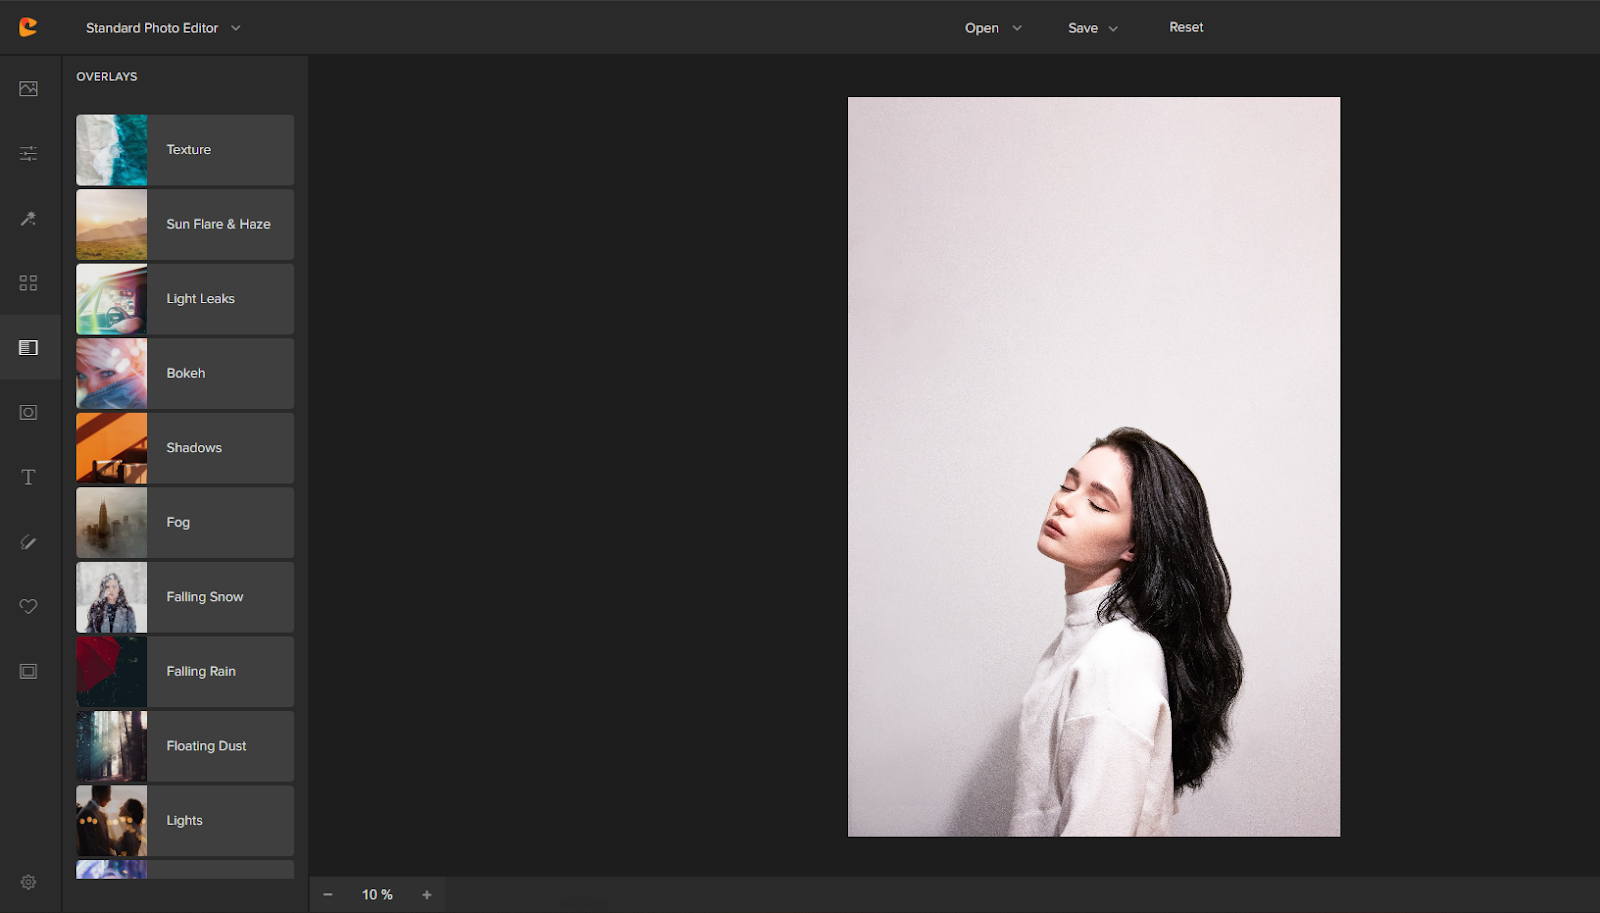
There are currently 11 types of Photo Overlays you can use on Colorcinch:
- Texture
- Sun Flare & Haze
- Light Leaks
- Bokeh
- Shadows
- Fog
- Falling Snow
- Falling Rain
- Floating Dust
- Lights
- Specialty
Step 3: Click on the Overlay effect you want to use.
For this particular edit, we’re going to try the “Bokeh” overlay in Colorcinch.
Bokeh overlays are great for adding dreamy, blurry effects to your photos. They mimic the way light appears in photos when the background is out of focus, or in technical terms, when a camera has a shallow depth of field.
Clicking on the “Bokeh” overlay category will open up a library of different Bokeh effects for you to choose from.
Here’s what the Bokeh overlay library looks like:
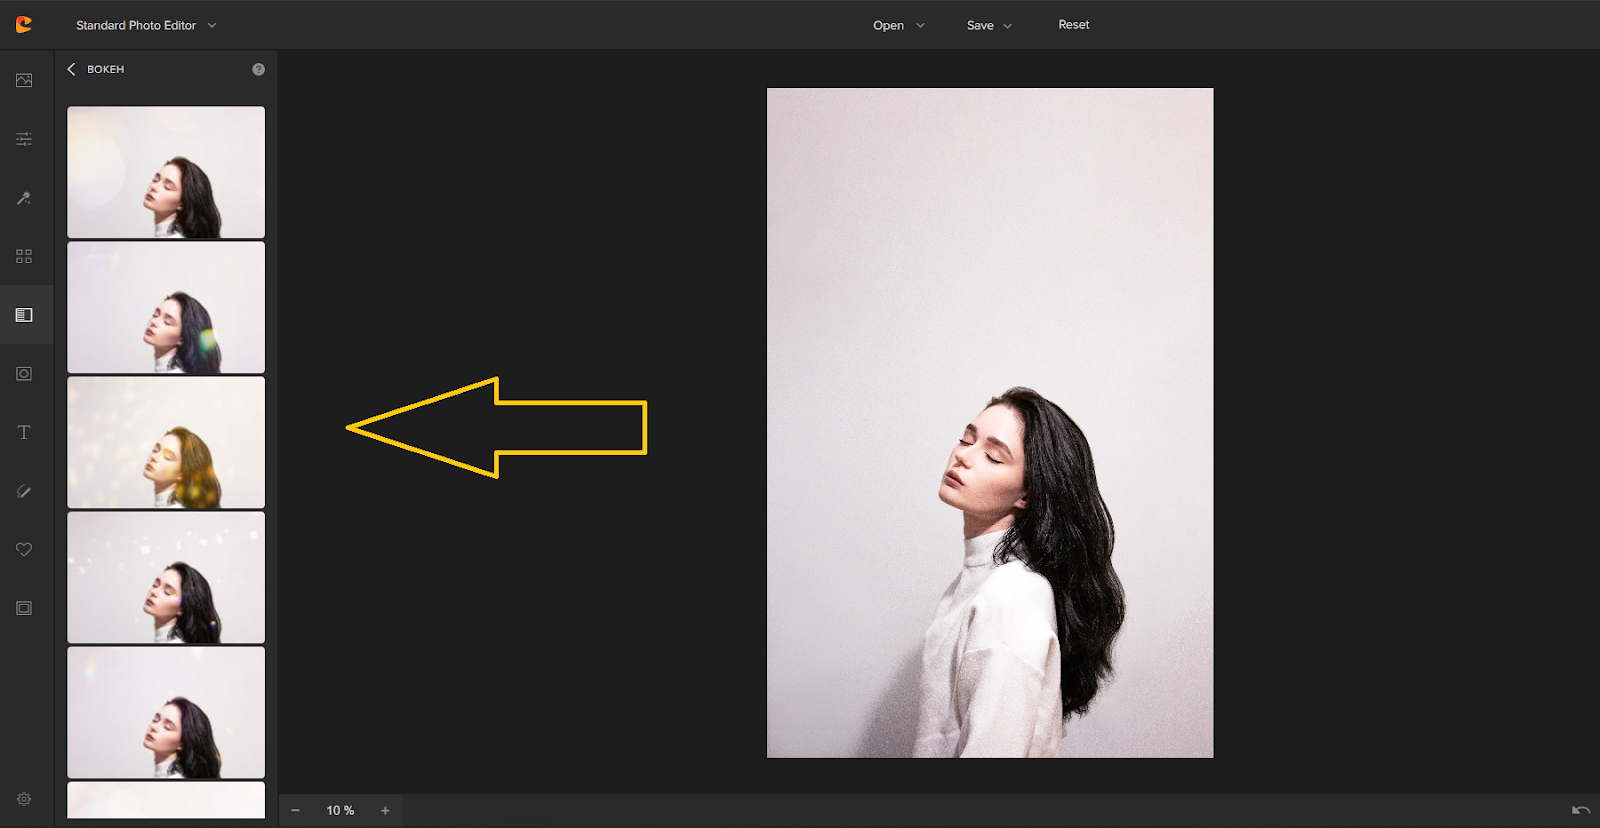
From there, you can scroll down to see all the different Bokeh effects and find one that you like. Colorcinch has 30+ Bokeh effects available, so you’re sure to find one that fits your style!
Each effect is named using a number, such as 001, 002, 003, 004, and so on.
This makes it so easy to remember which effect you like the best and saves you time from scrolling through all the options every time you want to use it.
Step 4: Preview the overlay by clicking on the effect.
You can preview what an overlay effect will look like on your photo by clicking each style option. This won’t actually apply the overlay to your photo yet – it’s just a way for you to see what the effect will look like before you commit to it.
For this particular photo, we’re going to use the “019” Bokeh effect. The rainbow colors in this bokeh style add a subtle pop of color to the original.
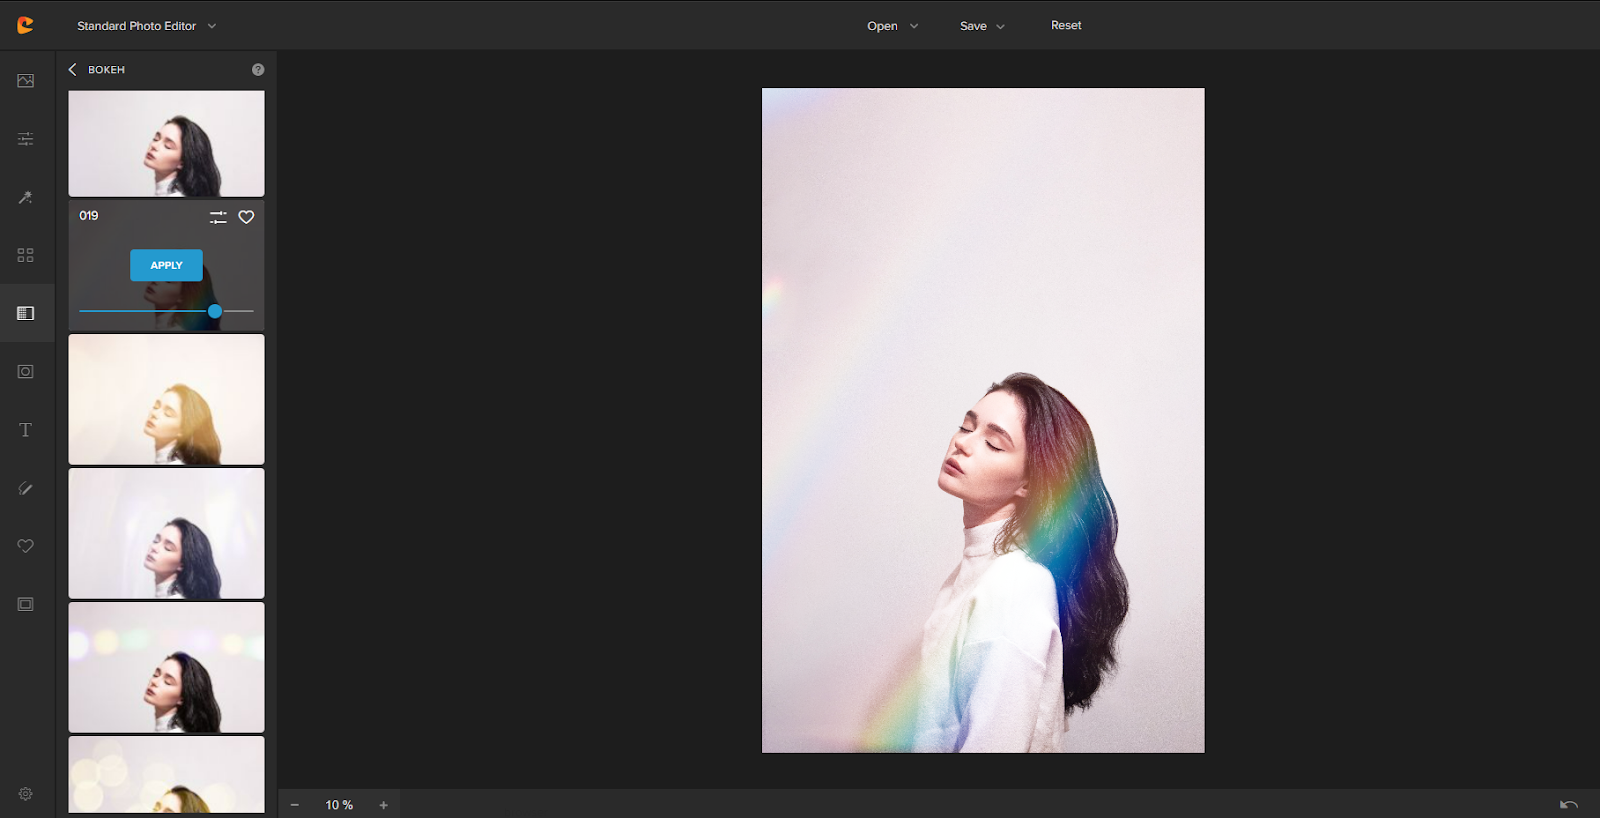
Step 5: Adjust the Overlay effect as you like.
Aside from the different effects available under each Overlay category, Colorcinch also lets you manipulate other overlay elements to further customize the effect.
You can access these options by clicking the “Settings” icon that appears on each overlay style.
Here’s what those options look like for the “019” Bokeh effect:
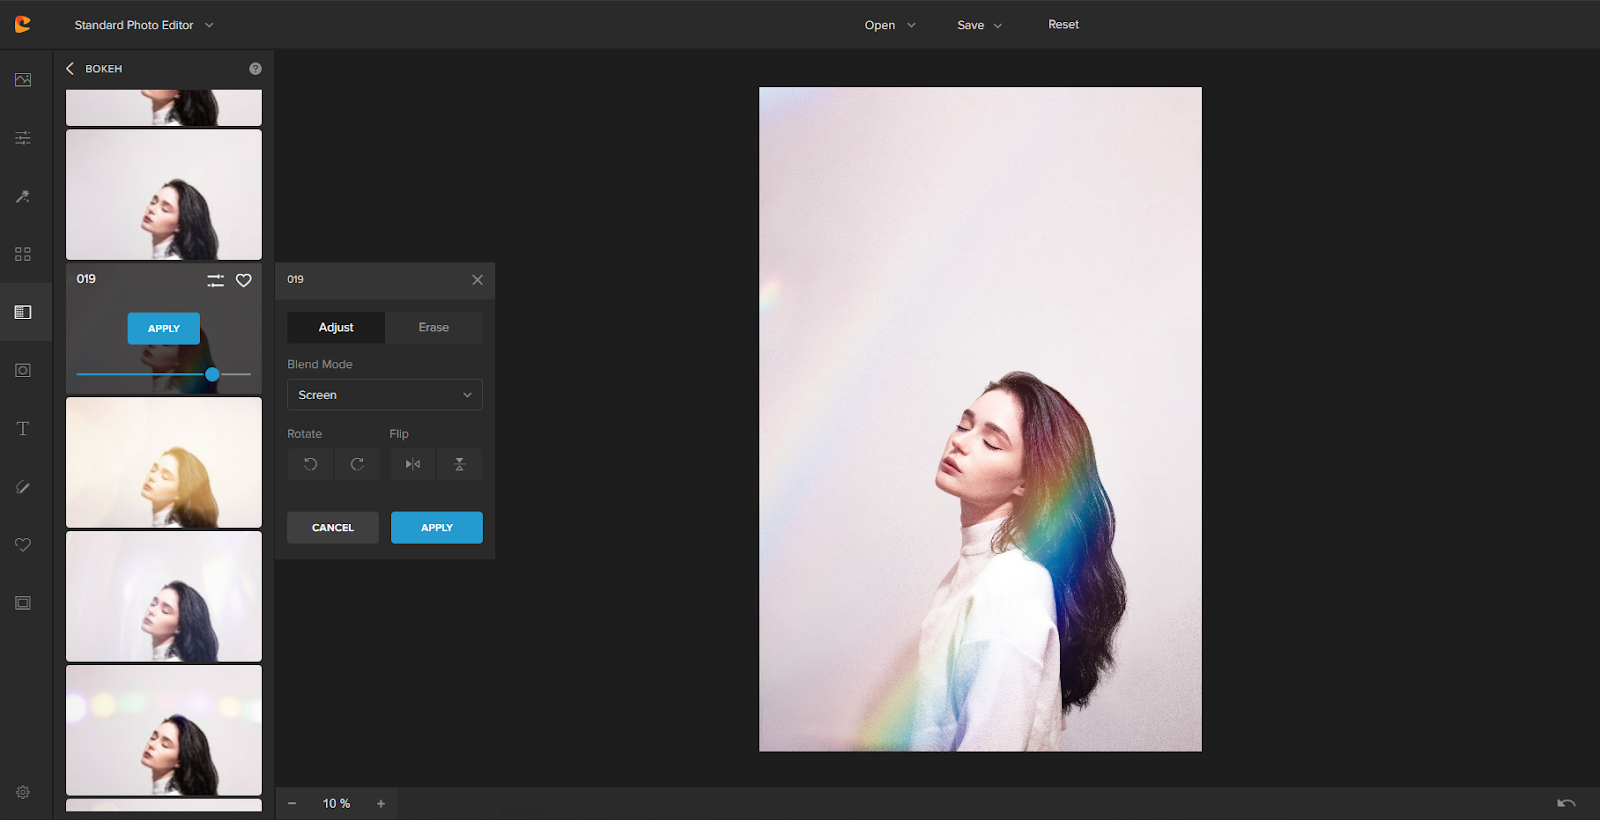
You can change the Blend mode, Rotate the orientation of the effect, or Flip it horizontally or vertically. You can also use the Transparency slider to make the effect more or less visible.
The heart icon in the top right corner lets you add the effect to your “Favorites” so you can easily find it again later.
Let’s keep the transparency at a full 80% for this photo – that translucent rainbow effect in the foreground really draws the eye to the lovely woman in this picture.
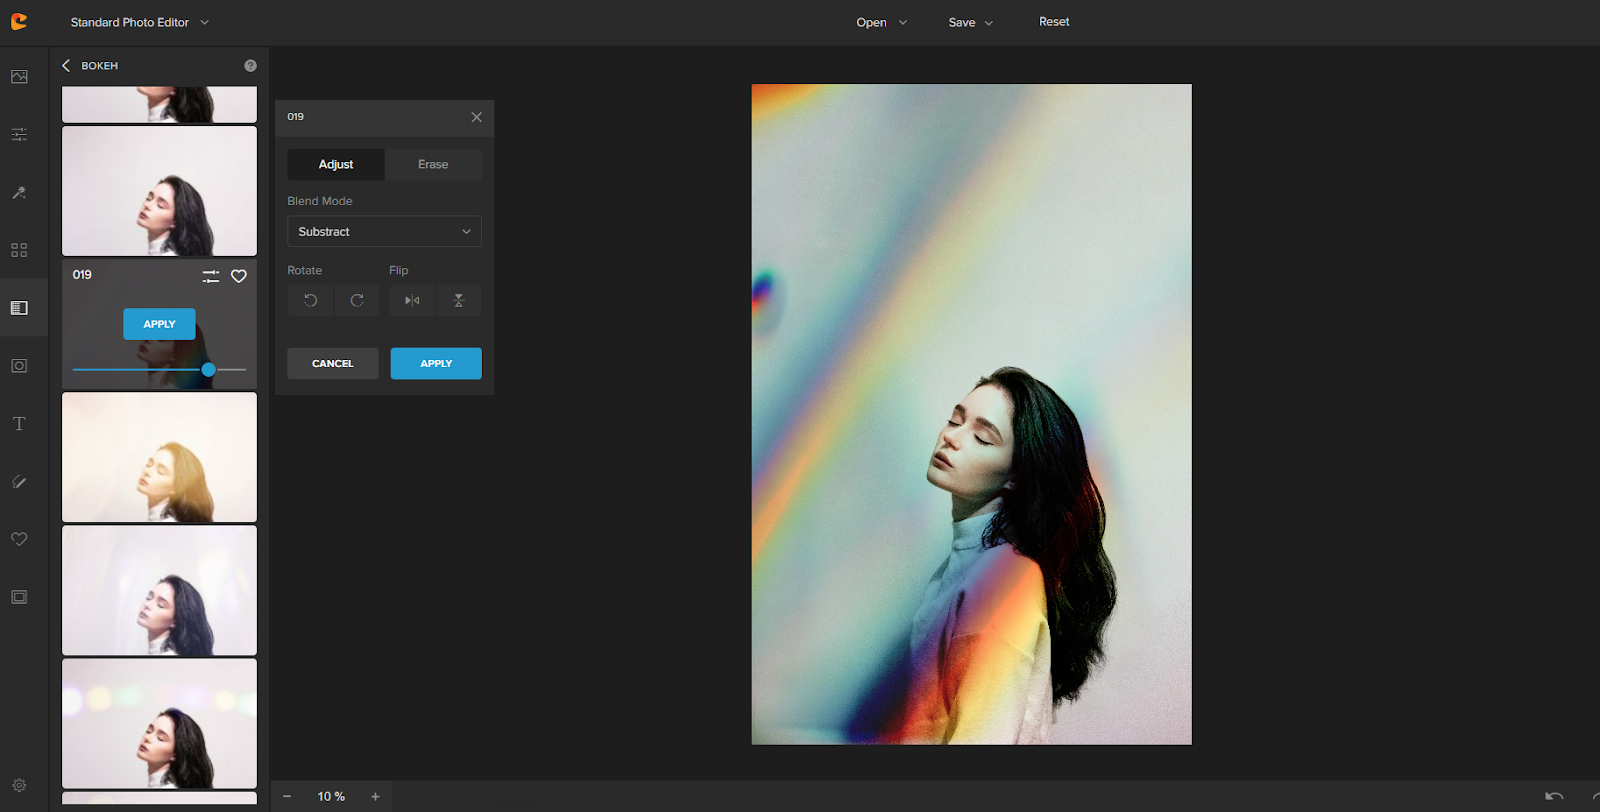
We also used the “Subtract” Blend Mode to give our photo a darker, more mysterious look.
Click “Apply” to finalize the custom Overlay effect.
Step 6: Save your edited photo from Colorcinch.
Once you’re happy with your overlay edits on the Colorcinch app, click on the “Save” icon in the top right corner.
This will give you several options for saving your photo:
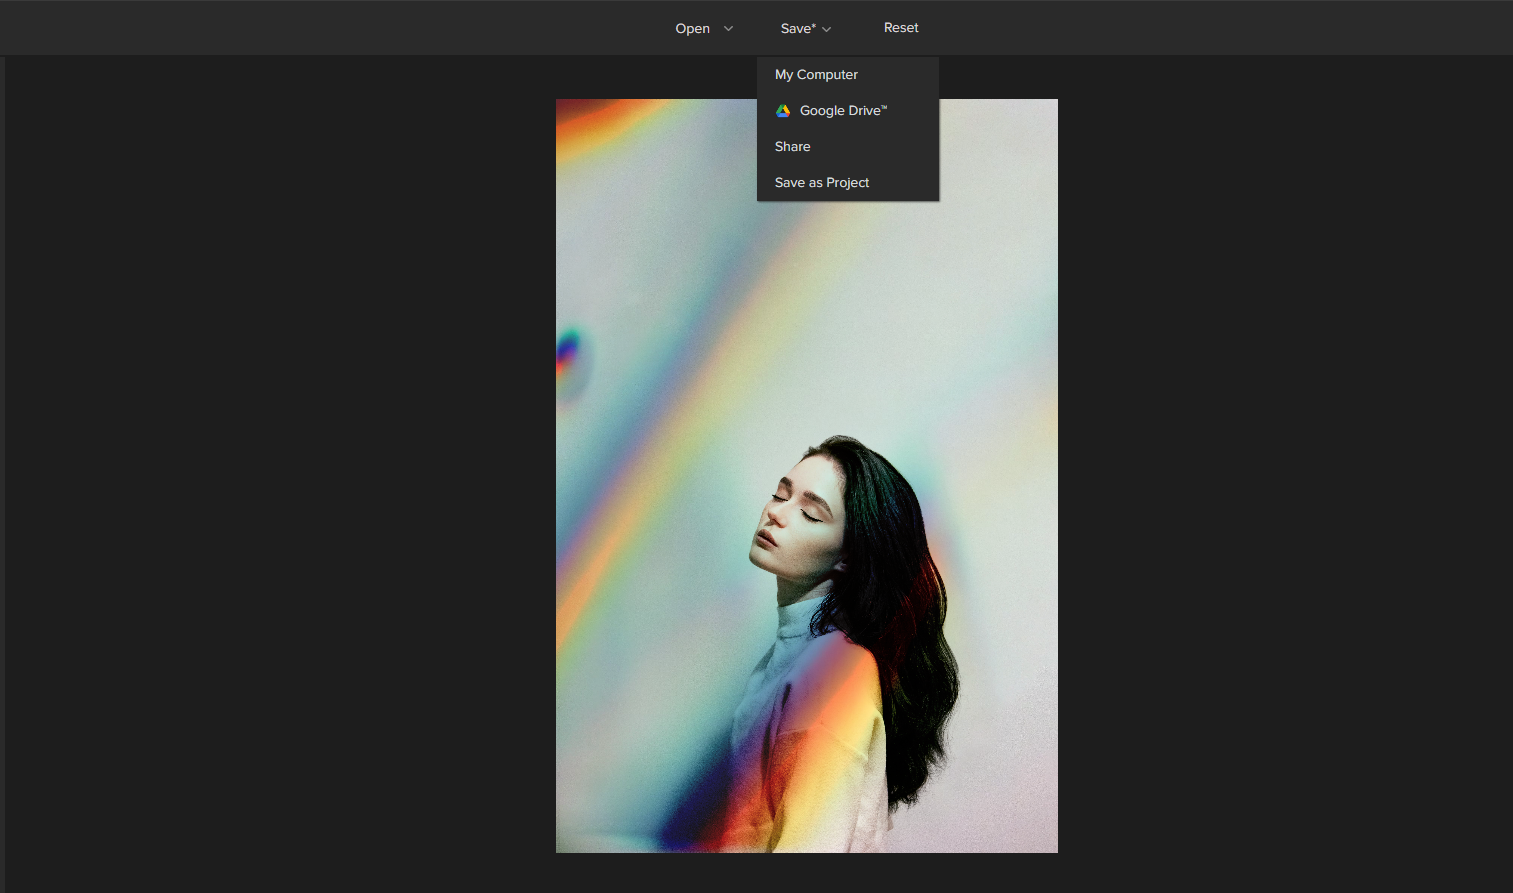
- My Computer: This will download the edited photo to your computer or laptop.
- Google Drive: This will save the edited photo to your Google Drive account.
- Share: This will give you a link that you can share with others so they can view or download the photo.
- Save as Project: This will save your edits as a project on Colorcinch, so you can come back and edit it later.
And that’s it! You’ve successfully added an Overlay effect to your photo using Colorcinch.
Use it anywhere you like – as your new Facebook profile picture, as an Instagram post, or even in a blog post or as inspiration for your videos. You can even print it out and frame it as a real piece of art!
FAQs
What are photo overlays?
Overlays are digital images that can be added to photos or videos to create a certain effect. In photography, overlays are often used to add textures, colors, or patterns to an image.
How can I add overlays to my photo for free?
There are a few ways to add aesthetic overlays to your photos for free. One way is to find free overlay images online and download them to your computer. However, this method can be time-consuming and you may not be able to find the exact overlay that you’re looking for.
Another way is to use a free online photo editor like Colorcinch. Colorcinch offers a wide range of overlays on the site that you can add to your photos with just a few clicks. Plus, it’s easy to use and you don’t need any prior editing experience.
How do you make a custom overlay?
You can make a custom overlay in Colorcinch by first choosing a base image, then adding your own personal touches with the Overlay tool.
Each Overlay effect has the “Settings” icon, under which you can adjust different elements of the overlay. For example, try different Blend modes to see how it changes the look of your photo, or use the Transparency slider to adjust the visibility of the effect.
You can also combine several types of overlays on Colorcinch by applying one effect, then another layer, and so on. This lets you create a truly unique look for your images.


