Shapes — such as a circle — can be a powerful tool that can really help take your creativity and designs to the next level.
In this article, I will show you how to create a circle image in 4 easy steps, as well as how to use some more advanced options to further customize your selection.
In addition, you can use your newly-created circle images to make awesome presentations on Graphue – a presentation template website.
To take it a step further, I’ll also provide a walk-through guide on how to use the circle shape from a graphic design point of view. (Creating a Business Card)
In this example, you’ll also be able to check out some really cool additional features that Colorcinch has to offer to help bring your designs to life!
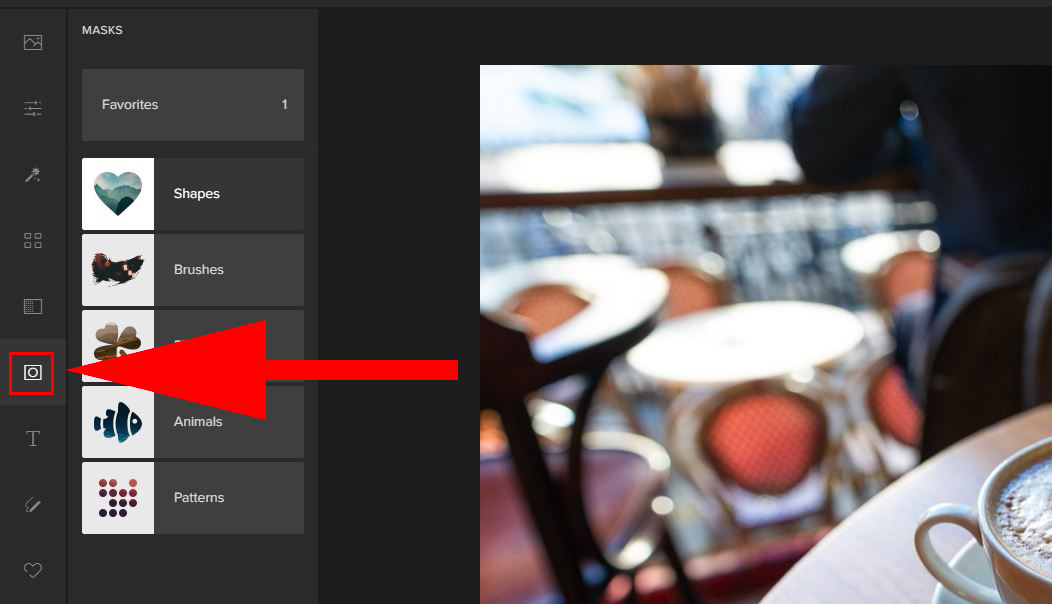
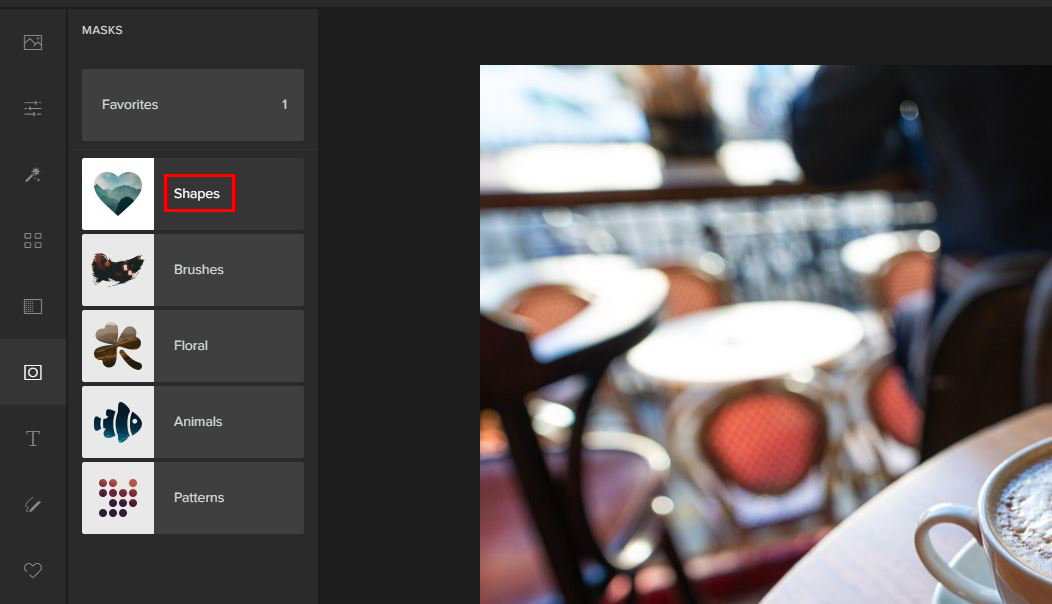
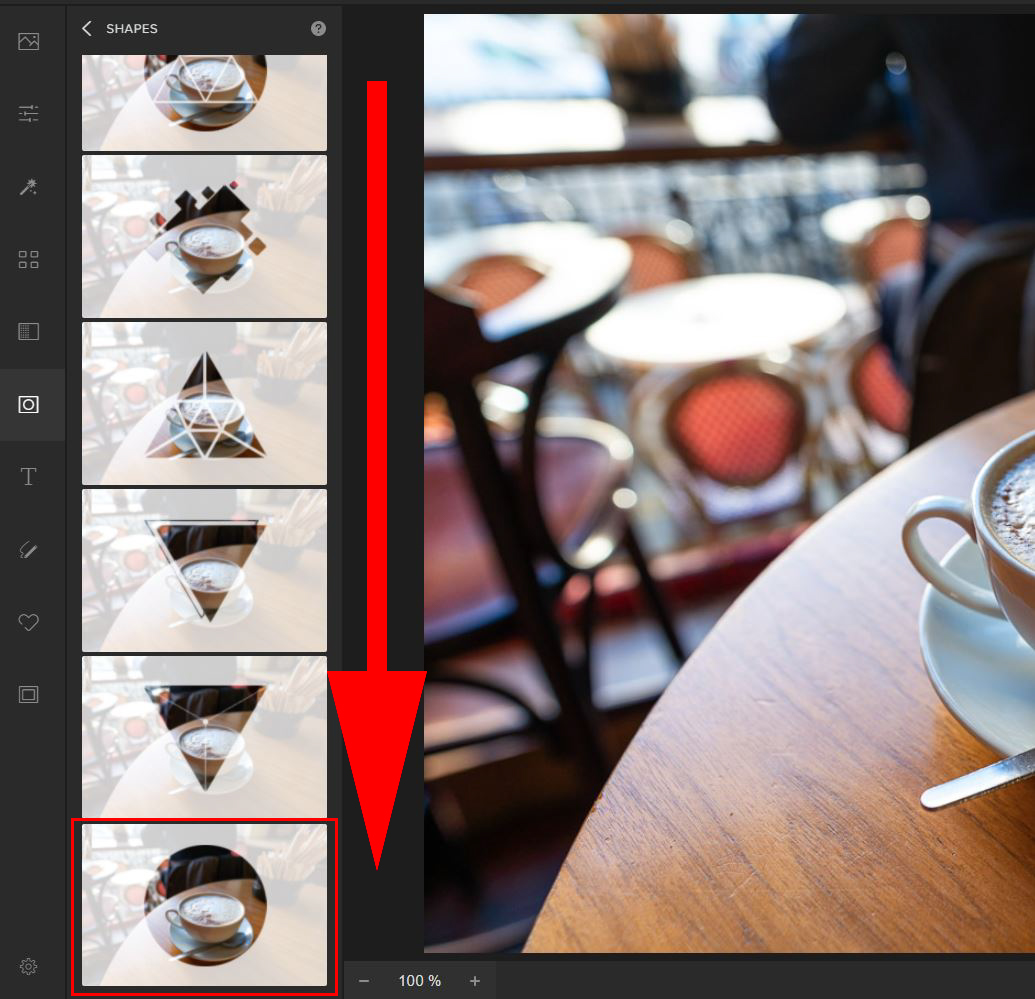
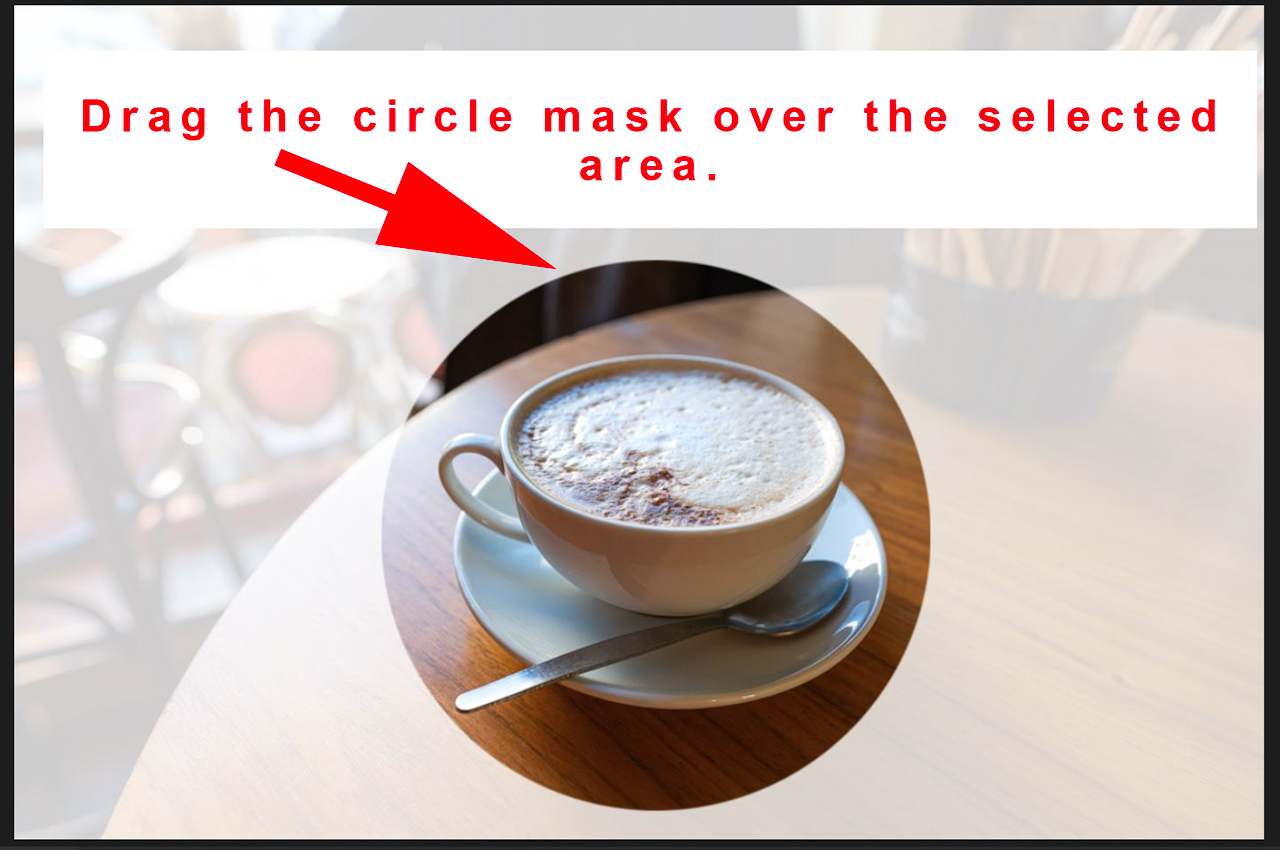
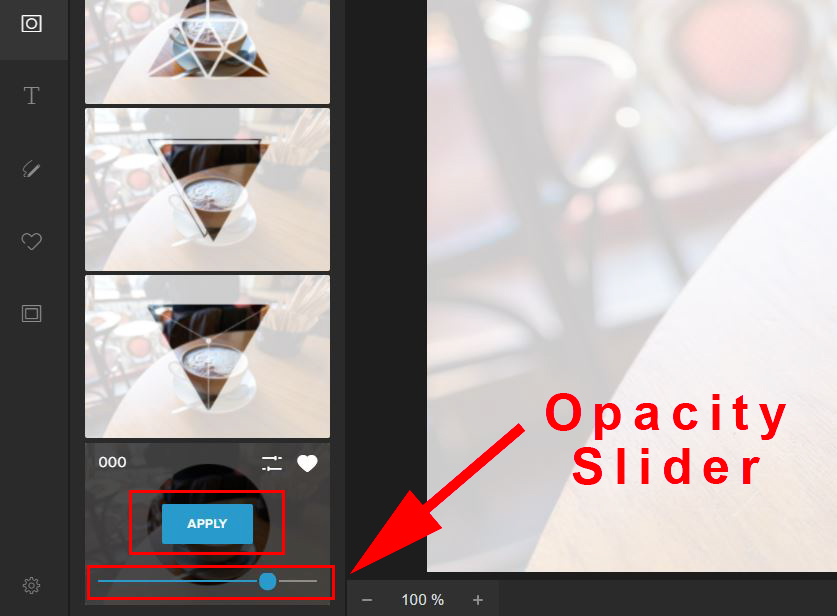
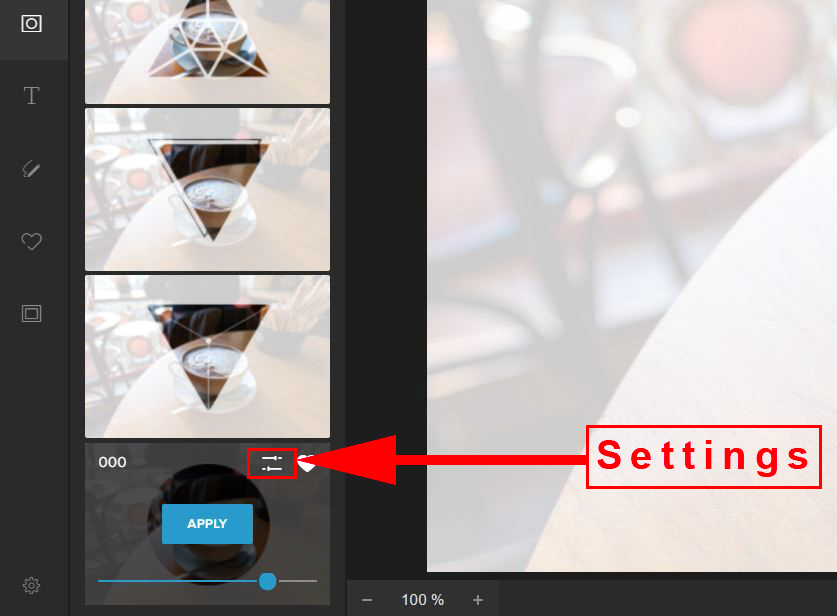
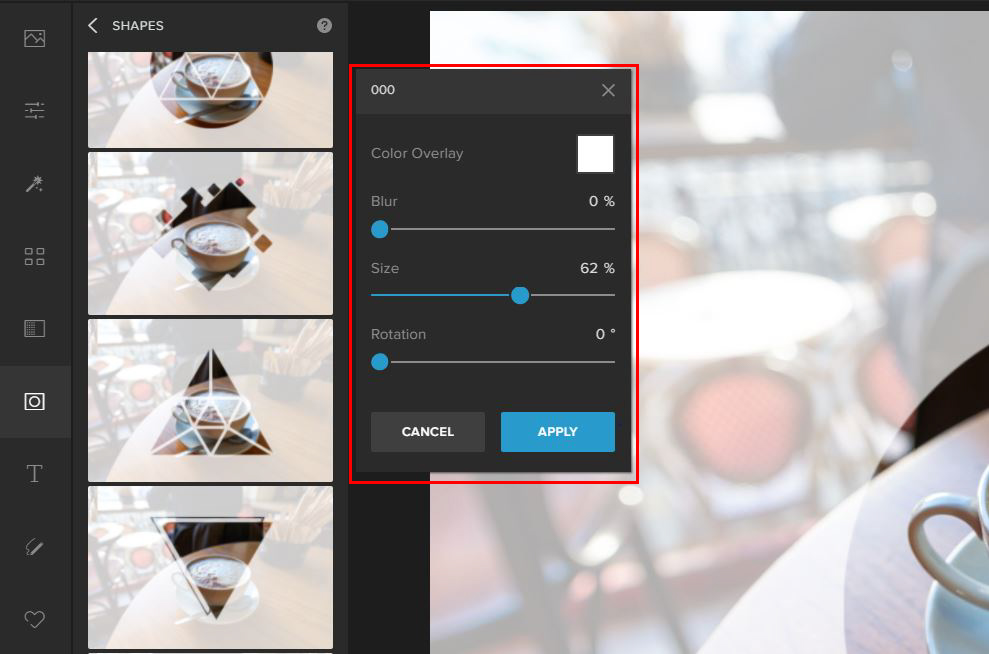
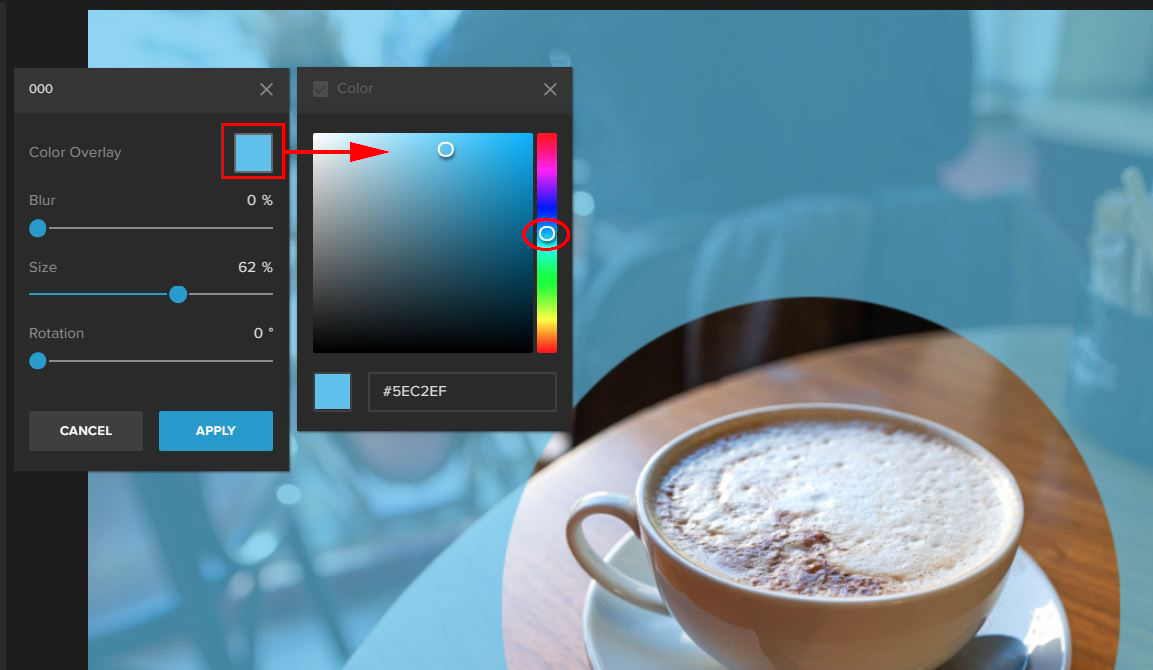
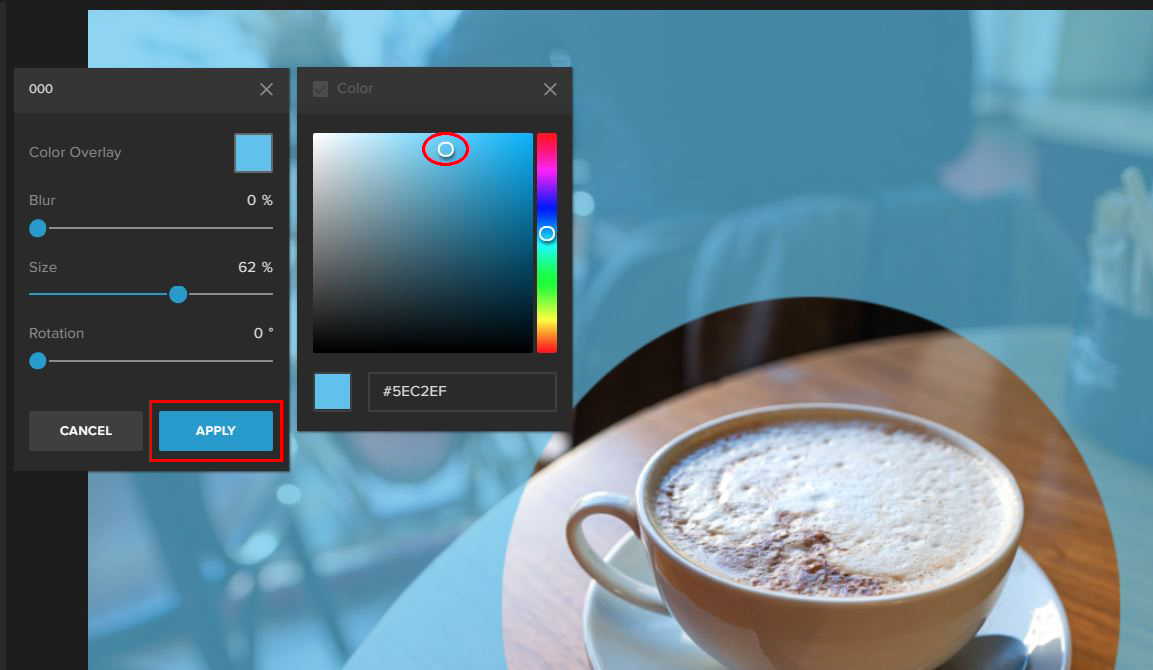
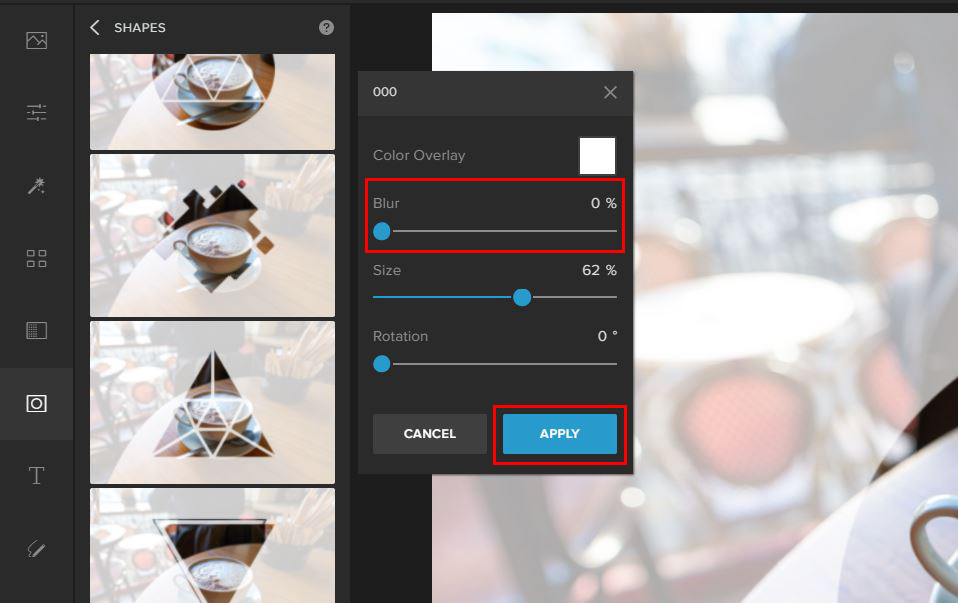
Step 1: Upload your image into Colorcinch. Step 2: Select Masks in the left-hand column. Step 3: Click on Shapes. Scroll down until you see the Circle Shape and click on it. Step 4: Using your mouse, drag the Circle Mask over the area which you would like included within the circle. From here you can adjust the Opacity slider and/or click the Apply button to save your changes! Boom! And just like that, you’re done! But hang on…we can do so much more! Check out the section below to further customize your selections, or learn how to save and export your image here! To adjust the size of the Circle Mask, as well as to change the background color, or even blur it, click on the Settings button. Under Settings, you will have a few extra options to choose from, including: Color Overlay (background color), Blur, Size, and Rotation. If you click the Color Picker next to Color Overlay, you can change the background color around your circle crop. Drag the Circle Selector (highlighted in the above image) up and down to change the hue/color. Once your color has been selected, you can make further changes to the color by moving the other Circle Selector. (See the image below) Make sure to click the Apply button to save your selection! If you would like to use a semi-transparent background and further blur it, you can easily do so by using the Blur Slider. You can see what the effect looks like below. (Blur is set to 0% and 100%)How to Create a Circle Image
Part 1: The Basics

Part 2: Additional Options and Customization
Color Overlay:
Blur:


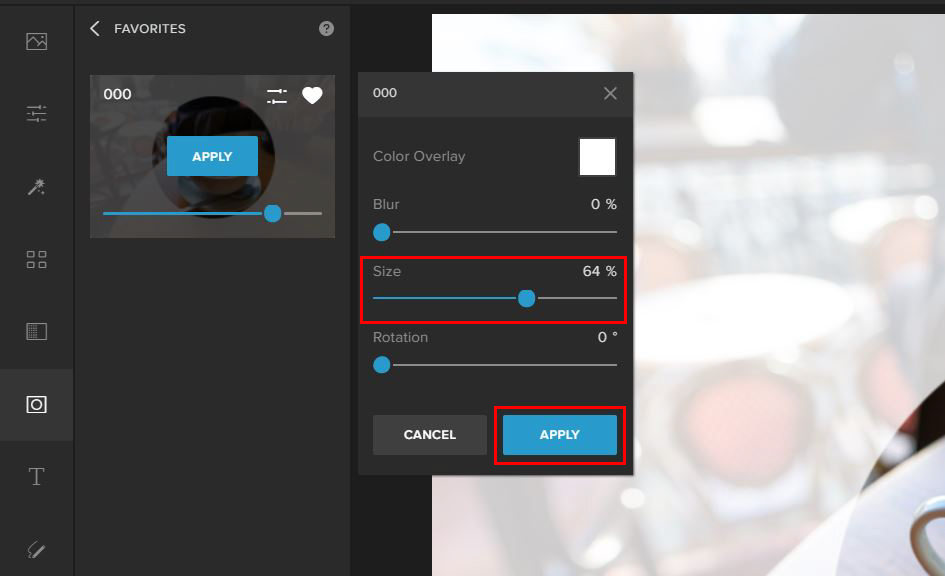
Size:
The most important slider of them all! You will find more often than not that you need to adjust this slider.
Simply increase or decrease the Size slider to fit your selection. If you need to reposition the mask after resizing, click on the mask and move it to your desired location.
So now that you have the tools to create a circle image, I’d like to show you how you can put your new skills to use!
In the next section, I’m going to create a business card using the circle crop. I’ll also be using some additional features in Colorcinch that can really help bring your designs to life!
Part 3: Putting it All Together – Using a Circle Image in Graphic Design
I’ve already uploaded my image into Colorcinch and the first two things to do are:
- Resize the Circle Mask and reposition it
- Set the background to be a solid color and change the color
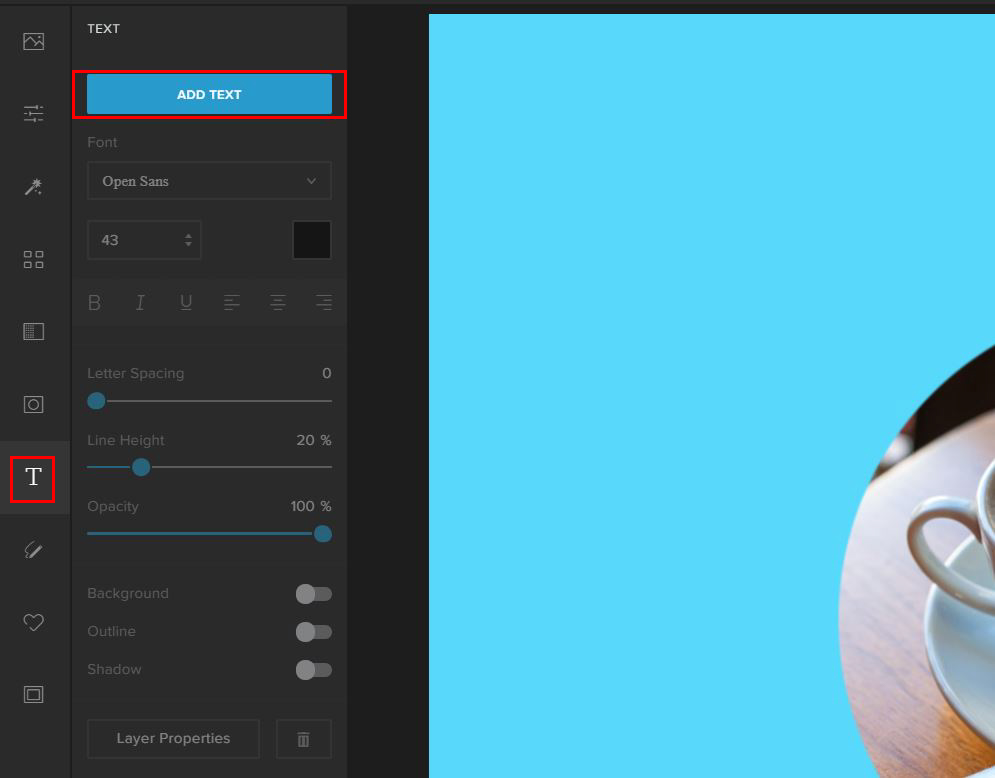
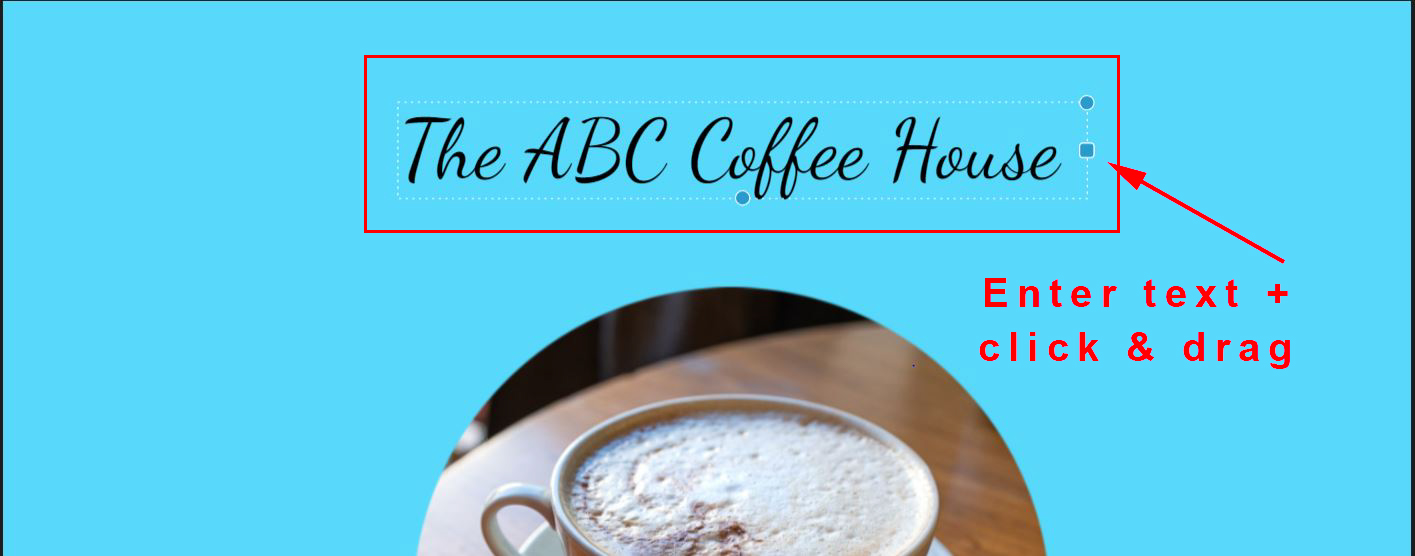
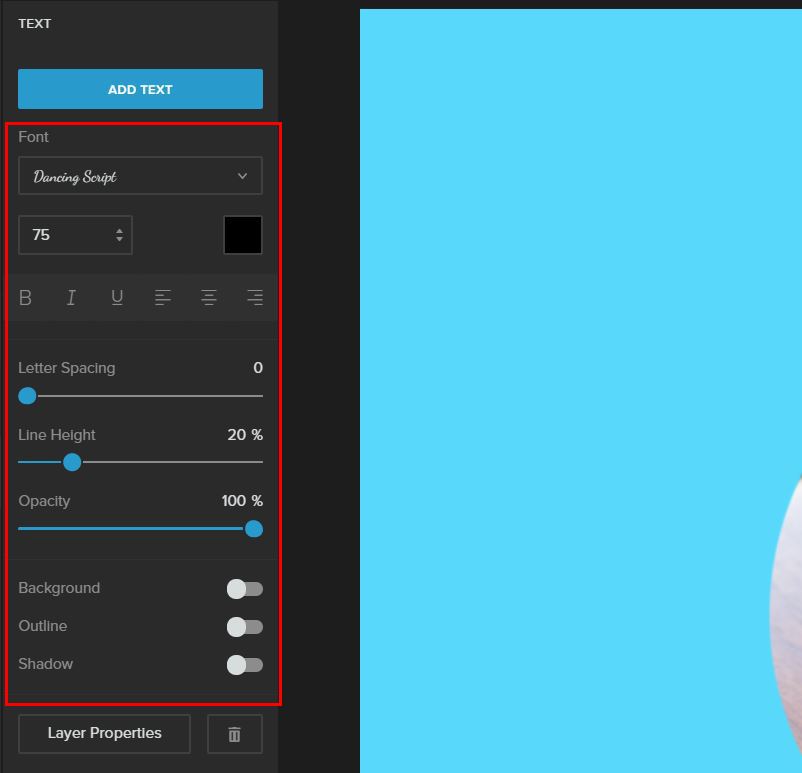
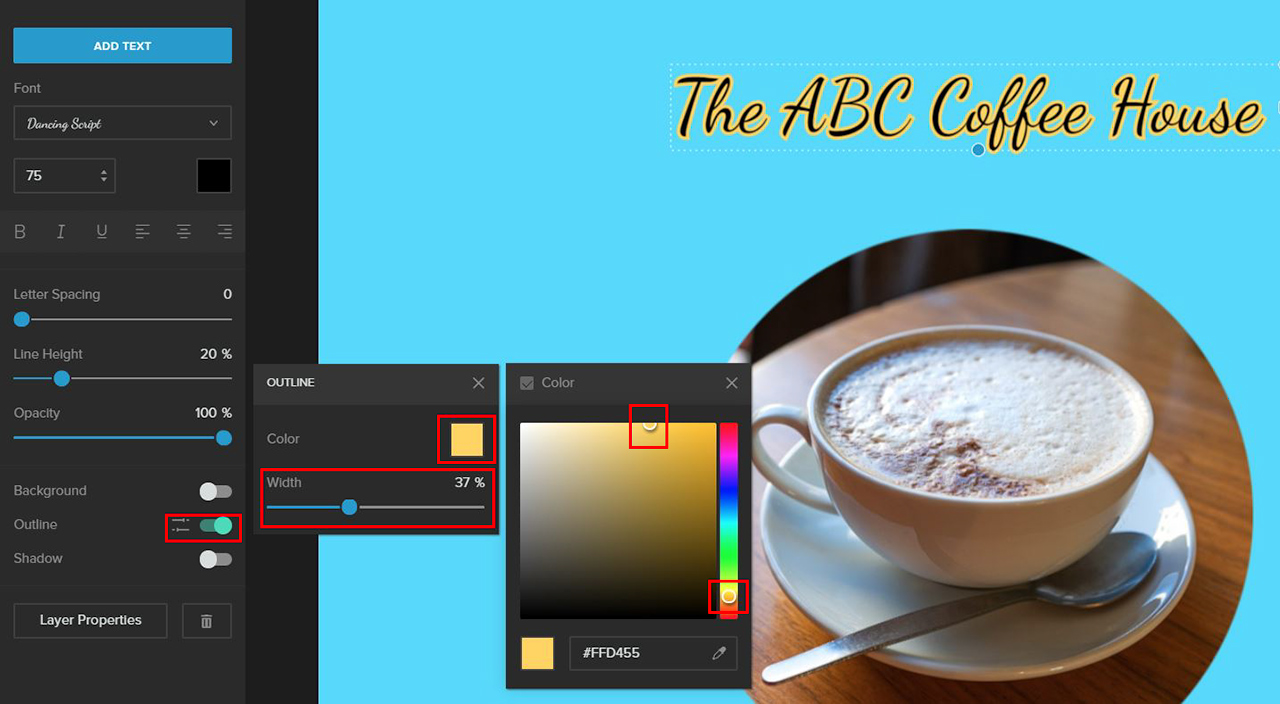
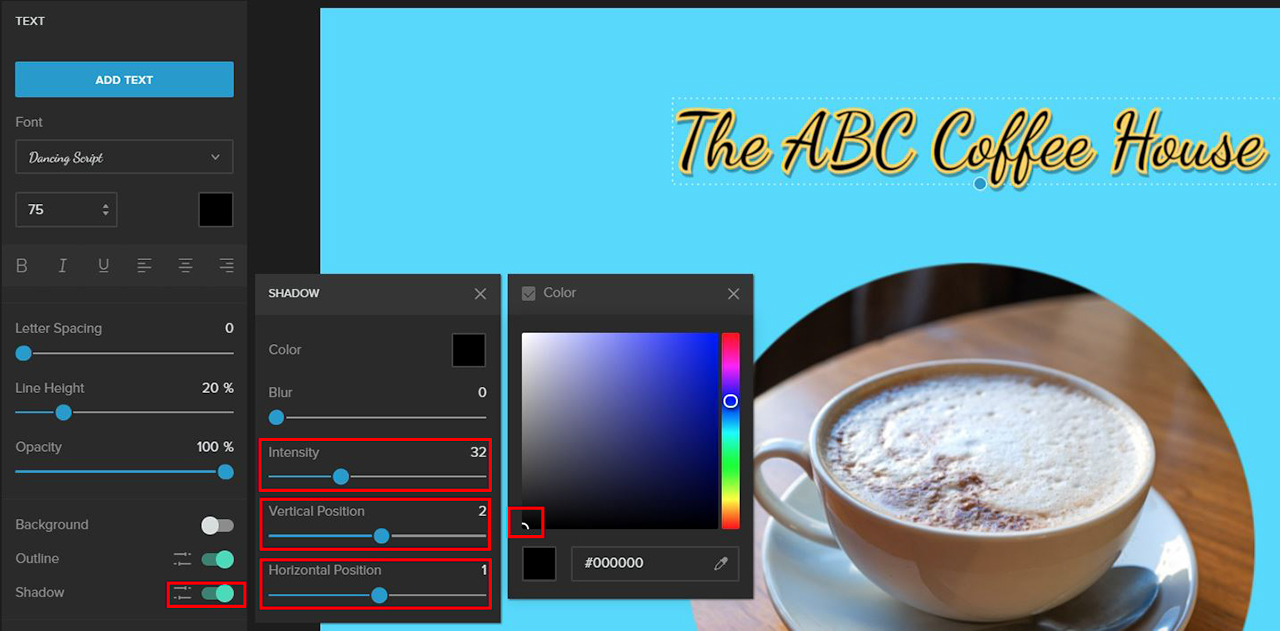
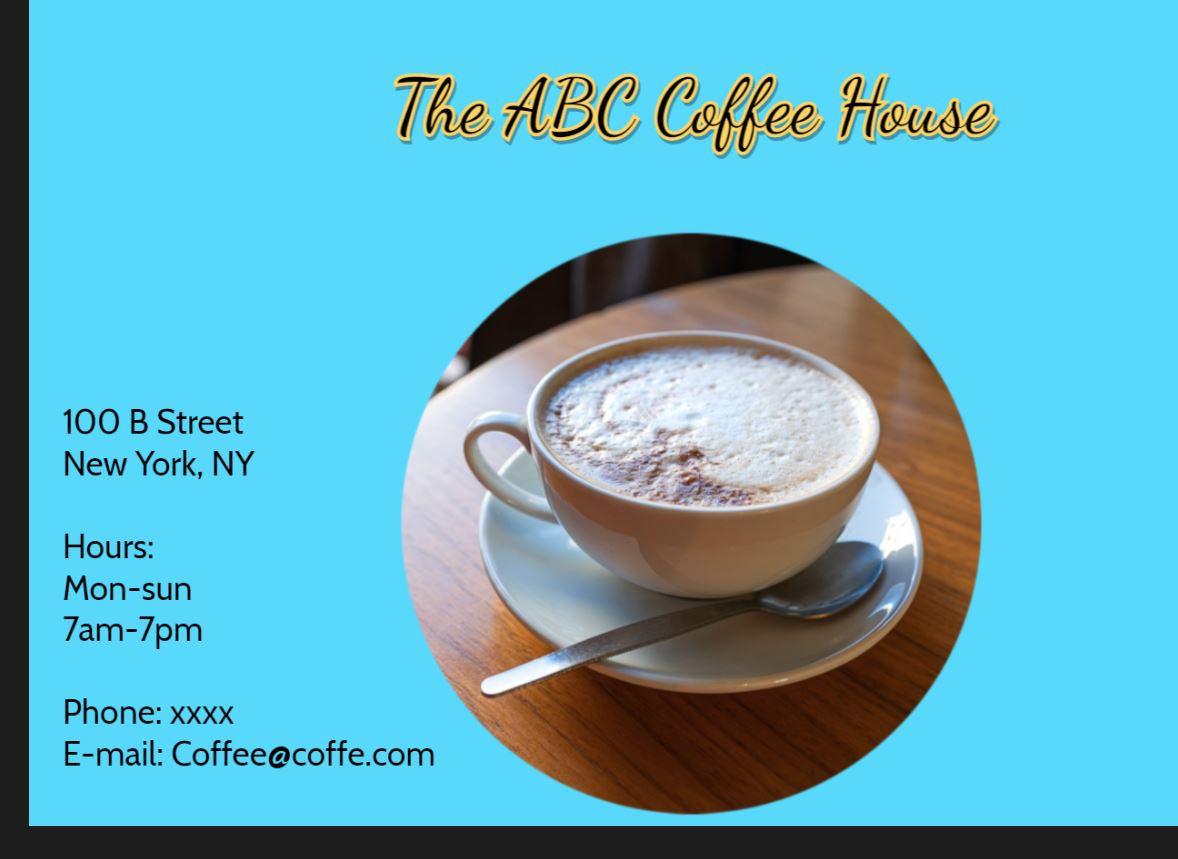
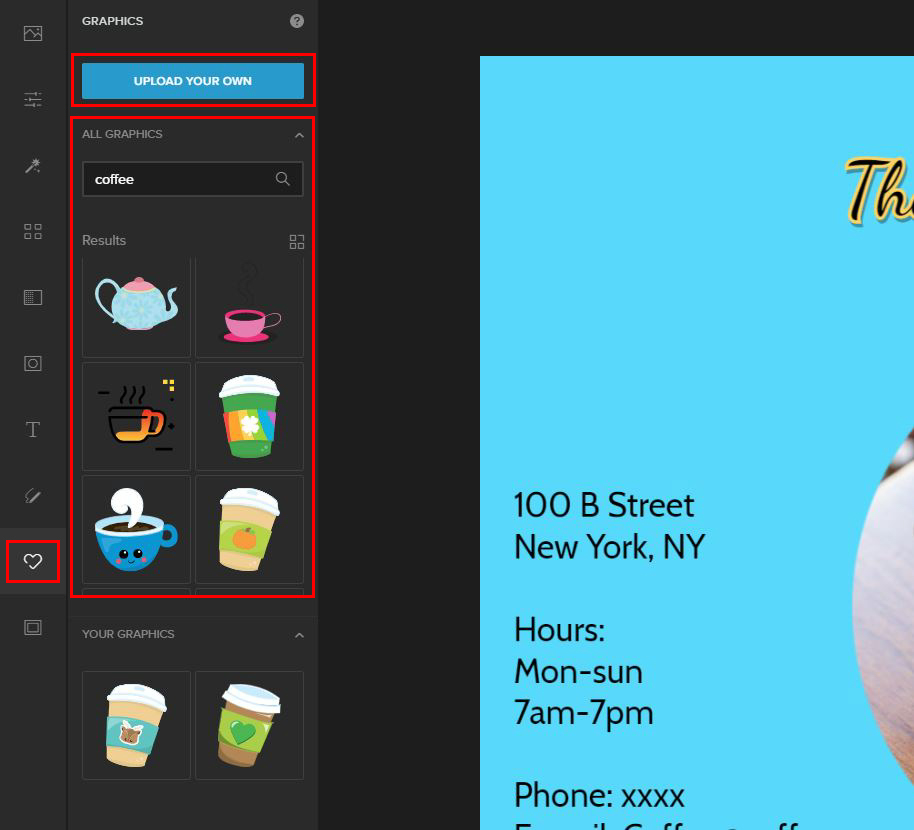
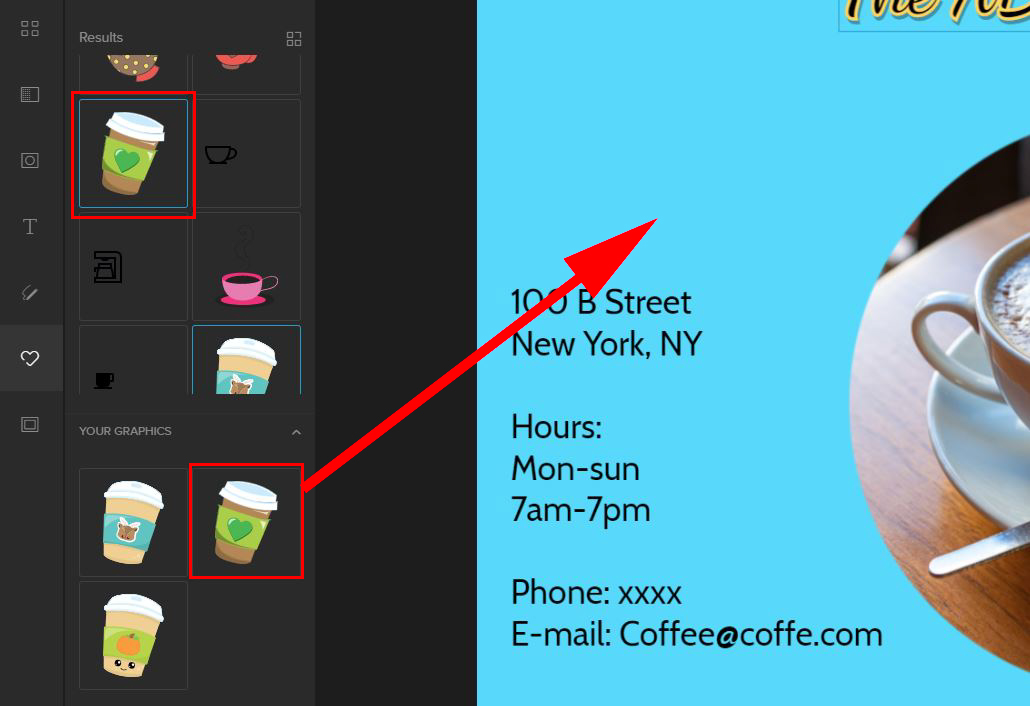
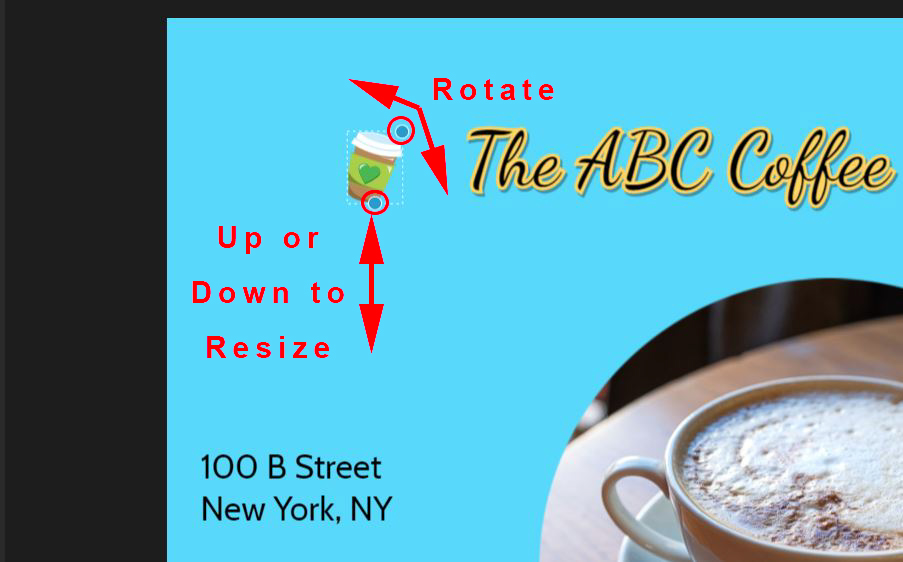
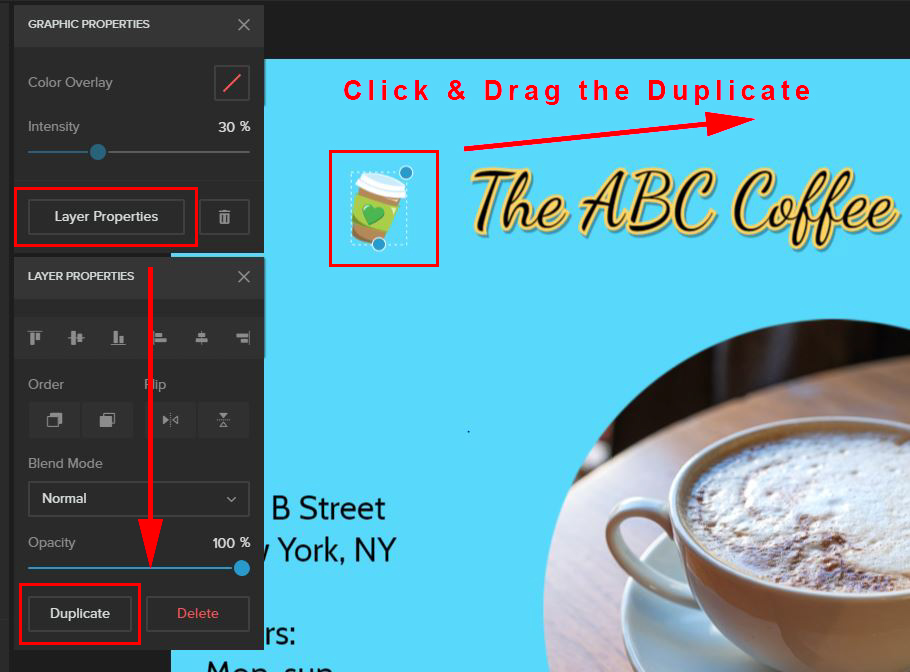
Next, I’d like to add some text to my business card. Click on the Text tab in the left-hand column, followed by the Add Text button. Once the Text Box appears, enter some text and drag it to the location you’d like. For this example, I’m the owner of a coffee house, so I’ll name it, “The ABC Coffee House”. In the text column, there are quite a few options to play around with, including: Front, Font Size, and Color. In addition, we have quite a few other powerful options to really make your text stand out! Below is a quick overview of the main text options. Keep in mind that the title is the first thing that people will see, so don’t be afraid to pull out all of the stops with the above tools! In my example, I used the “dancing script” Font with a Font Size of 75. I’ll keep the text color black. Now that I have my title text, I’d like to make it pop more. To do so, I’m going to use the Outline and Shadow features! Next, I added some additional text for my coffee business using the same steps as above. The only difference here is that I changed the Font to “cabin” and set the Font Size to 43. Now to add some final touches! In this section, I’m going to Introduce a few graphic elements to add a little more interest to my design. Firstly, you’ll need to click on the Graphics tab in the left-hand column. Here you will have two options: Since my theme here is Coffee, all I have to do is type “coffee” in the search bar and select the graphics that appeal to me. To select a graphic, click on it once, and it will appear in the Your Graphics section. From the Your Graphics section, drag the icon onto your design and move it to your desired location. You can also easily resize and rotate your graphics. To quickly duplicate a graphic, click once on it, select Layer Properties, followed by Duplicate. Next, click and drag the duplicate graphic to its new location. Now, I could finish here, but I’d like to add just one more finishing touch using the steps above! Below I added another graphic from our wide range of existing graphics, which accentuates my lovely circle based image! As you can see, the options are endless, so let your imagination run wild! Well, that’s it for this tutorial, but the good news is, we have plenty more tips and tricks on the way! Stay tuned and we’ll see you in the next article!Adding Text:
Outline Settings:
Shadows Settings:
Adding Graphics:


Conclusion:
