Have you ever used a character maker to create an avatar online?
If you’d like to try, then you’ve come to the right place. We’re going to take a look at making avatars and characters in this handy tutorial, and we’ll give you the lowdown on the subject, including:
- Why it’s a good idea to create a virtual version of yourself
- A step-by-step guide on how to use a free online character maker from start to your finished avatar
- How to save your avatar in different sizes and upload it to social media and Gravatar
What’s the Big Deal About Avatars Anyway?
“Aren’t avatars kind of old-fashioned now?”
I hear you, but the answer is that avatars and characters are very much alive and kicking!
Facebook’s avatar maker provided people with a bit of fun and distraction earlier this year, and you couldn’t go on your feed without seeing yet another one of your friends as an anime character!
Character makers aren’t just for kids. There are plenty of good reasons for you to use an avatar or character to represent you online, including:
- Safety – not everyone wants their photo out on the internet
- Personal branding with a little anonymity
- You’re camera shy
- It’s fun
- You can go for a different look and be as serious or as silly as you like!
How to use an Online Character Maker
Ok, so hopefully you’ve decided to have a go at creating a character online. Now we’re going to get to the fun stuff and actually use an avatar maker.
I’ll walk you through the steps, and best of all, it’s free to use so you don’t stand to lose anything if you don’t like your character.
There’s no image editing of an actual photo involved, so the steps are simple to follow.
If you do want to edit your avatar further once you have downloaded and saved it you can use a free image editor like Colorcinch to add some extra touches – like, do you want rounded edges on your avatar, or fancy adding some falling snow around your character?
Hey, you’ve got a blank canvas, so let your imagination roll!
Step 1: Open the character maker
Click here for the free online avatar maker
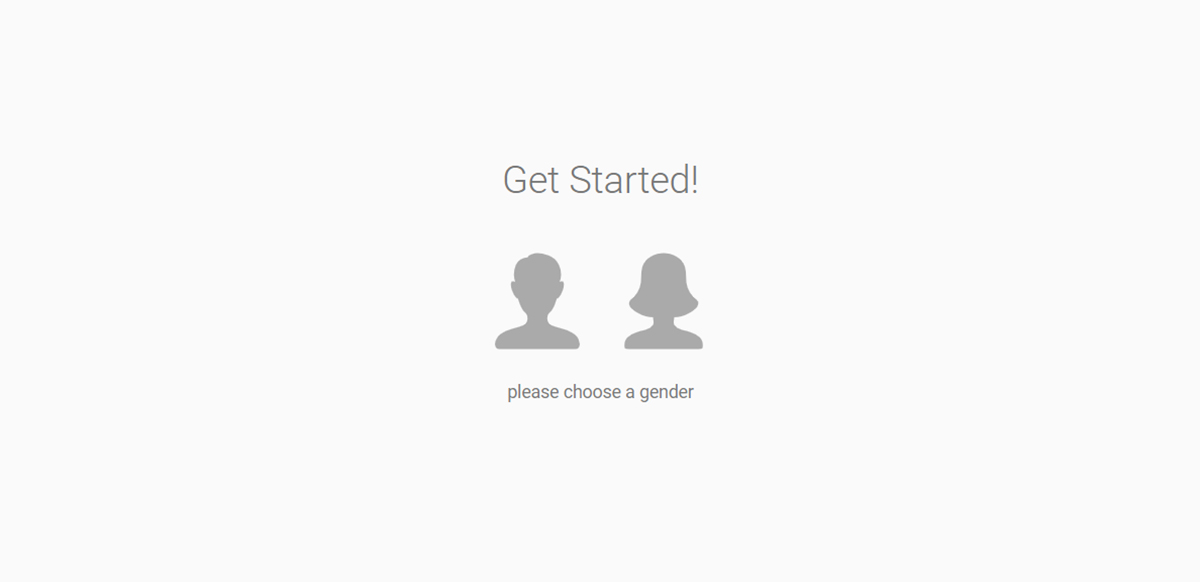
Step 2: Choose gender
Go to the Get Started panel and choose your gender:
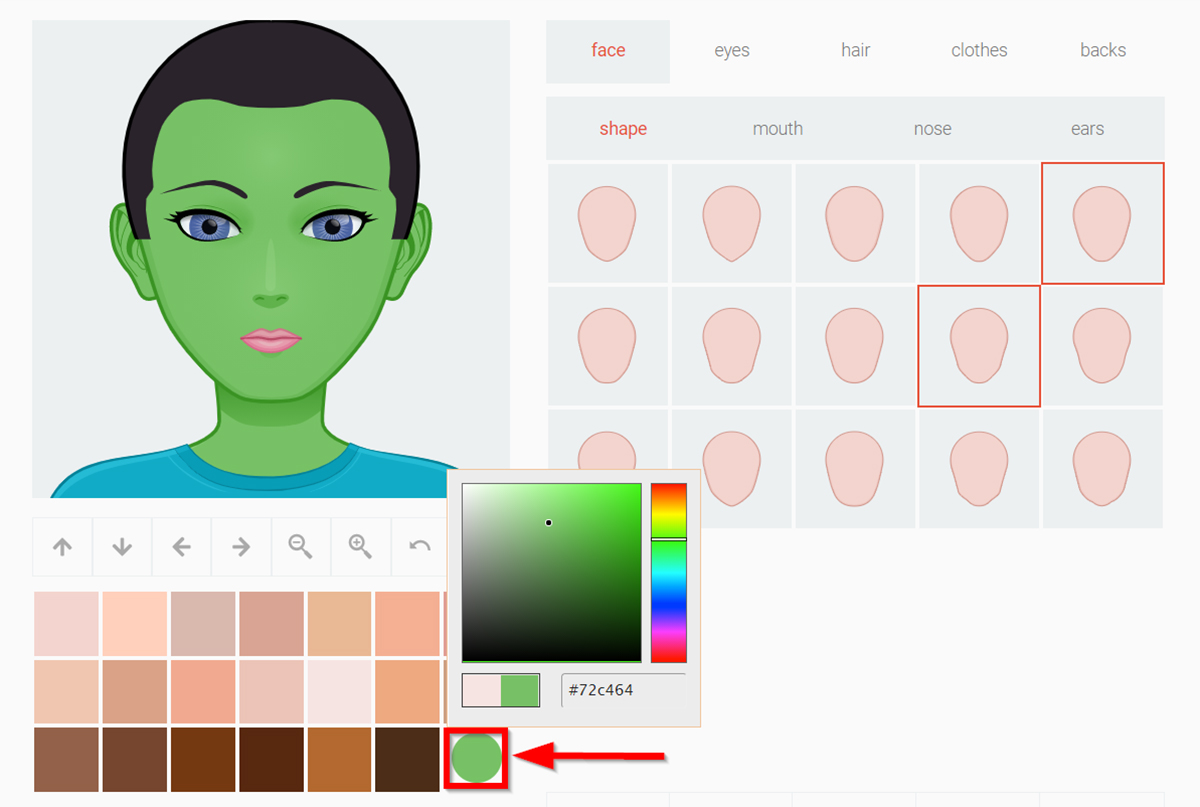
Step 3: Choose face shape and skin color
The character maker will open up to the Face module:
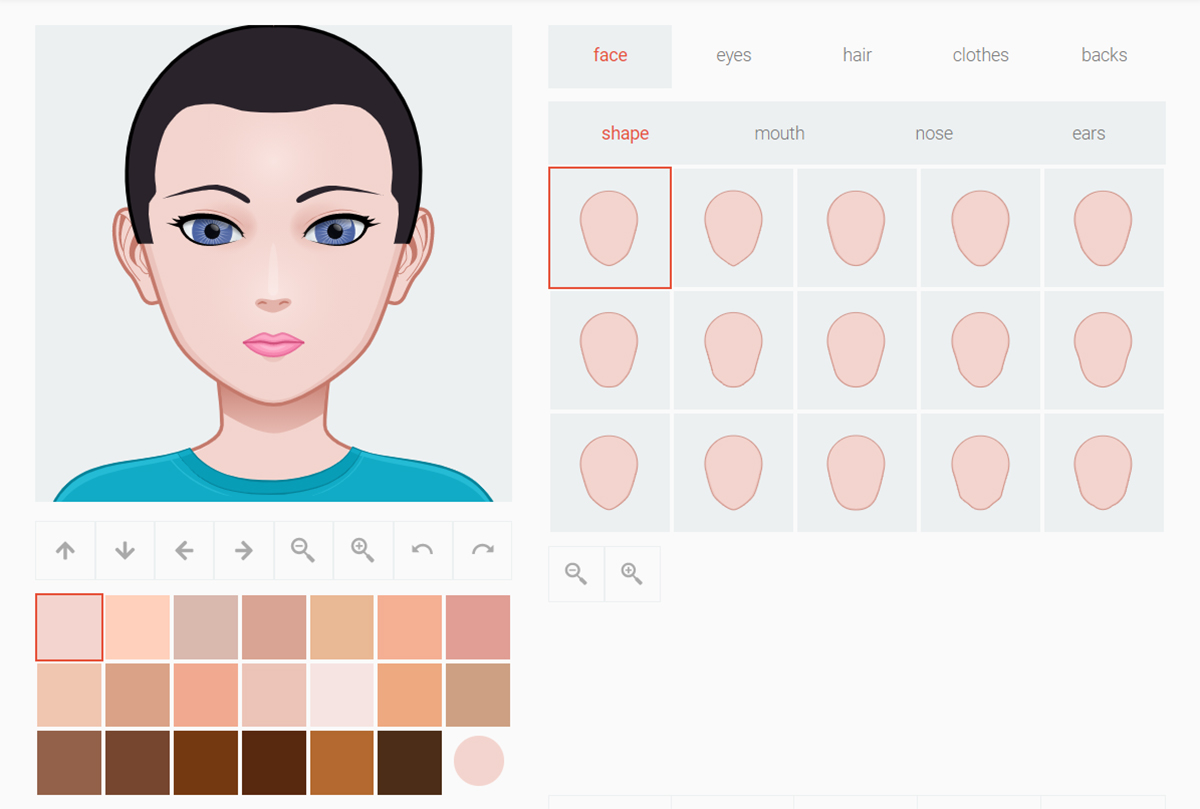
Here you will find a selection of face shapes and skin tones to choose from.
Try different ones out to see which one you prefer.
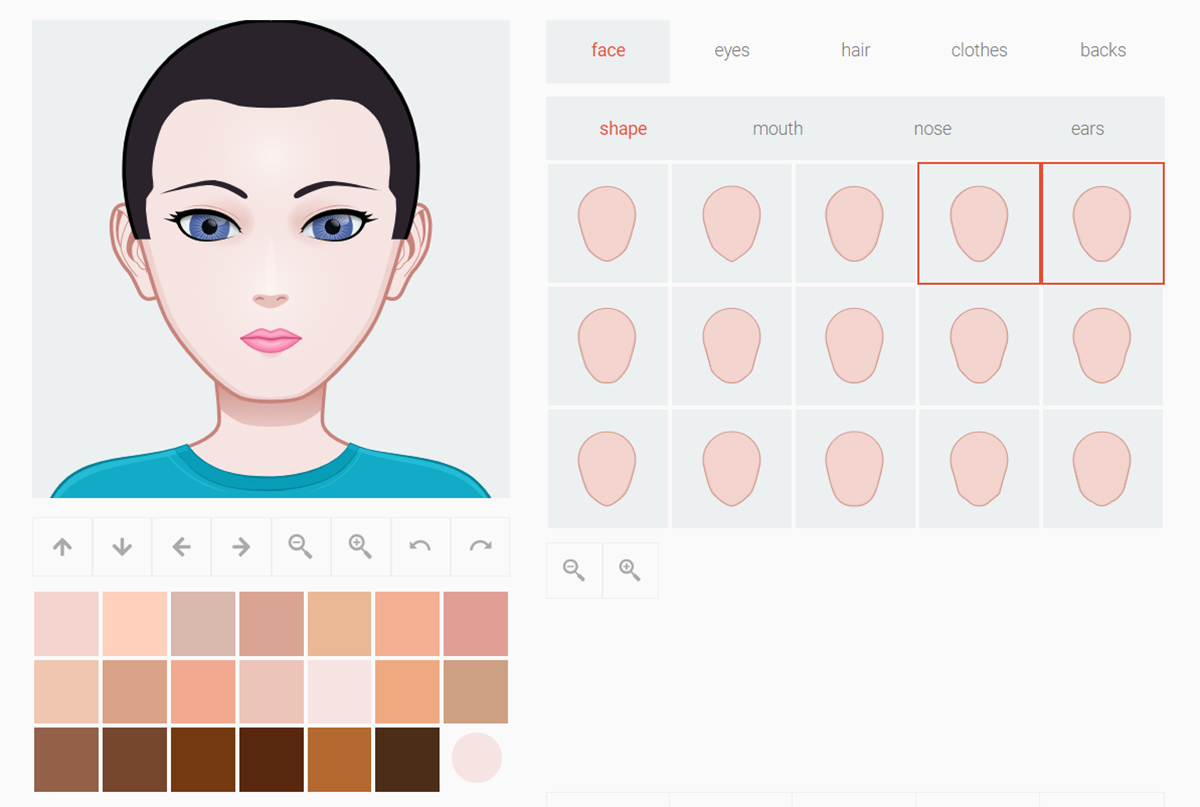
If you can’t find the exact skin tone you want, you can customize it by clicking on the circle at the end of the square skin color blocks.
A color editor will open up in a small window, allowing you to choose the right color:
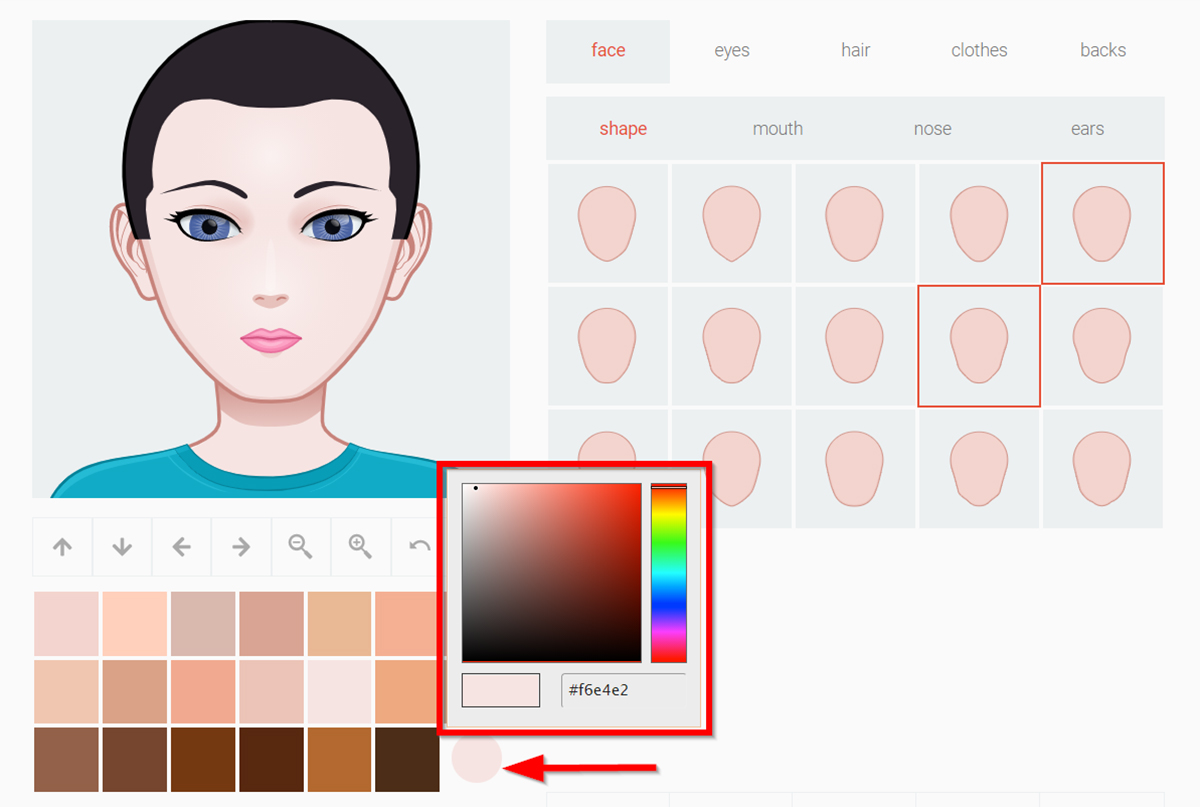
To change the color to a custom choice, click on the grab the handle at the top of the color range window on the right-hand side and drag it down to the hue you want.
I’ve chosen Incredible Hulk green for this step just to show you what’s possible! My actual avatar is going to be closer to my own skin tone.
To fine-tune the actual shade, click on the small black dot in the square window and pull it around the square window to get the shade you want:
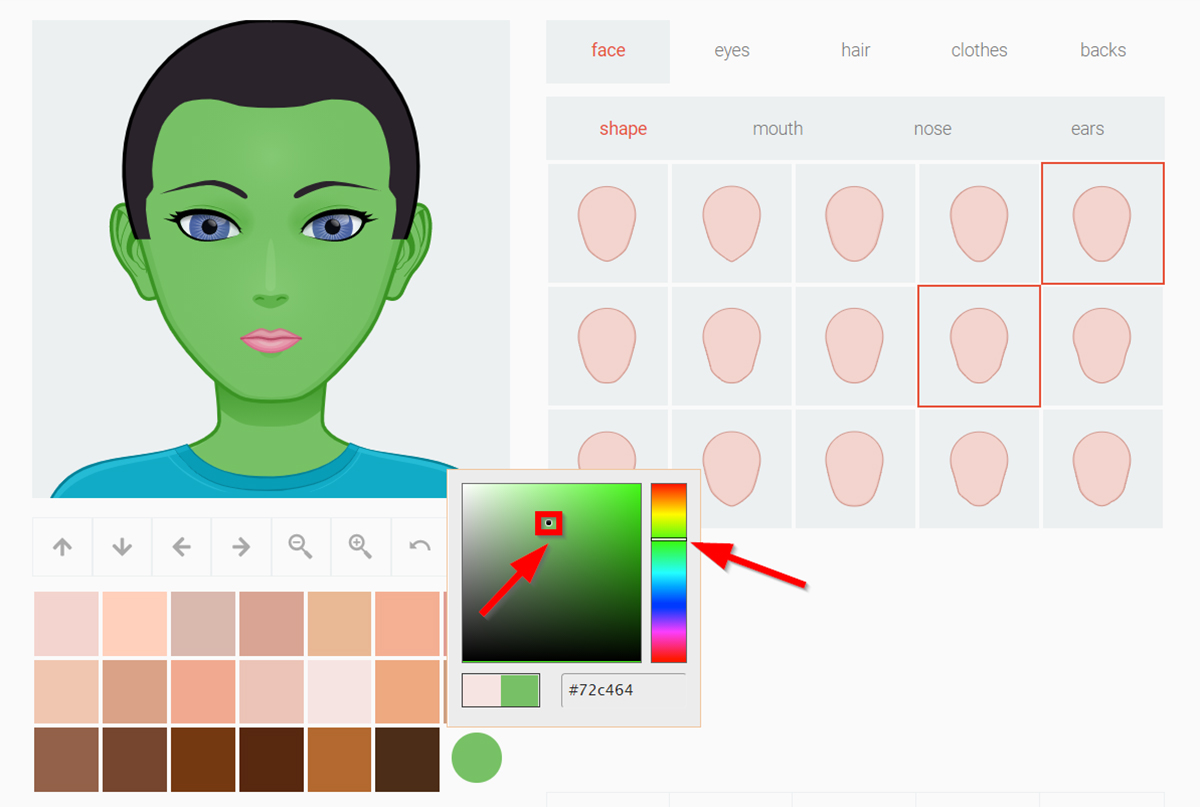
When you are done, click the circle to apply to the image:
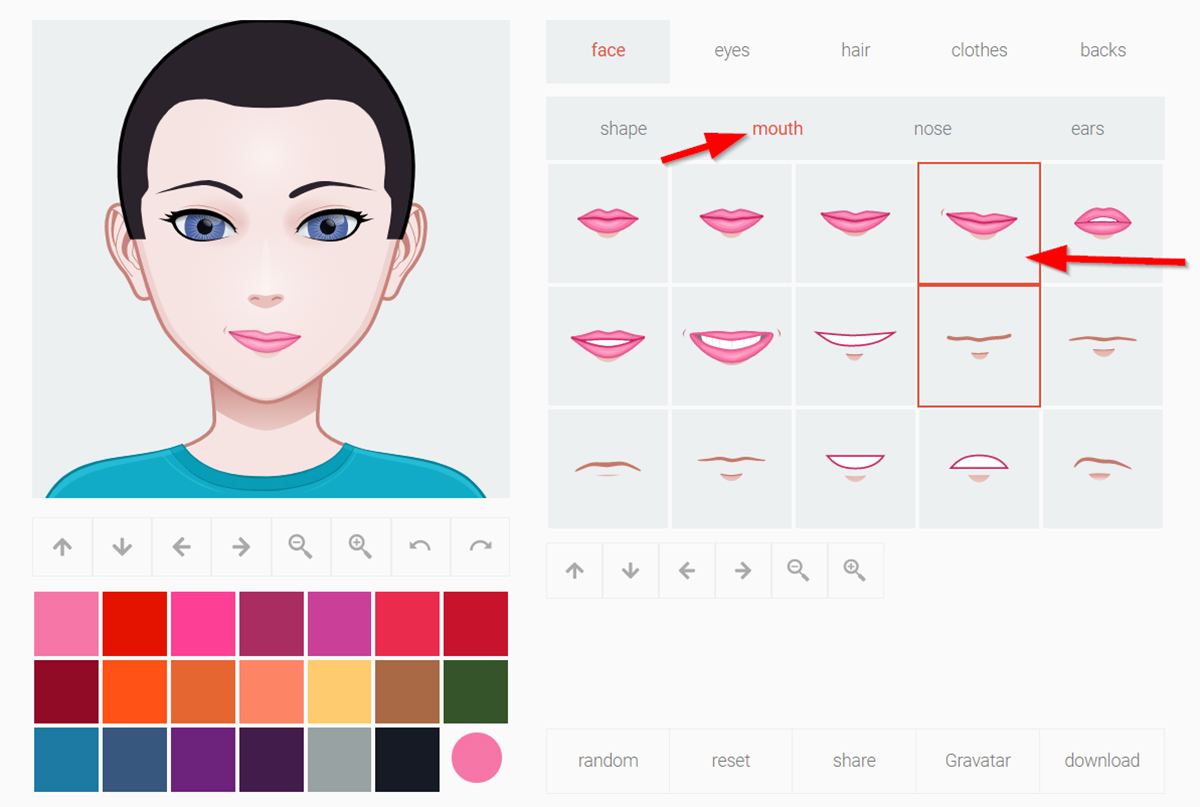
Step 4: Choose a mouth shape
Click on Mouth (next to Shape) and decide what mouth shape and color you’d like:
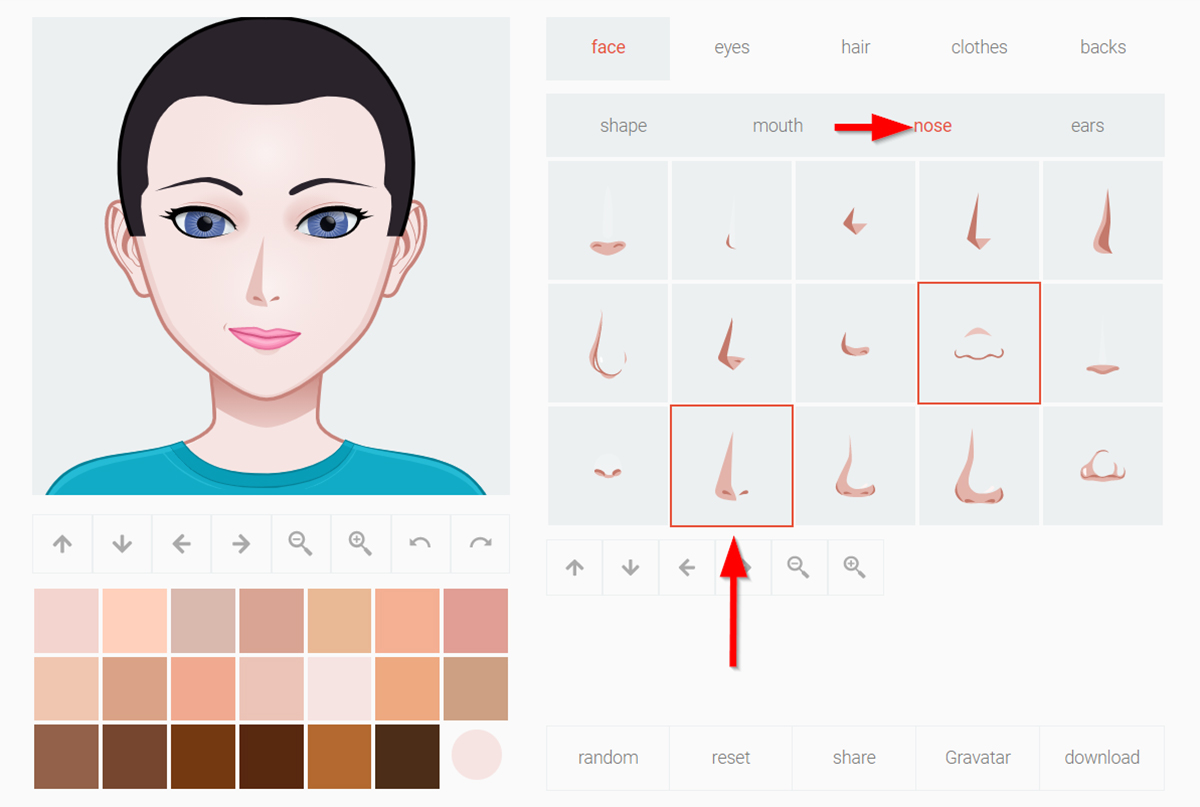
Step 5: Nose
Click on Nose, and decide what you want your schnozz to look like. Small and dainty, or big and bold – it’s your choice!
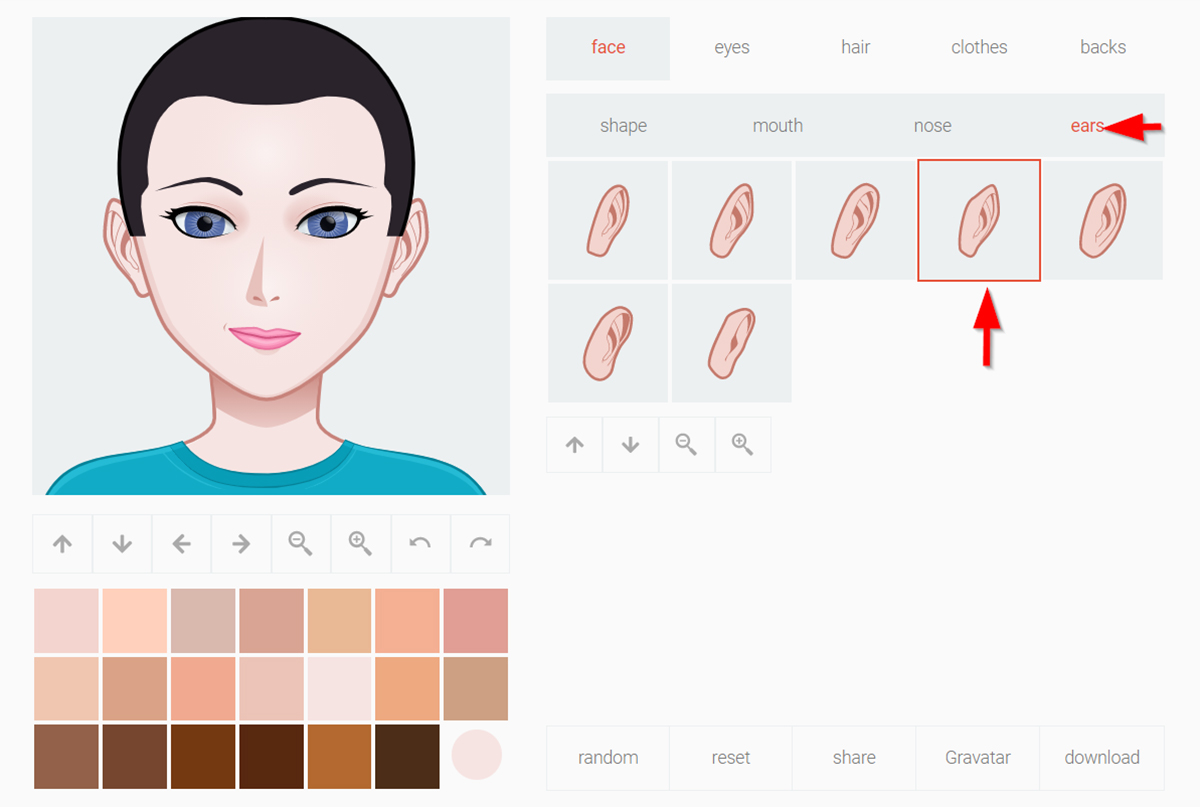
Step 6: Ears
Move along to Ears, and follow the same procedure:
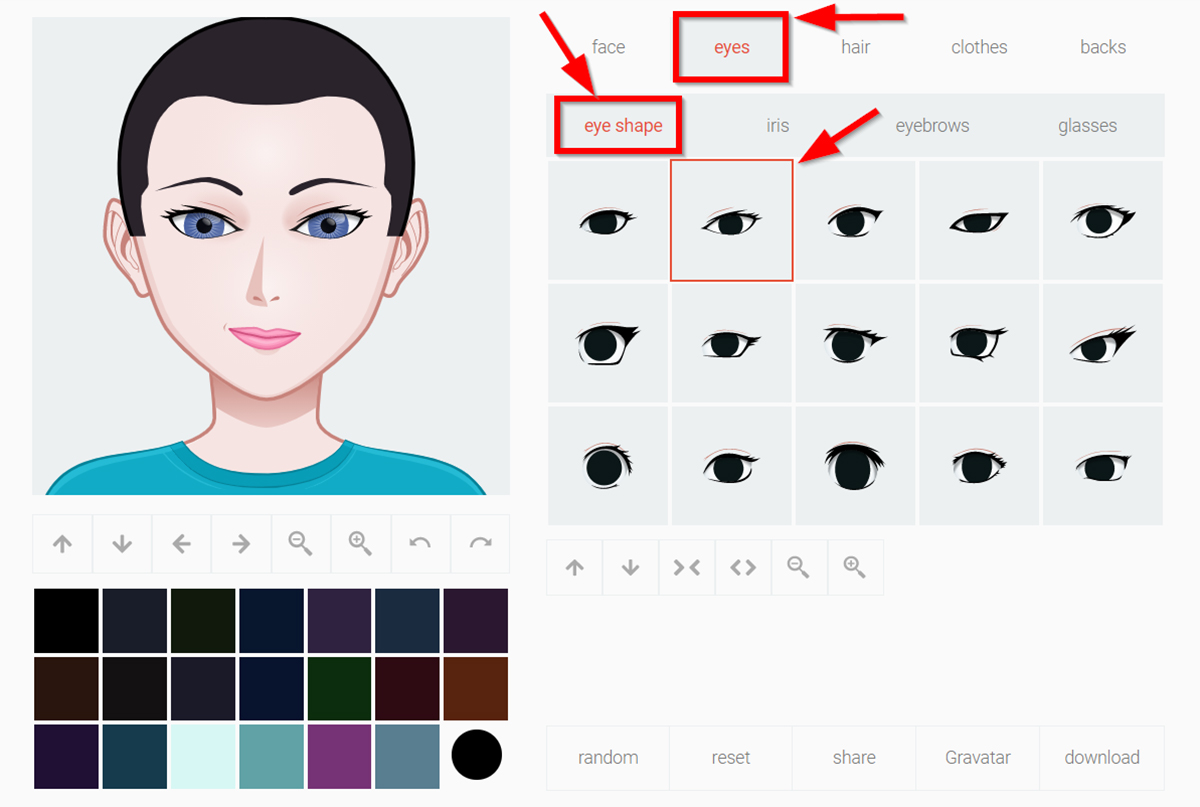
Step 7: Eyes
Continue along the top menu to Eyes. The sub-menu will start with Eye Shape, so go to the choices and pick your peepers:
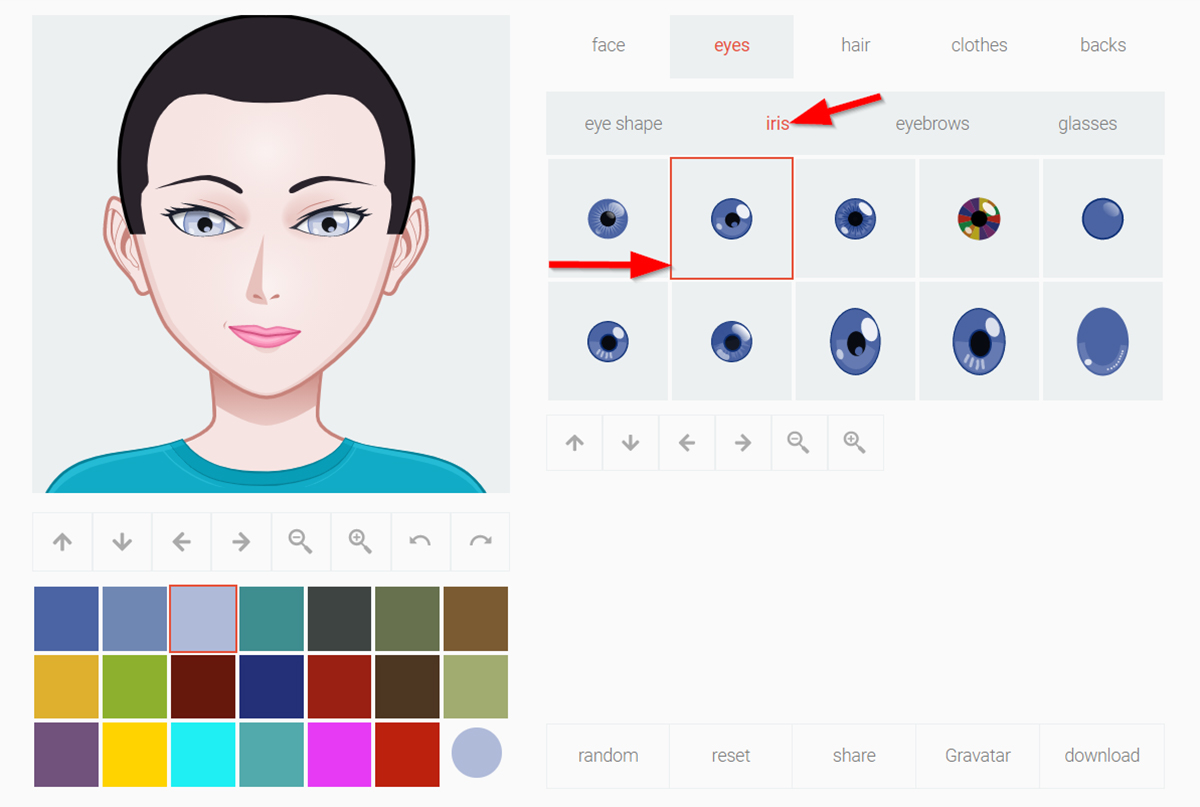
Step 8: Iris shape and color
Next along the sub-menu is Iris.
Have lots of fun here by giving yourself huge anime-style irises or stay subtle.
You can also change your iris color from this page by going down to the choices at the bottom and clicking on them or making a custom eye color as you could for skin tone:
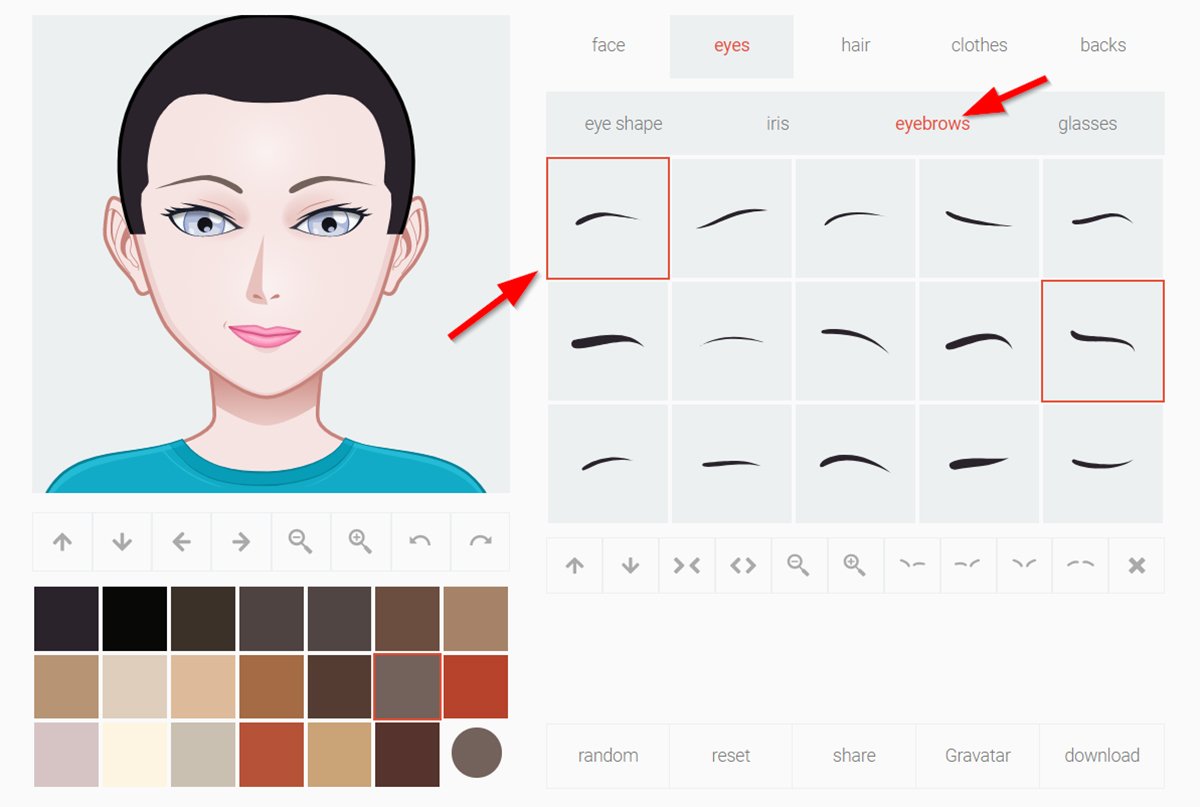
Step 9: Eyebrow shape and color
Click on the Eyebrow sub-menu, and choose your brow shape and color. Go full-on evil villain or glam celebrity here:
Step 10: Glasses
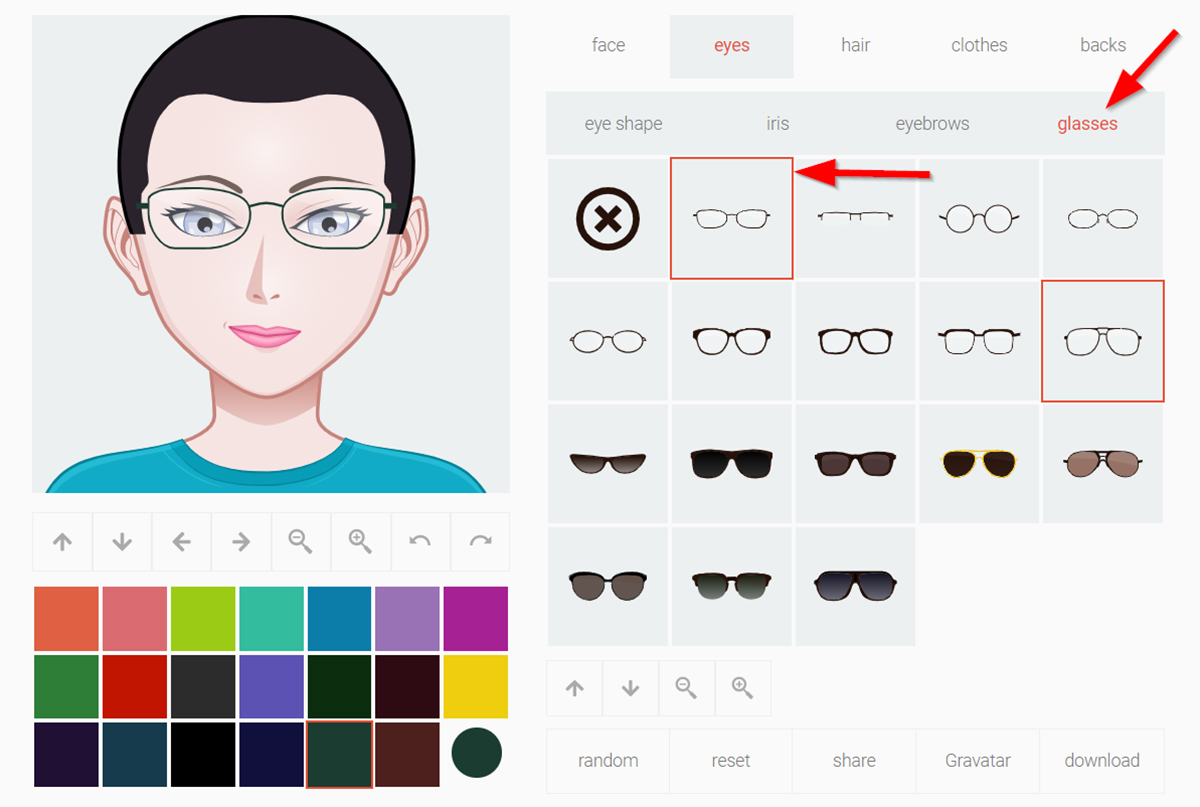
Now you can add your glasses style, from academic-looking to some cool shades. Change the frame color if you wish as well. Or click the X if you don’t want any glasses:
Step 11: Hairstyle and color
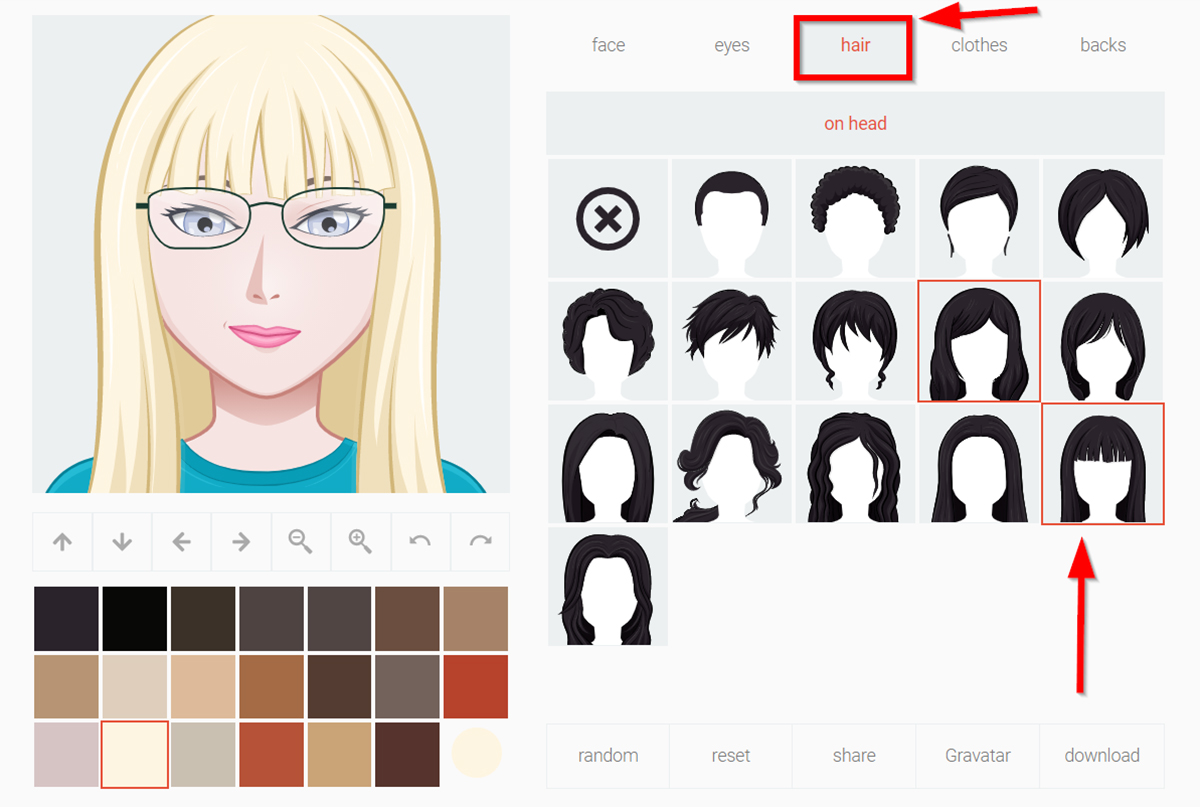
Here, you get to be your own hairstylist. Go up to the main menu, and click on Hair. Choose from a range of styles suited to your gender, and add the color you want your locks to be by going down to the color swatches as you did before:
Step 12: Clothes
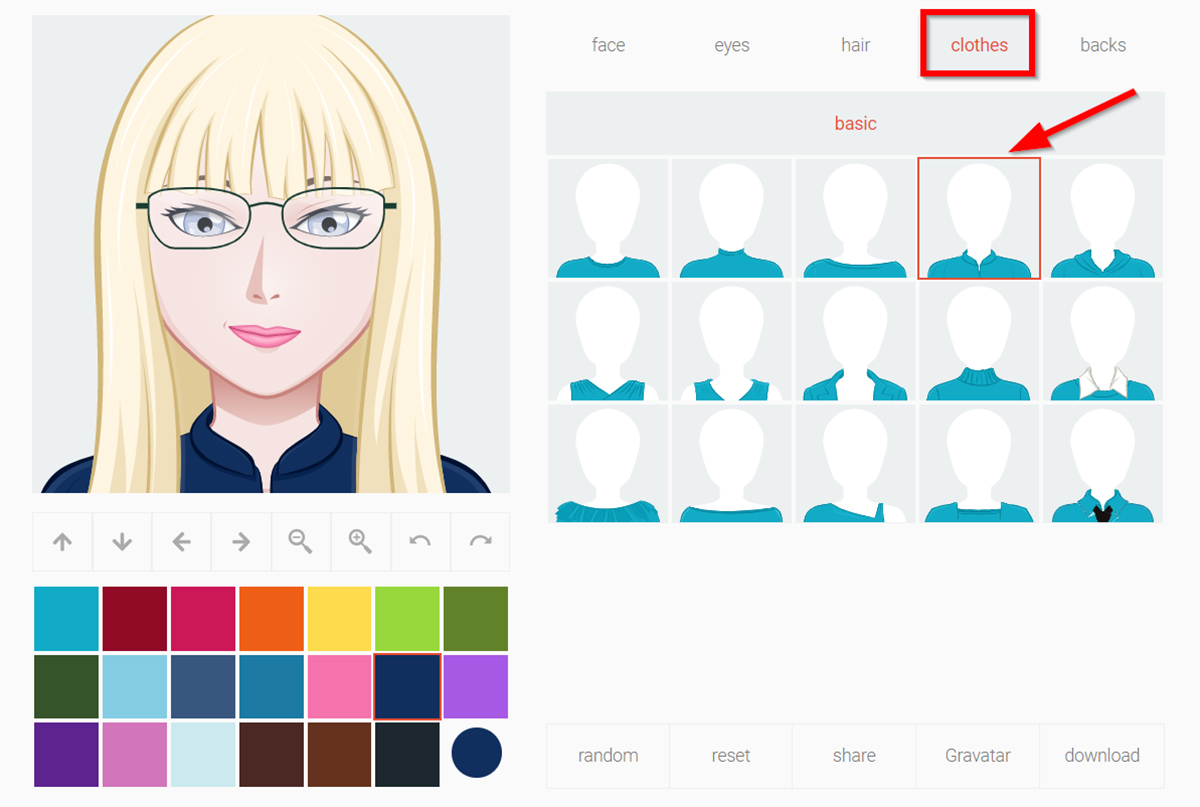
Go back to the main menu, and click on Clothes. Choose the style you prefer and the color too. Ok, so there isn’t a huge selection of clothing options, but there should be something to suit most people here:
Step 13: Background pattern and color
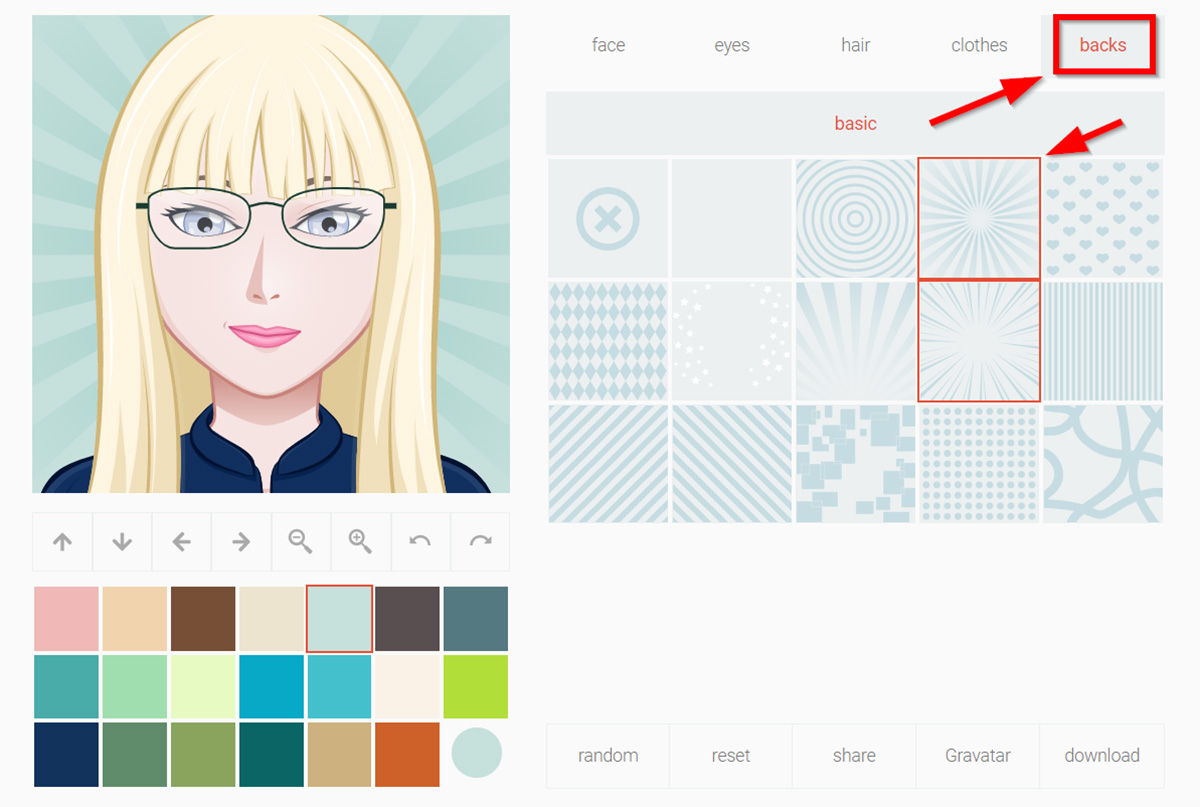
Last step now! On the main menu, click on Backs. You get a choice of background patterns and colors so you decided if you want to go subtle or psychedelic
You can also choose not to have a background for your avatar – just click on the X. You’re done! I like my new avatar, and it does resemble me (if it had a few more wrinkles, anyway!) so I think I’ll keep it for posterity.
Step 14: Download or share
Now you’ve made your avatar with the online character maker, you have a choice of what to do with it.
If you want to download it, go to the bottom of the avatar generator and click Download. You’ll get different size and file options to save your character to your computer for future use:
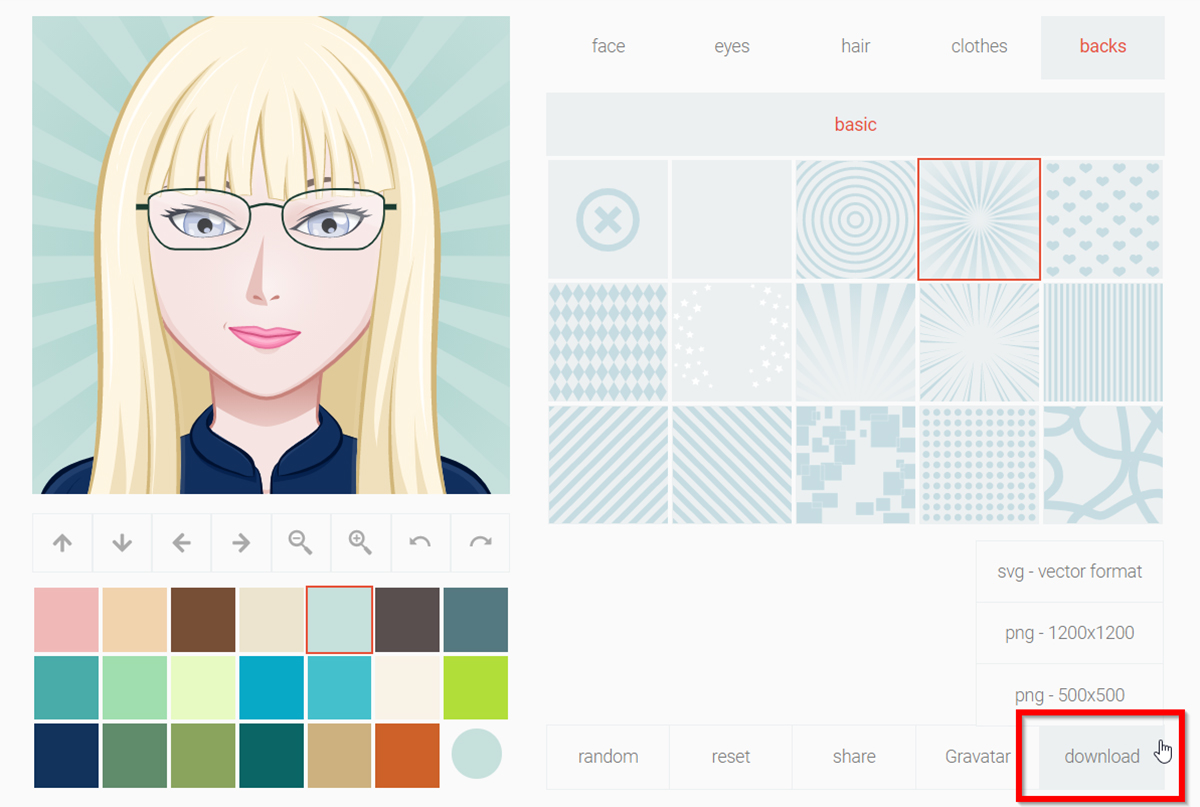
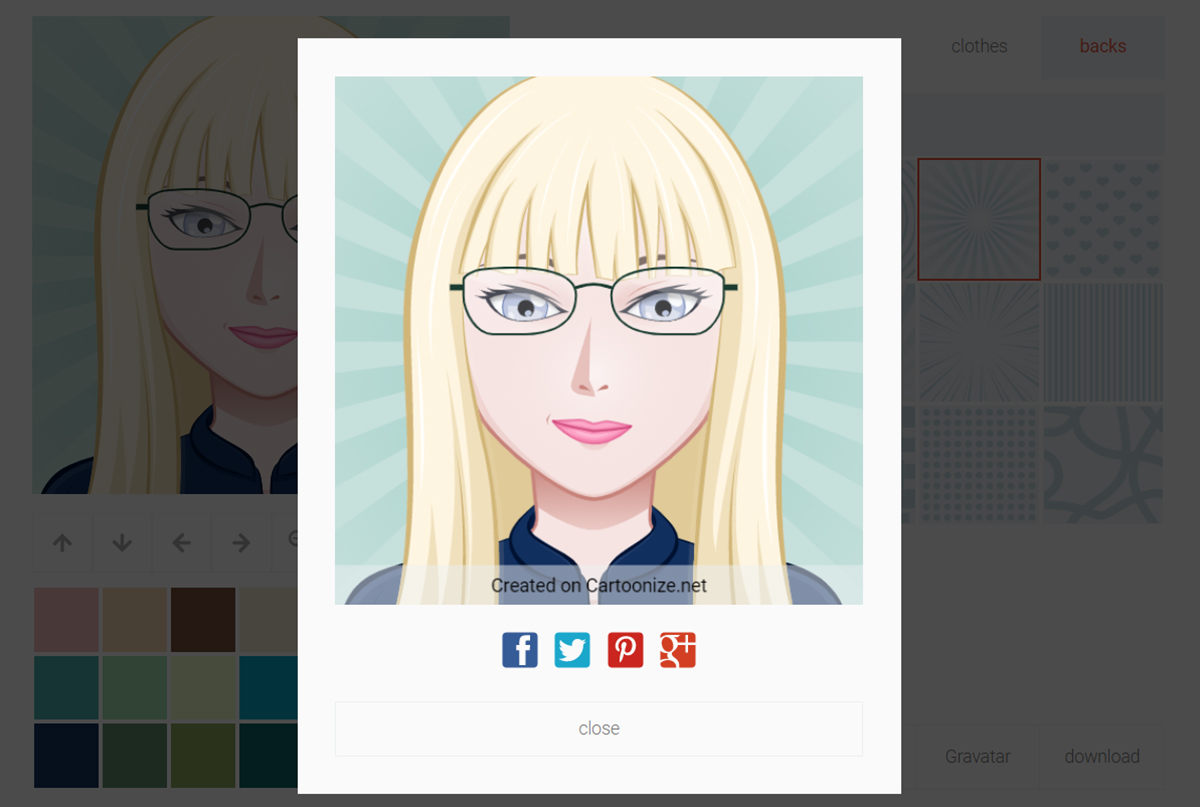
To share to social media, click on Share.
A new window with your creation will open up, giving you the choice of sharing to Facebook, Pinterest, Twitter, or Google +.
Just click on the icons of each social media platform you want to use, and follow the instructions:
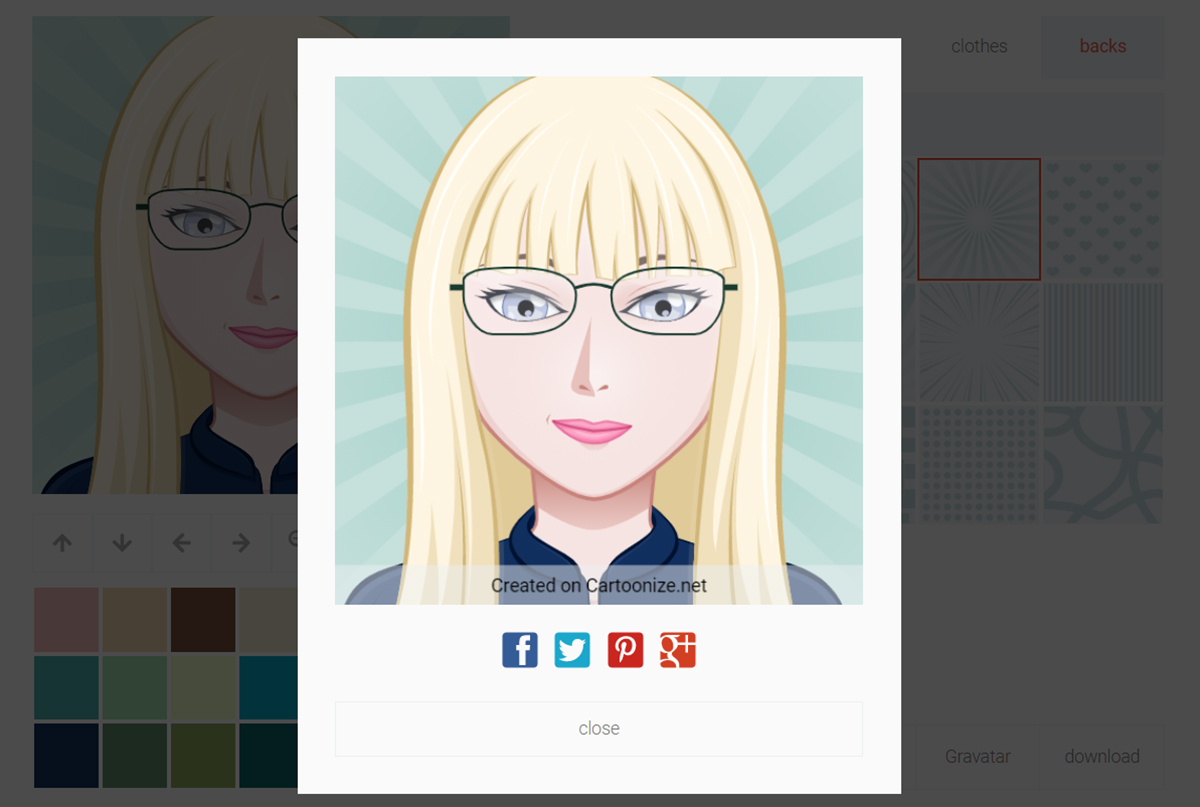
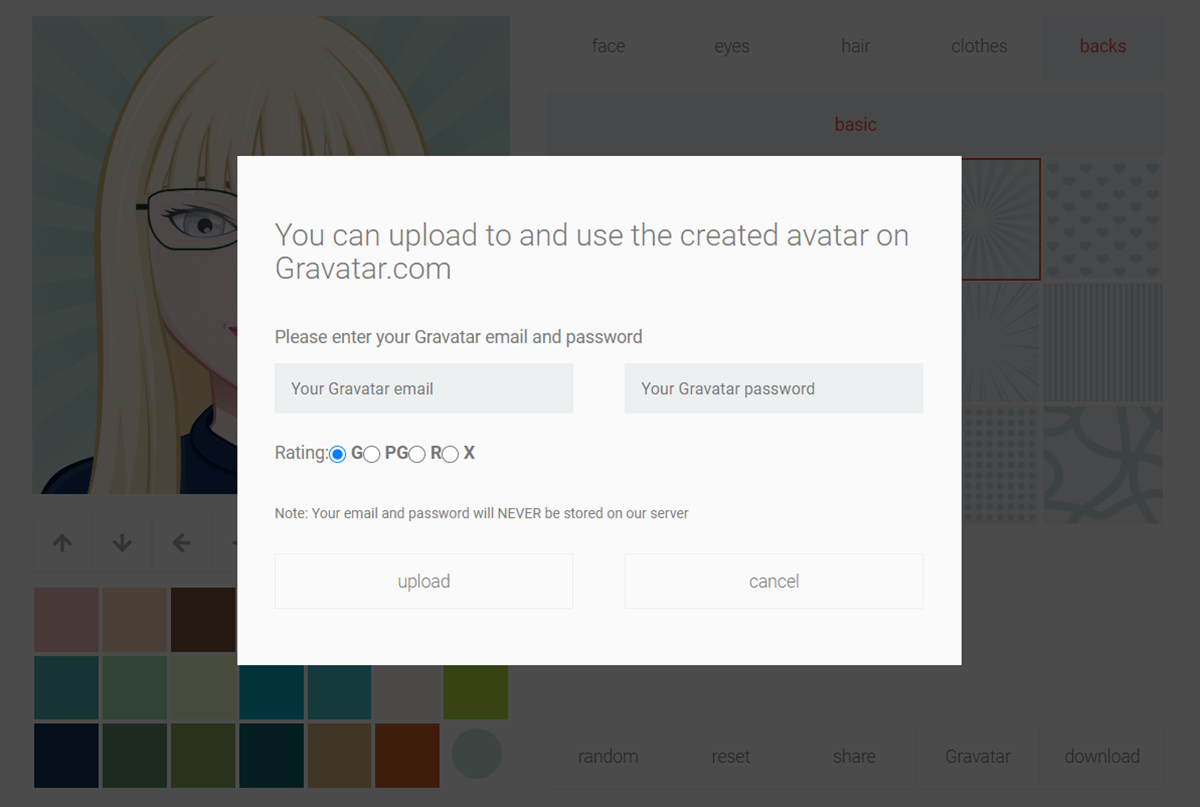
If you are a user of Gravatar and want to add your character, click on the Gravatar option.
A window will open up for you to enter your details and for you to upload your new avatar to the site.
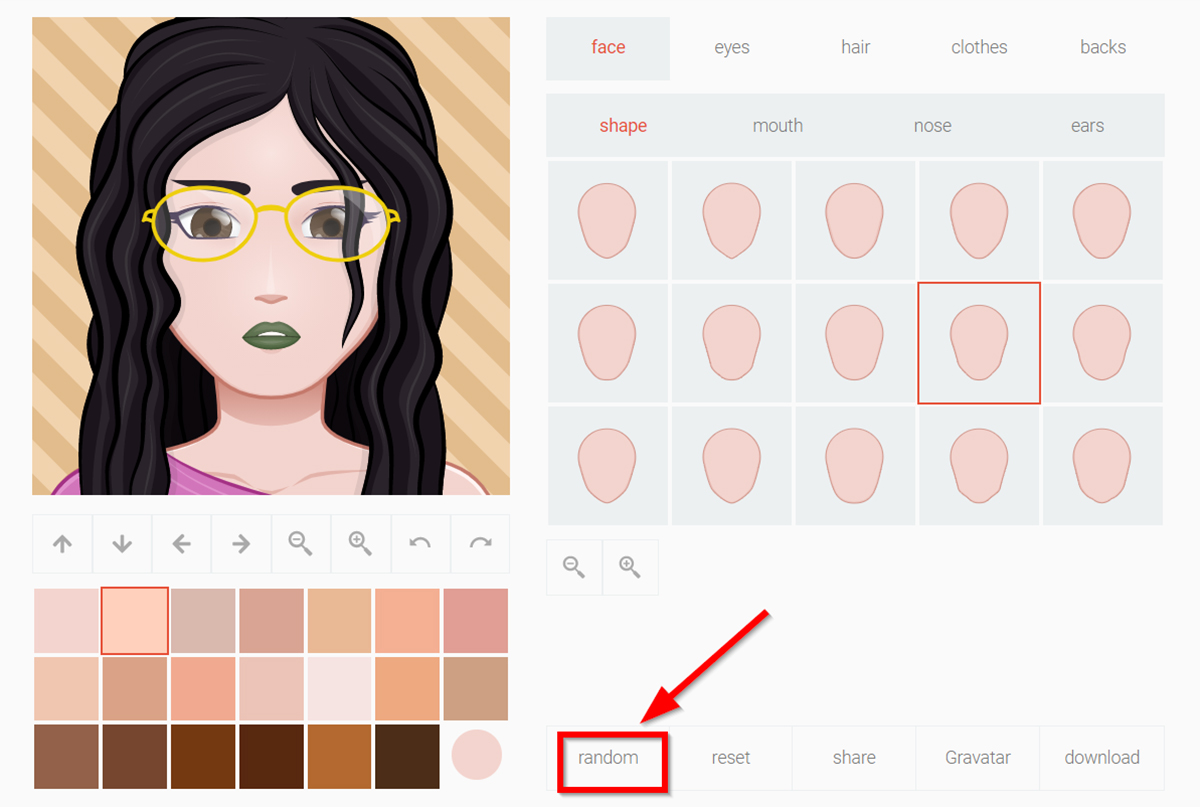
I also want to mention that there’s an option to randomize your avatar in this character maker.
Along the bottom of the generator, click the Random button, and see what it comes up with! This one’s a bit scary for me – I think I prefer the one I made…
Want to Take Things Further?
We mentioned using Colorcinch to add further effects to your avatar, but you could use it to cartoonize a photo of yourself instead.
The character maker and the cartoon maker in Colorcinch are two different things, although they may seem similar. The main differences are:
- The cartoon creator uses a photo to build the cartoon from
- You can edit your image before cartoonizing it – adjust the brightness, crop it, etc.
- There are a lot of different cartoon styles you can use
- You can adjust the strength of the cartoon filter
Conclusion
I hope you enjoyed this tutorial (I know I did!) and got something useful out of it.
Using an online character maker can help you and your kids preserve your privacy and safety on the internet as there are no real-life photos of you involved.
You can also choose how you want your avatar to look and what part of your personality you want to express.
Enjoy!


