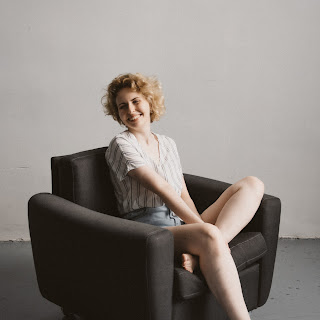
Have you ever wondered why landscape photos taken on a cloudy day look better than those with midday sun? Or why do studio portraits look so good? The answer is diffuse light.
Diffuse or soft light is always filtered through something. For example, sunlight on an overcast day is diffused by clouds. Soft light is used in photography to get balanced images without harsh shadows.
This article will give you a brief overview of diffuse light, how to work with it and how to achieve diffuse light in different situations.
What is Diffuse Light?
The human eye sees objects that emit light, such as the sun, light bulbs, fire, etc. We also see things that reflect light.
Diffuse lighting is a soft light without the intensity or glare of direct light. It comes from all directions and is scattered.
Therefore, diffuse light is much smoother and does not create dramatic shadows. It appears to wrap around objects.
The light hits an irregular surface and becomes diffused, for example when it falls through a coated light bulb, curtains or a frosted window in winter.
You can only diffuse light in dark places.
Lailah Gifty Akita
You can’t change weather during the photoshoot; however, you can change your approach if you know the lighting conditions.
For example, take your model in the shade under a tree if you want to take portraits on a sunny day, but the light is too harsh.
Move around your subject; you’ll notice how the light changes at different angles. This way you can experiment and adapt to the conditions. Diffuse light photography looks more beautiful and softer than high-contrast images.
Also, you can try to salvage a failed photo by editing it. Use Colorcinch to adjust the exposure and soften the shadows.
When Should You Use Diffused Light?
Diffused light is mainly used for portraits because it creates little or no shadow on a person’s face.
It softens the dark areas, which are extremely important when shooting a domain subject. Also, it allows your model to relax without blinking of direct light.
Let’s take a look at other types of photography that require diffuse light:
- Outdoor portraits
- All kinds of studio photography
- Still life photography
- Food photography
- Interior photography
Where Could You Find Diffuse Light?
Direct light is always available, but you need to put some effort into achieving diffuse lighting. Here are a few tricks to find diffuse light:
- A cloudy sky that diffuses the sun rays
- Shady settings under the trees or buildings
- Golden hour
- A translucent reflector placed between your subject and a light source
Many photographers love to shoot during what is called “golden hour”. This is an hour in the early morning before sunrise and an hour in the evening before sunset.
During these hours, the sun is more golden and it casts its warm, yellow light on the subject, resulting in magical colors.
The sunlight has a different angle (compared to midday), and the atmosphere acts like a diffuser. That’s why you can also call it diffuse light.
Types of Lighting
Basically, there are 3 types of lighting that you as a photographer work with, such as:
- Direct
- Diffuse
- Ambient light
We already know what diffuse light is, so let’s learn about direct and ambient types.
Direct Light
Direct (or hard) light creates high-contrast images with bright areas and hard shadows.
In short, direct light is when there is no obstruction between the subject and the light source. The midday sun is a great example of hard light.
Most novice photographers make this common mistake when standing with their backs to the sun and photographing a model.
All interesting textures and contrasts disappear, and you get a portrait with a flat white face and dark holes where the eyes should be.
If you’re taking a portrait at high noon, ask your model to look directly at the sun. However, your model might grimace because of the harsh light and ruin the image.
Ambient Light
All kidding aside, you have already photographed ambient light, even if you are not aware of it. Ambient light is any form of light that you did not specifically intend to include in the photo, such as:
- Sunlight
- Moonlight
- Candles
- Fireplaces
- Lamps
You can also think of it as a collection of light reflecting off of all the objects in the scene.
There is always a light source that prevents you from getting your best shot. Instead of fighting it, ambient light can become your advantage.
Candles, fireplaces, neon signs are a great addition to your photo and they may help you get a fantastic image. Ambient light is usually used in studios and indoor photography.
A little tip: you can add reflector lighting to your scene in a studio to eliminate unwanted shadows on the model’s face.
Diffuse Light Principle
You don’t need a big budget to create diffuse lighting indoors. You can create soft light on any budget.
The principle for diffuse lighting is pretty simple: you need to place a translucent filter, screen or sheet between your subject and a light source.
This way, you diffuse the light and avoid strong shadows. Once you understand the concept, you can create soft light with any materials you have at hand.
Diffusion Techniques
There are a few ways to achieve diffuse light in photography. Let’s take a look at some of them:
- Windows
- Softboxes
- Reflectors
- Umbrellas
- Diffusion paper
- Post-processing
Windows are one of the easiest ways to create diffuse light indoors. Rooms with south-facing windows have soft light most of the day.
A little tip: use the white translucent curtain in front of the window and place your subject near it to get even softer light.
Another way to get diffuse light in photography is using a softbox. This is a photographic device with a reflective silver side and a light diffusion layer that should be placed over a light source.
Most photography studios have some softboxes available. These allow you to control the diffuse lighting even better.
Scrims and umbrellas work the same way, but they provide a slightly different light.
Don’t be afraid to experiment and change the angles of the light. You’ll be surprised how many different looks of a scene you can achieve by changing the position of the light.
A reflector is another inexpensive way to diffuse light. It looks like a versatile disk with a reversible layer of reflective material. You can purchase one such disk on Amazon for about $20.
Diffusion paper usually clamps to the barn doors of light. It won’t give you dramatic results, but it’s still a good option to soften the overall look of the image.
How to Achieve Diffuse Light with Post-Processing?
If you don’t have any diffusion tools at hand, you can always try to save photos in the editor. Colorcinch provides plenty of settings and filters that can help you improve any photo. Let me show you one quick example.
I have a photo of my friend that I took at midday with hard shadows on the face.
1. First, upload the photo into the online photo editor Colorcinch.
2. Then, navigate to the Filters section and choose the effect you like. In my case, I think Simple effects will work the best on this portrait.
3. After trying a few effects, pick a proper one. I used filter #003 from the Simple section for this photo.
By the way, you can shortlist the filter you like. Simply click on the heart icon to add a filter to your favorites.
4. When I applied the filter, I see there are still some dark areas on the face. To fix that navigate to Exposure settings and decrease the Shadows.
5. Save the photo on your computer with a few clicks of a mouse, when you are completely satisfied with the results.
See before & after images below.
[/vc_column_text][/vc_column][/vc_row]I hope this quick tutorial will come in handy for you.
How to Create Diffuse Light Outdoors?
Depending on the type of photo shoot you are doing, you may need diffuse lighting outdoors.
For example, a simple light modifier can help you diffuse the intense midday sun and avoid harsh shadows on your model’s face.
All you need is a 5-in-1 reflector kit. Use a reflector layer to fill in hard shadows, or position the diffuser between the light and your subject.
Over to You
Understanding the different types of light will work to your advantage on your photographic journey.
Now when you know the principles of diffuse light, you should not be afraid of midday sun anymore. You can change your approach and make the most of any situation.
Don’t hesitate to pick up your camera and start photographing. Experiment with the light, take more photos, live and learn.